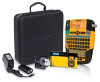
Dymo Rhino 4200 Case Kit User Guide - Page 16
Cleaning Your Printer
 |
View all Dymo Rhino 4200 Case Kit manuals
Add to My Manuals
Save this manual to your list of manuals |
Page 16 highlights
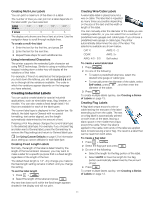
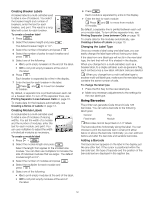
To print and collate multiple copies 1 Press + . 2 Select the number of copies of the group of labels to print and press . 3 Select All to print all of labels in the group. 4 Press . 5 Select one of the following: • Yes to print collated. • No to print normally. 6 Press to begin printing. Printing Separator Lines between Cells For multi-cell labels, such as breaker and module labels, you can choose whether or not to print a separator line between each of the cells. By default, separator lines are printed between cells. To turn off printing of separator lines 1 Press + . 2 Select Print options and press . 3 Select Separator lines and press . 4 Select No and press . Pausing Between Labels When printing multiple copies, the printer pauses after printing each label so you can cut the label. You can turn this feature off to have the labels print continuously. To print continuously 1 Press + . 2 Select Print options and press . 3 Select Pause to cut and press . 4 Select No and press . Advancing the Label To add additional blank space to the beginning or end of your label, you can advance the label in 1/4" increments. To advance the label 1 Press + . 2 Press to advance the label. Adjusting the Print Contrast Depending on the label material you choose, you may need to lighten or darken the printed text on the label. To adjust the print contrast 1 Press + . 2 Select Print options and press . 3 Select Print contrast and press . 4 Press or to increase or decrease the print contrast. 5 Press . 6 Repeat as necessary until you are satisfied with the print quality. Cleaning Your Printer Your printer is designed to give you long and trouble-free service, while requiring very little maintenance. Clean your printer from time to time to keep it working properly. To clean the cutter blade 1 Remove the label cassette. 2 Press and hold the cutter button to expose the cutter blade. 3 Use a cotton ball and alcohol to clean both sides of the blade. The cutter blade is extremely sharp.Use caution when cleaning. To clean the print head 1 Remove the label cartridge. 2 Remove the cleaning tool from inside the label cartridge door. Figure 7 3 Gently wipe the padded side of the tool across the print head. See Figure 7. 16
-
 1
1 -
2
-
3
-
4
-
5
-
6
-
7
-
8
-
9
-
10
-
 11
11 -
 12
12 -
 13
13 -
 14
14 -
 15
15 -
 16
16 -
 17
17 -
 18
18 -
 19
19 -
 20
20 -
 21
21
 |
 |
