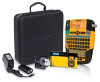
Dymo Rhino 4200 Case Kit User Guide - Page 9
Working with Labels
 |
View all Dymo Rhino 4200 Case Kit manuals
Add to My Manuals
Save this manual to your list of manuals |
Page 9 highlights
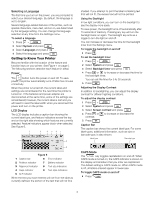
ALT Key The key is used to select the function or symbol printed above a key. For example, when you press , the number 9 appears in the display; however, if you press and then , an asterisk (*) appears in the display. Escape Key The key cancels an action or exits from a menu without making a selection. Navigation Keys The navigation keys operate as follows: Keys Function Moves one character to the left in the display. Returns to the previous menu (you can also use ). + Moves one cell to the left in a multi-cell label. Moves one label to the left in the display. Moves one character to the right in the display. Moves to the next menu level (you can also use ). + Moves one cell to the right in a multi-cell label. Moves one label to the right in the display. Moves up in a list of items. Moves down in a list of items. Selects a menu item. Backspace Key The key deletes the character to the left of the cursor. Clear Key The key clears all current text and format settings, returning the display to the General label type. Cutter Button The button cuts the label. When printing multiple labels, the printer pauses after printing each label so that you can cut the label. You can turn this feature off, so that multiple labels will print continuously. See Pausing Between Labels on page 16. Hot Keys A number of Hot Keys are available for creating specific types of labels, adding barcodes, and formatting text. These Hot Keys are described in detail later in this User Guide. Working with Labels You can create a single label or a group of labels. A group of labels can be created manually by adding labels to the current label or automatically using serialization. See Creating a Series of Labels on page 13 for information about using serialization. Creating a Label The printer remembers the last label that you were working on when the power was turned off. You need to clear that label text and formatting before you create a new label. To create a new label 1 If necessary, press to clear the previous label and formatting from the display. 2 Enter some text using the keypad. 3 Format the text size and style. See Formatting a Label on page 10. 4 Optionally, save the label to the library. See Saving Labels on page 14. Adding a Label You can insert a label before or after the current label. To add a label 1 Press . 2 Select one of the following: • Left to add a label to the left of the cursor position. • Right to add a label to the right of the cursor position. 3 Press . A new blank label is inserted in the display to the left or right of the current label. You can move from label to label by pressing and . 9
-
 1
1 -
2
-
3
-
 4
4 -
 5
5 -
 6
6 -
 7
7 -
 8
8 -
 9
9 -
 10
10 -
 11
11 -
 12
12 -
 13
13 -
 14
14 -
15
-
16
-
17
-
18
-
19
-
20
-
21
 |
 |
