Dymo Rhino 5200 Industrial Label Printer User Guide - Page 12
Creating Block Labels
 |
View all Dymo Rhino 5200 Industrial Label Printer manuals
Add to My Manuals
Save this manual to your list of manuals |
Page 12 highlights
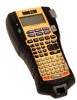
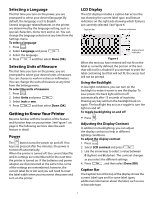
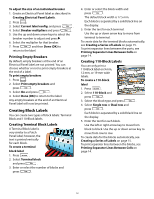
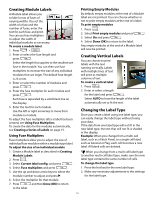
To adjust the size of an individual breaker 1. Create an Electrical Panel label as described in Creating Electrical Panel Labels. 2. Press . 3. Select Current label config. and press . 4. Select Breaker multipliers and press . 5. Use the up and down arrow keys to select the breaker number to adjust and press =. 6. Select the multiplier for that breaker. 7. Press and then Done (OK) to return to the label. Printing Empty Breakers By default, empty breakers at the end of an Electrical Panel label are not printed. You can choose whether or not to print empty breakers at the end of a label. To print empty breakers 1. Press . 2. Select Print empty breakers and press . 3. Select On and press . 4. Select Done (OK) to return to the label. Any empty breakers at the end of an Electrical Panel label will now be printed. Creating Block Labels You can create two types of block labels: Terminal Block and 110-Block labels. Creating Terminal Block Labels A Terminal Block label is very similar to a Patch Panel label; however, the text is printed vertically for each block. To create a terminal block label 1. Press . 2. Select Terminal block and press . 3. Enter or select the number of blocks and press . 4. Enter or select the block width and press . The default block width is 17.5 mm. Each block is separated by a solid black line on the display. 5. Enter the text for each terminal. Use the up or down arrow key to move from terminal to terminal. To create data for the terminal blocks automatically, see Creating a Series of Labels on page 15. To print separator lines between the ports, see Printing Separator Lines Between Cells on page 14. Creating 110-Block Labels You can only print a 110-Block label on 9 mm, 12 mm, or 19 mm wide labels. To create a 110-block label 1. Press . 2. Select 110-block and press . 3. Select the block type and press . 4. Select Single row or Dual row and press . Each block is separated by a solid black line on the display. 5. Enter the text for each block. Use the left or right arrow key to move from block to block. Use the up or down arrow key to move from row to row. To create data for the blocks automatically, see Creating a Series of Labels on page 15. To print separator lines between the blocks, see Printing Separator Lines Between Cells on page 14. 12
-
 1
1 -
2
-
3
-
4
-
5
-
6
-
 7
7 -
 8
8 -
 9
9 -
 10
10 -
 11
11 -
 12
12 -
 13
13 -
 14
14 -
 15
15 -
 16
16 -
 17
17 -
18
-
19
-
20
-
21
-
22
-
23
-
24
 |
 |