E-Z-GO Terrain 1500 Owner Manual - Page 29
Differential Lock, 12Volt Power Outlet, Rear View Mirror, Front Seats
 |
View all E-Z-GO Terrain 1500 manuals
Add to My Manuals
Save this manual to your list of manuals |
Page 29 highlights
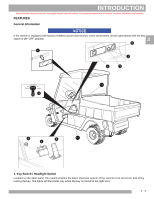
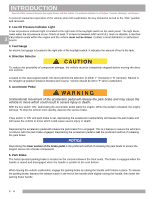
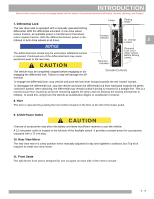
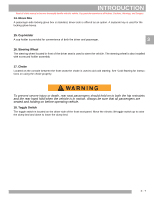
INTRODUCTION Read all of this manual to become thoroughly familiar with this vehicle. Pay particular attention to all Notices, Cautions, Warnings, and Dangers. 7. Differential Lock Choke Parking Brake The rear drive axle is equipped with a manually operated locking differential. With the differential unlocked, if one drive wheel looses traction, all available power is transferred to that wheel until it regains traction. With the differential locked, power is distributed to both drive wheels at all times. Direction Selector Di erential 3 Locked NOTICE The differential lock should only be used when additional traction is required. Continued use of the differential lock may cause excessive wear to the rear tires. Dierential Unlocked Dierential Lock Lever (Stop Vehicle Before Moving Lever) 75694G01 The vehicle must be completely stopped before engaging or disengaging the differential lock. Failure to stop will damage the differential. Console Controls To engage the differential lock, stop vehicle and push the lock lever forward towards the red 'locked' symbol. To disengage the differential lock, stop the vehicle and push the differential lock lever backward towards the green 'unlocked' symbol. After unlocking, the differential may remain locked if driving is resumed in a straight line. This is a normal occurrence caused by pressure remaining against the gears and not allowing the locking mechanism to release. To avoid this, simply turn the vehicle as acceleration begins or accelerate in reverse. 8. Horn The horn is operated by pushing the horn button located on the floor to the left of the brake pedal. 9. 12Volt Power Outlet Overuse of accessories may drain the battery and leave insufficient reserve to start the vehicle. A 12 volt power outlet is located to the left side of the key/light switch. It provides constant power for accessories equipped with a 12 volt plug. 10. Rear View Mirror The rear view mirror is a two-position mirror manually adjusted for day and nighttime conditions.Sun Top kit is required to install rear view mirror. 11. Front Seats The split bench front seat is designed for one occupant on each side of the center console. 3- 5
-
 1
1 -
2
-
3
-
4
-
5
-
6
-
7
-
8
-
9
-
10
-
11
-
12
-
13
-
14
-
15
-
16
-
17
-
18
-
19
-
20
-
21
-
22
-
23
-
 24
24 -
 25
25 -
 26
26 -
 27
27 -
 28
28 -
 29
29 -
 30
30 -
 31
31 -
 32
32 -
 33
33 -
 34
34 -
35
-
36
-
37
-
38
-
39
-
40
-
41
-
42
-
43
-
44
-
45
-
46
-
47
-
48
-
49
-
50
-
51
-
52
-
53
-
54
-
55
-
56
-
57
-
58
-
59
-
60
-
61
-
62
-
63
-
64
-
65
-
66
-
67
-
68
-
69
-
70
-
71
-
72
-
73
-
74
-
75
-
76
-
77
-
78
 |
 |
