E-Z-GO Terrain 1500 Owner Manual - Page 58
Changing the Oil
 |
View all E-Z-GO Terrain 1500 manuals
Add to My Manuals
Save this manual to your list of manuals |
Page 58 highlights
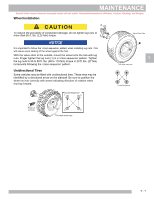
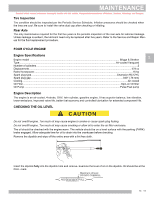
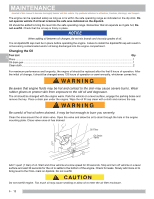
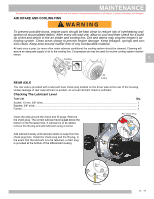
MAINTENANCE Read all of this manual to become thoroughly familiar with this vehicle. Pay particular attention to all Notices, Cautions, Warnings, and Dangers. The engine can be operated safely as long as oil is within the safe operating range as indicated on the dip stick. Do not operate vehicle if oil level is below the safe area indicated on the dipstick. Oil should be added to bring the level into the safe operating range. Remember that oil expands as it gets hot, Do not overfill. Check that the oil cap is firmly in place. NOTICE When adding oil between oil changes, do not mix brands and viscosity grades of oil. The oil dipstick/fill cap must be in place before operating the engine. Failure to install the dipstick/fill cap will result in oil becoming contaminated and/or oil being discharged into the engine compartment. Changing the Oil 5 Tool List Qty. Pliers ...1 Oil drain pan ...1 Clean cloth...2 For maximum performance and longevity, the engine oil should be replaced after the first 8 hours of operation. After the initial oil change, it should be changed every 125 hours of operation or semi-annually, whichever comes first. Be aware that engine fluids may be hot and contact to the skin may cause severe burns. Wear rubber gloves to protect skin from exposure to the old oil and degreaser. The oil should be changed with the engine warm. Park the vehicle on a level surface, engage the parking brake and remove the key. Place a drain pan under the engine. Wipe the oil fill cap clean with a cloth and remove the cap. Be careful of hot oil when drained. It may be hot enough to burn you severely. Clean the area around the oil drain valve. Open the valve and allow the oil to drain through the hole in the engine mounting plate. Close valve once oil has drained. Oil Filter Oil Drain Valve Add 1 quart (1 liter) of oil. Start and drive vehicle at a slow speed for 30 seconds. Stop and turn off vehicle on a level surface and wait 30 seconds for the oil to settle to the bottom of the engine. Check for leaks. Slowly add more oil to bring level to the FULL mark on dipstick. Do not overfill. Do not overfill engine. Too much oil may cause smoking or allow oil to enter the air filter enclosure. 5 - 12
-
 1
1 -
2
-
3
-
4
-
5
-
6
-
7
-
8
-
9
-
10
-
11
-
12
-
13
-
14
-
15
-
16
-
17
-
18
-
19
-
20
-
21
-
22
-
23
-
24
-
25
-
26
-
27
-
28
-
29
-
30
-
31
-
32
-
33
-
34
-
35
-
36
-
37
-
38
-
39
-
40
-
41
-
42
-
43
-
44
-
45
-
46
-
47
-
48
-
49
-
50
-
51
-
52
-
 53
53 -
 54
54 -
 55
55 -
 56
56 -
 57
57 -
 58
58 -
 59
59 -
 60
60 -
 61
61 -
 62
62 -
 63
63 -
64
-
65
-
66
-
67
-
68
-
69
-
70
-
71
-
72
-
73
-
74
-
75
-
76
-
77
-
78
 |
 |
