Electrolux E30EW75ESS Use and Care Manual
Electrolux E30EW75ESS Manual
 |
View all Electrolux E30EW75ESS manuals
Add to My Manuals
Save this manual to your list of manuals |
Electrolux E30EW75ESS manual content summary:
- Electrolux E30EW75ESS | Use and Care Manual - Page 1
- Electrolux E30EW75ESS | Use and Care Manual - Page 2
Features page later in this manual for the location of your product's serial number. QUESTIONS? For toll-free telephone support in the U.S. and Canada: 1-877-4ELECTROLUX (1-877-435-3287) For online support and internet product information: www.electrolux.com ©2004 Electrolux Home Products, Inc. Post - Electrolux E30EW75ESS | Use and Care Manual - Page 3
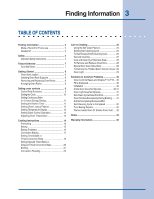
Instructions 4 Feature Overview 7 Your Wall Oven 7 Getting Started 8 Oven Vent Location 8 Installing Oven Rack Supports 8 Removing and Replacing Oven Racks 8 Arranging Oven Racks 8 Setting oven Adjusting Oven Temperature 13 Cooking Instructions 14 Preheating 14 Baking 15 Baking Problems - Electrolux E30EW75ESS | Use and Care Manual - Page 4
4 Safety IMPORTANT SAFETY INSTRUCTIONS Please read all safety instructions before using your new Electrolux wall oven. WARNING To reduce the risk of fire, electrical shock, or injury when using your wall oven, follow basic precautions including the following: • Remove all tape and packaging wrap - Electrolux E30EW75ESS | Use and Care Manual - Page 5
installation instructions. • Do not leave children alone-Children should not be left alone or unattended in the area where an appliance is in use. They should never be allowed to sit or stand on any part of the appliance. • DO NOT TOUCH INTERIOR OVEN ELEMENTS OR INTERIOR SURFACES OF THE WALL OVEN - Electrolux E30EW75ESS | Use and Care Manual - Page 6
manufacturer's instructions for cleaning. SELF CLEANING OVENS • Clean in the self-cleaning cycle only the parts of the appliance listed in this Owner's Guide. to the fumes given off during the self-clean cycle of any wall oven. Move birds to another well ventilated room. IMPORTANT SAFETY NOTICE - Electrolux E30EW75ESS | Use and Care Manual - Page 7
YOUR WALL OVEN CONVECTION FAN OVEN VENT Feature Overview 7 CONTROL PANEL OVEN DOOR LATCH BROILING ELEMENT OVEN RACK SLIDERS OVEN RACK SUPPORT OVEN RACKS OVEN LIGHT HIDDEN BAKE ELEMENT COVER GLASS OVEN DOOR BROILER PAN COVER BROILER PAN DOOR HANDLE - Electrolux E30EW75ESS | Use and Care Manual - Page 8
is necessary for proper air circulation in the oven and good baking results. Oven Vent Warm Air Installing Oven Rack Supports ALWAYS INSTALL OVEN RACK SUPPORT BEFORE TURNING ON THE OVEN (WHEN THE OVEN IS COOL). To install oven rack support, insert the support tabs in the holes located on the - Electrolux E30EW75ESS | Use and Care Manual - Page 9
Controls 9 CONTROL PAD FUNCTIONS Read the instructions carefully before using the oven. For satisfactory use of your oven, become familiar with the various functions of the oven as described below. Note: The graphics on your timer may look like one of those shown. Both are operating the same way - Electrolux E30EW75ESS | Use and Care Manual - Page 10
10 Setting Oven Controls SETTING THE CLOCK The or pad is used to set the clock. The in the display will flash with "PF" (power failure, See Figure 1). Note: The clock cannot be set when the oven is on. When PF appears in the display, press or . No sound will be heard, but after 10 seconds a beep - Electrolux E30EW75ESS | Use and Care Manual - Page 11
when the set time has run out. It does not start or stop cooking. The Timer feature can be used during any of the other oven control functions. To set the Timer (example for 5 minutes): 1. Press or . "0:00" will appear in the display (Figure 5). 2. Press the number pads to set the - Electrolux E30EW75ESS | Use and Care Manual - Page 12
from being turned on. It does not disable the clock, Timer, electric and gas surface burners, Warmer Zone or the interior oven lights. Figure 1 To activate the Oven Lockout feature: 1. Press and hold or for 3 seconds (Figure 1). 2. After 3 seconds a beep will sound and "DOOR LOCKED" will flash on - Electrolux E30EW75ESS | Use and Care Manual - Page 13
lower than the recommended temperature. The baking results should help you to decide how much of an adjustment is needed. To adjust the oven temperature: 1. Press or for 8 seconds (Figure 4). 2. To increase the temperature use the number pads to enter the desired change. (Example 30°F) (Figure - Electrolux E30EW75ESS | Use and Care Manual - Page 14
14 Cooking Instructions PREHEATING Figure 1 Figure 2 Figure 3 Figure 4 Figure 5 Figure 6 Figure 7 The or pad controls the Preheat feature. The Preheat feature will bring the oven up to temperature and then indicate when to place the food in the oven. Use this feature in combination with the Bake - Electrolux E30EW75ESS | Use and Care Manual - Page 15
preheating is necessary, refer to the Preheat Feature for instructions. The oven can be programmed to bake at any temperature from 170 350°" will appear in the display. 4. Press or . A beep will sound once the oven temperature reaches 350° F and the display will show "350°" (Figure 3). Pressing or - Electrolux E30EW75ESS | Use and Care Manual - Page 16
too close to oven wall or rack overcrowded. • Pan warped. • Oven too cool. • Oven overcrowded. • Oven door opened too frequently. • Place a marked glass measuring cup filled with water on the center of the oven rack. If the water level is uneven, refer to the installation instructions for leveling - Electrolux E30EW75ESS | Use and Care Manual - Page 17
Cooking Instructions 17 CONVECTION BAKING The convection oven uses a fan located in the rear wall of the oven to circulate heated air based on brands of food items tested. Cook times may vary with your specific brand of food item. Setting Convection Bake The or pad controls the Convection Bake - Electrolux E30EW75ESS | Use and Care Manual - Page 18
350° F and the display will show "350°"and the fan icon (Figure 4). Note: The convection fan will start AS SOON AS the oven is set for Convection Bake. The oven icon will show a rotating fan within the square. This rotating fan icon indicates when the Convection Fan is operating (See rotating fan - Electrolux E30EW75ESS | Use and Care Manual - Page 19
Cooking Instructions 19 SETTING TIMED BAKE OR TIMED CONVECTION BAKE The (or ) or (or ) and (or ) pads control the Timed Bake feature. The automatic timer of the Timed Bake feature will turn the oven OFF after cooking for the desired amount of time you selected. To program the oven to begin baking - Electrolux E30EW75ESS | Use and Care Manual - Page 20
20 Cooking Instructions SETTING DELAYED TIMED BAKE OR DELAYED TIMED CONVECTION BAKE Figure 1 Figure 2 Figure 3 Figure 4 Figure 5 Figure 6 Figure 7 The (or ) or (or ) , (or ) and (or ) pads control the Delayed Time Bake feature. The automatic timer of the Delayed Time Bake will turn the oven on - Electrolux E30EW75ESS | Use and Care Manual - Page 21
direct heat under the broil element of the oven. Preheating Preheating is suggested when searing rare steaks. (Remove the broiler pan before preheating. Foods will stick if placed on hot metal.) To preheat, set the control(s) to BROIL as instructed in this manual. Wait for the element to become red - Electrolux E30EW75ESS | Use and Care Manual - Page 22
22 Cooking Instructions Setting Broil The or pad controls the Broil feature. When broiling, heat radiates downward from the oven broiler for even can cause a grease fire to spread and cause personal injury. To set the oven to broil at the default setting (550°F): 1. Place the broiler pan insert on - Electrolux E30EW75ESS | Use and Care Manual - Page 23
Cooking Instructions 23 CONVECTION ROASTING When convection roasting, use the broiler pan in oven. 2. Press or . "---°" will appear in the display ( Figure 1). 3. Press , , . "350°" will appear in the display (Figure 2). 4. Press or . "350°" will remain on and the convection fan icon will show - Electrolux E30EW75ESS | Use and Care Manual - Page 24
when cleaning any exterior parts of the oven manually. During the self-cleaning cycle, the outside of the wall oven can become very hot to the touch. foil. These items can not withstand high cleaning temperatures. 4. Oven racks and oven rack supports must be removed. If they are not removed the self - Electrolux E30EW75ESS | Use and Care Manual - Page 25
. Once the door has been locked the "DOOR LOCKED" indicator light will stop flashing and remain on. Also, the oven icon will appear in the display (Figure 3). Note: Allow about 15 seconds for the oven door lock to close. When the Self-Clean Cycle is Completed: 1. The time of day and "DOOR LOCKED - Electrolux E30EW75ESS | Use and Care Manual - Page 26
The automatic timer will turn the oven on and off at the time you select in advance. Be sure to review TO START THE SELF-CLEAN CYCLE setted start time, for the period of time previously selected. "CLn" and oven icon will appear in the display (Figure 5). When the Self-Clean Cycle is Completed: - Electrolux E30EW75ESS | Use and Care Manual - Page 27
are recommended. Be sure to rinse the cleaners as bluish stains may occur during heating and cannot be removed. Oven Racks Oven racks and oven rack supports must be removed from the oven during the selfclean cycle for cleaning. If they are not removed, the self-clean cycle will not start. Clean - Electrolux E30EW75ESS | Use and Care Manual - Page 28
to re-install the door. Make sure the hinge supports are fully engaged before unlocking the hinge levers. Removal of the Oven Door Lock in normal position Lock engaged for door removal HINGE SLOT - Door removed from the appliance SPECIAL DOOR CARE INSTRUCTIONS Most oven doors contain glass - Electrolux E30EW75ESS | Use and Care Manual - Page 29
glass shield, pull the back side of the shield toward the inside of the oven in a manner to lift it up from the oven side. 4. The glass shield should come out easily by pushing a little toward front of the wall oven. 5. Replace halogen light appliance bulb taking care to not touch the bulb. If - Electrolux E30EW75ESS | Use and Care Manual - Page 30
30 Solutions to Common Problems IMPORTANT Before calling for service, review this list. It may save you both time and expense. This list includes common experiences that are not the result of defective workmanship or material in your cooktop. OVEN CONTROL BEEPS AND DISPLAYS F1 THROUGH F10 • - Electrolux E30EW75ESS | Use and Care Manual - Page 31
to Common Problems 31 • Controls are not set properly. See instructions to set the controls. • House fuse has blown or circuit breaker has tripped immediately following installation. • House fuse may not be fully engaged. Check fuse and screw or engage circuit breaker securely. OVEN LIGHT DOES - Electrolux E30EW75ESS | Use and Care Manual - Page 32
32 Solutions to Common Problems SOIL NOT COMPLETELY REMOVED AFTER SELFCLEANING CYCLE IS COMPLETED • Failure to clean bottom, from top of oven, frame of oven or door area outside oven seal. These areas are not in the self-cleaning area, but get not enough to burn on residue. Clean these areas before - Electrolux E30EW75ESS | Use and Care Manual - Page 33
Notes 33 - Electrolux E30EW75ESS | Use and Care Manual - Page 34
34 Notes - Electrolux E30EW75ESS | Use and Care Manual - Page 35
Notes 35 - Electrolux E30EW75ESS | Use and Care Manual - Page 36
Your wall oven is protected by this warranty In the U.S.A., your appliance is warranted by Electrolux Home Products North America, a division of White Consolidated Industries, Inc. We authorize no person to change or add to any of our obligations under this warranty. Our obligations for service and
-
 1
1 -
 2
2 -
 3
3 -
 4
4 -
 5
5 -
 6
6 -
 7
7 -
8
-
9
-
10
-
11
-
12
-
13
-
14
-
15
-
16
-
17
-
18
-
19
-
20
-
21
-
22
-
23
-
24
-
25
-
26
-
27
-
28
-
29
-
30
-
31
-
32
-
33
-
34
-
35
-
36
 |
 |