Electrolux EI30GS55LW Installation Instructions (All Languages) - Page 7
Electrical Requirements, Moving the Appliance for, Servicing and Cleaning, Range Installation
 |
View all Electrolux EI30GS55LW manuals
Add to My Manuals
Save this manual to your list of manuals |
Page 7 highlights
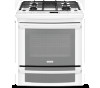
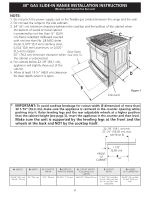
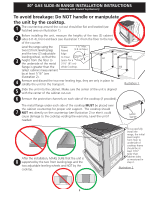
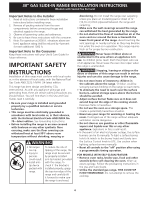
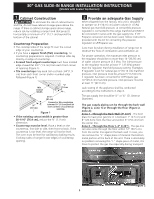
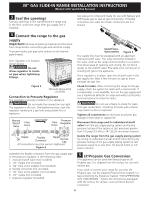
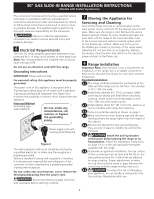
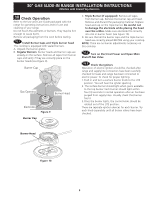
30" GAS SLIDE-IN RANGE INSTALLATION INSTRUCTIONS (Models with Sealed Top Burners) The conversion must be performed by a qualified service technician in accordance with the manufacturer's instructions and all local codes and requirements. Failure to follow these instructions could result in serious injury or property damage. The qualified agency performing this work assumes responsibility for the conversion. Failure to make the appropriate conversion can result in serious personal injury and property damage. 6 Electrical Requirements 120 volt, 60 Hertz, properly grounded dedicated circuit protected by a 15 amp circuit breaker or time delay fuse. Note: Not recommended to be installed with a Ground Fault Interrupt (GFI). Do not use an extension cord with this range. Grounding Instructions IMPORTANT Please read carefully. For personal safety, this appliance must be properly grounded. The power cord of this appliance is equipped with a 3-prong (grounding) plug which mates with a standard 3-prong grounding wall receptacle (see Figure 6) to minimize the possibility of electric shock hazard from the appliance. Preferred Method Grounding type wall receptacle Do not, under any circumstances, cut, remove, or bypass the grounding prong. Power supply cord with 3-prong grounding plug. Figure 6 The wall receptacle and circuit should be checked by a qualified electrician to make sure the receptacle is properly grounded. Where a standard 2-prong wall receptacle is installed, it is the personal responsibility and obligation of the consumer to have it replaced by a properly grounded 3-prong wall receptacle. Do not, under any circumstances, cut or remove the third (ground) prong from the power cord. Disconnect electrical supply cord from wall receptacle before servicing cooktop. 7 Moving the Appliance for Servicing and Cleaning Turn off the range line fuse or circuit breakers at the main power source, and turn off the manual gas shut-off valve. Make sure the range is cold. Remove the service drawer (warmer drawer on some models) and open the oven door. Lift the range at the front and slide it out of the cut-out opening without creating undue strain on the flexible gas conduit. Make sure not to pinch the flexible gas conduit at the back of the range when replacing the unit into the cut-out opening. Replace the drawer, close the door and switch on the electrical power and gas to the flame size. 8 Range Installation Important Note: Door removal is not a requirement for installation of the range, but is an added convenience. Refer to the Use and Care Guide for oven door removal instructions. Standard Installation 8.1 The range cooktop overlaps the countertop at the sides and the range rests on the floor. The cooktop is 31½" (80 cm) wide. 8.2 Install base cabinets 30" (76.2 cm) apart. Make sure they are plumb and level before attaching cooktop. Shave raised countertop edge to clear 31½" (80 cm) wide range top rim. 8.3 Install cabinet doors 32" (81.3 cm) min. apart so as not to interfere with range door opening. 8.4 Cutout countertop exactly as shown on page 1. 8.5 Make sure the two front leveling legs and the rear leveling wheels are setup higher than the height of the cabinet. 8.6 Remove and discard the two rear leveling legs, they are only in place to solidify the unit for the transport. 8.7 Install the anti-tip bracket at this point before placing the range at its final position. Follow the installation instructions on page 12 or on the anti-tip bracket template supplied with the range. 8.8 To provide an optimum installation, the top surface of the countertop must be level and flat (lie on the same plane) around the 3 sides that are adjacent to range cooktop. Proper adjustments to make the top flat should be made or gaps between the countertop and the range cooktop may occur. 8.9 To reduce the risk of damaging your appliance, do not handle or manipulate it by the cooktop. Manipulate with care. 7
-
 1
1 -
 2
2 -
 3
3 -
 4
4 -
 5
5 -
 6
6 -
 7
7 -
 8
8 -
 9
9 -
 10
10 -
 11
11 -
 12
12 -
13
-
14
-
15
-
16
-
17
-
18
-
19
-
20
-
21
-
22
-
23
-
24
-
25
-
26
-
27
-
28
-
29
-
30
-
31
-
32
-
33
-
34
-
35
-
36
-
37
-
38
-
39
-
40
 |
 |