Electrolux EW30EF65GS Complete Owner's Guide (English) - Page 11
Control lock, Changing settings, Interior Luxury-Lighting™, Preheat Temperature Display
 |
UPC - 012505544514
View all Electrolux EW30EF65GS manuals
Add to My Manuals
Save this manual to your list of manuals |
Page 11 highlights
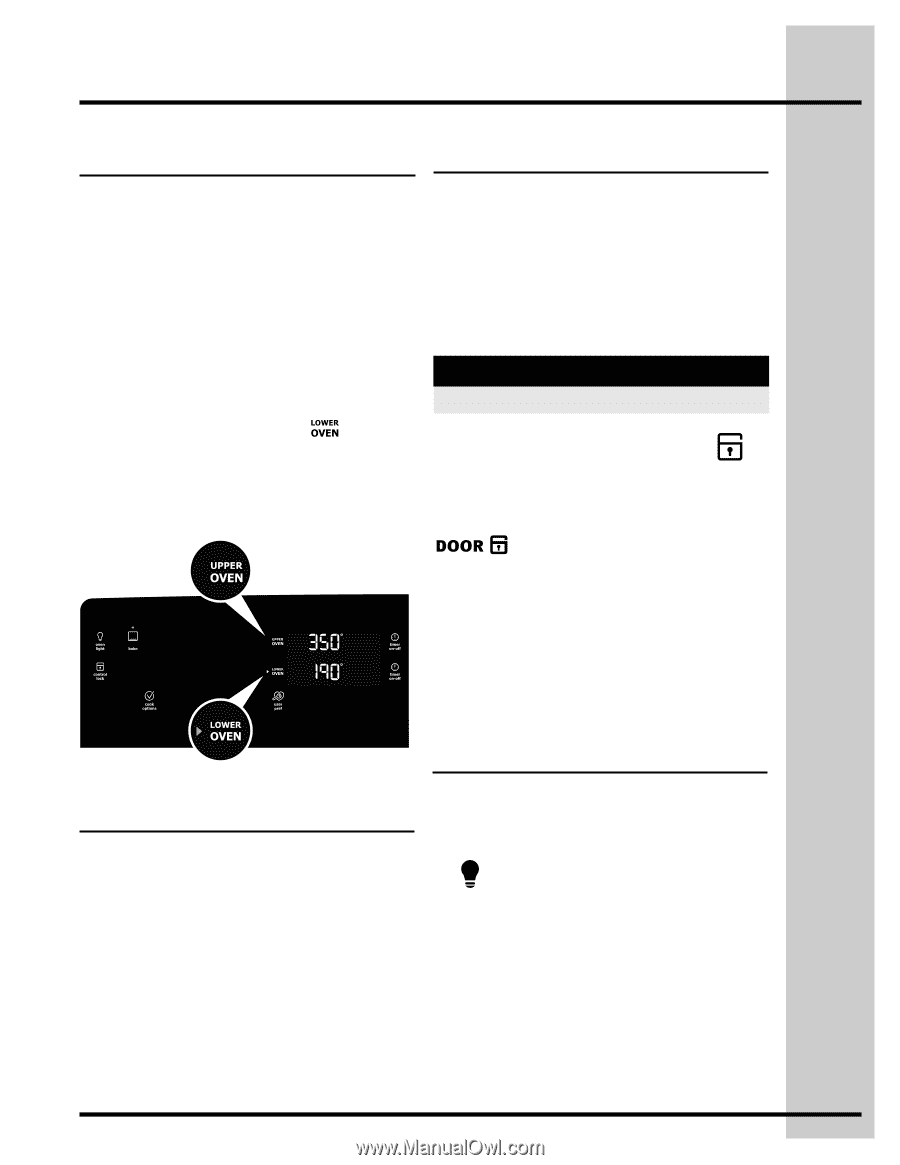
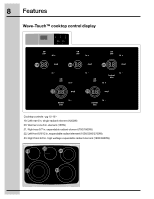
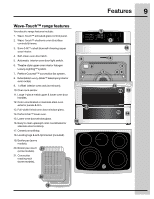
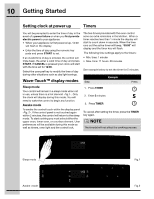
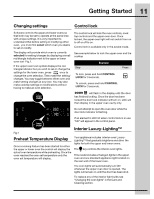
Getting Started 11 Changing settings Control lock Software controls the upper and lower ovens so that both may be set to operate at the same time with unique settings. It is very important to understand that before setting or modifying either oven, you must first select which oven you desire to set or modify. The display will provide which oven is currently selected for setting/changes by displaying a small red triangle indicator next to the upper or lower oven text -Fig.1. If the upper oven text symbol displays the red triangle indicator but you wish to set or change the settings for the lower oven, press once to change the oven selection. Then make the setting/ changes. You may toggle between either oven and make setting changes at any time. You may also make cooktop settings or modifications without having to make an oven selection. The control lock will lock the oven controls, cook top controls and the upper oven door. Once locked, the upper oven light will not switch from on to off or off to on. Control lock is available only in the awake mode. See example below to lock the upper oven and the cooktop Step Example Press To lock, press and hold CONTROL LOCK for 3 seconds. To unlock, press and hold CONTROL LOCK for 3 seconds. will flash in the display until the door has finished locking. Once the door has been locked the door lock indicator will turn on. LOC will then display in the upper oven cavity only. Do not attempt to open the oven door while the door lock indicator is flashing. If an element is still hot when control lock is in use "HE" will appear in the control panel. Interior Luxury-Lighting™ Fig.1 Preheat Temperature Display Once a cooking feature has been started for either the upper or lower oven the control will display the actual oven temperature while preheating. Once the oven reaches the oven set temperature only the oven set temperature will display. Your appliance includes interior oven LuxuryLighting™ that gradually brightens and dims the lights for both the upper and lower ovens. The key controls the interior oven lights. This model includes 2 halogen lights in the upper oven and one standard appliance light located on the rear wall of the lower oven. The oven lights will automatically turn ON whenever the upper oven door is opened. The lights will remain on until the door has been shut. To replace any of the interior light bulbs see "Changing the oven lights" in the Care and Cleaning section.
-
 1
1 -
2
-
3
-
4
-
5
-
 6
6 -
 7
7 -
 8
8 -
 9
9 -
 10
10 -
 11
11 -
 12
12 -
 13
13 -
 14
14 -
 15
15 -
 16
16 -
17
-
18
-
19
-
20
-
21
-
22
-
23
-
24
-
25
-
26
-
27
-
28
-
29
-
30
-
31
-
32
-
33
-
34
-
35
-
36
-
37
-
38
-
39
-
40
-
41
-
42
-
43
-
44
-
45
-
46
-
47
-
48
-
49
-
50
-
51
-
52
-
53
-
54
-
55
-
56
-
57
-
58
-
59
-
60
-
61
-
62
-
63
-
64
-
65
-
66
-
67
-
68
 |
 |