Epson 1781W Users Guide - Page 30
Connecting to a Computer for VGA Video, Run EMP_UDSE.EXE
 |
View all Epson 1781W manuals
Add to My Manuals
Save this manual to your list of manuals |
Page 30 highlights
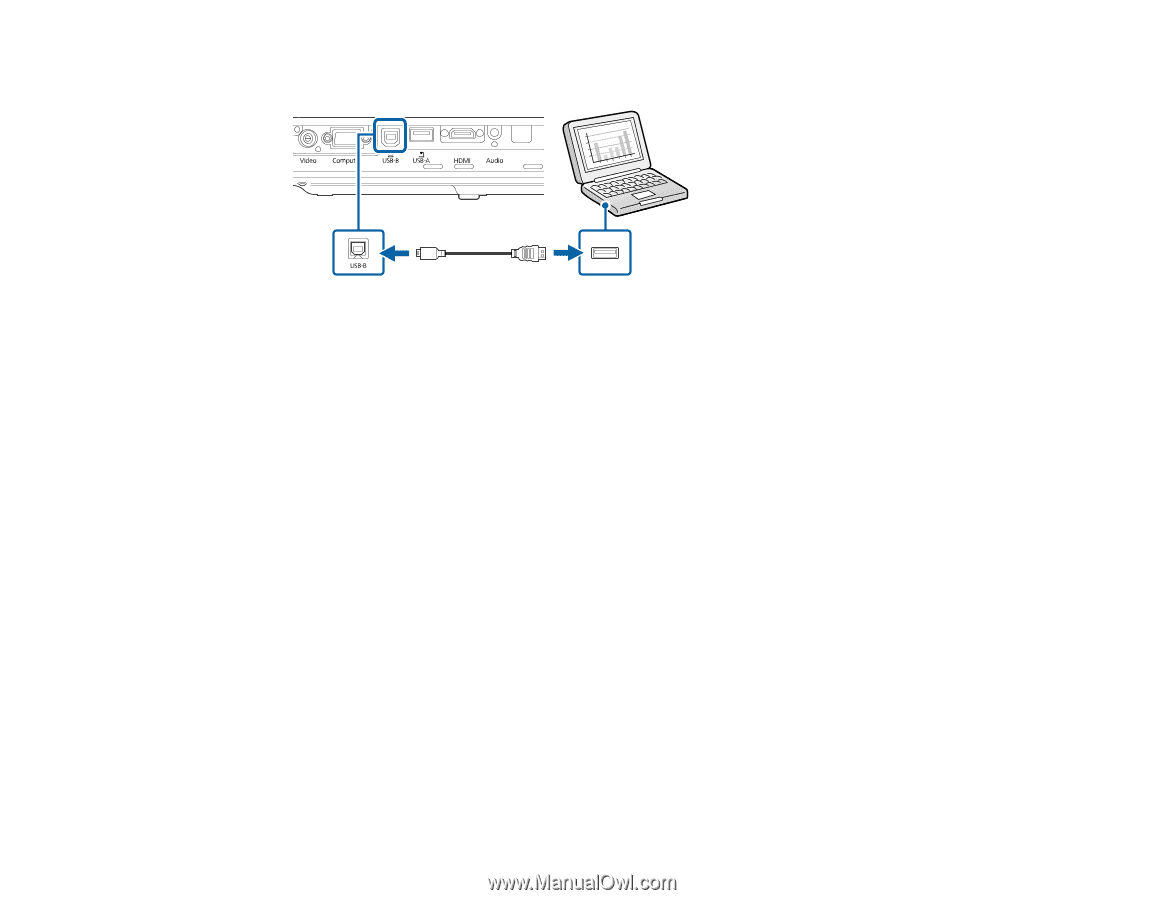
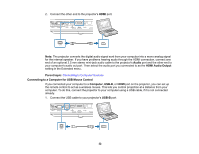
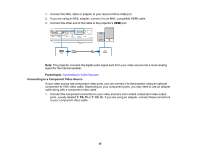
3. Connect the cable to your projector's USB-B port. 4. Connect the other end to any available USB port on your computer. 5. Do one of the following: • Windows 10/8.x: Click EPSON_PJ_UD when it appears on the desktop, then select Run EMP_UDSE.EXE in the dialog box that appears to install the Epson USB Display software. • Windows 7/Windows Vista: Select Run EMP_UDSE.EXE in the dialog box that appears to install the Epson USB Display software. • Mac: The USB Display setup folder appears on your screen. Select USB Display Installer and follow the on-screen instructions to install the Epson USB Display software. Follow any on-screen instructions. You need to install this software only the first time you connect the projector to the computer. The projector displays the image from your computer's desktop and outputs sound, if your presentation contains audio. Parent topic: Connecting to Computer Sources Connecting to a Computer for VGA Video You can connect the projector to your computer using a VGA computer cable. Note: To connect a Mac that includes only a Mini DisplayPort, Thunderbolt port, or Mini-DVI port for video output, you need to obtain an adapter that allows you to connect to the projector's VGA video port. Contact Apple for compatible adapter options. 1. If necessary, disconnect your computer's monitor cable. 2. Connect the VGA computer cable to your computer's monitor port. 30
-
 1
1 -
2
-
3
-
4
-
5
-
6
-
7
-
8
-
9
-
10
-
11
-
12
-
13
-
14
-
15
-
16
-
17
-
18
-
19
-
20
-
21
-
22
-
23
-
24
-
 25
25 -
 26
26 -
 27
27 -
 28
28 -
 29
29 -
 30
30 -
 31
31 -
 32
32 -
 33
33 -
 34
34 -
 35
35 -
36
-
37
-
38
-
39
-
40
-
41
-
42
-
43
-
44
-
45
-
46
-
47
-
48
-
49
-
50
-
51
-
52
-
53
-
54
-
55
-
56
-
57
-
58
-
59
-
60
-
61
-
62
-
63
-
64
-
65
-
66
-
67
-
68
-
69
-
70
-
71
-
72
-
73
-
74
-
75
-
76
-
77
-
78
-
79
-
80
-
81
-
82
-
83
-
84
-
85
-
86
-
87
-
88
-
89
-
90
-
91
-
92
-
93
-
94
-
95
-
96
-
97
-
98
-
99
-
100
-
101
-
102
-
103
-
104
-
105
-
106
-
107
-
108
-
109
-
110
-
111
-
112
-
113
-
114
-
115
-
116
-
117
-
118
-
119
-
120
-
121
-
122
-
123
-
124
-
125
-
126
-
127
-
128
-
129
-
130
-
131
-
132
-
133
-
134
-
135
-
136
-
137
-
138
-
139
-
140
-
141
-
142
-
143
-
144
-
145
-
146
-
147
-
148
-
149
-
150
-
151
-
152
-
153
-
154
-
155
-
156
-
157
-
158
-
159
-
160
-
161
-
162
-
163
-
164
-
165
-
166
-
167
-
168
-
169
-
170
-
171
-
172
-
173
-
174
-
175
-
176
-
177
-
178
-
179
-
180
-
181
-
182
-
183
-
184
-
185
-
186
-
187
-
188
-
189
-
190
-
191
-
192
-
193
-
194
-
195
-
196
-
197
-
198
-
199
-
200
-
201
-
202
-
203
-
204
-
205
-
206
-
207
-
208
-
209
-
210
-
211
-
212
-
213
-
214
-
215
-
216
-
217
-
218
-
219
-
220
-
221
-
222
-
223
-
224
-
225
-
226
-
227
-
228
-
229
-
230
-
231
-
232
-
233
-
234
-
235
-
236
-
237
-
238
-
239
-
240
-
241
-
242
-
243
-
244
-
245
 |
 |