Epson 1810p Product Information Guide - Page 19
Managing Projectors (PowerLite 1815p only), Using EMP Monitor - powerlite user manual
 |
UPC - 010343858213
View all Epson 1810p manuals
Add to My Manuals
Save this manual to your list of manuals |
Page 19 highlights
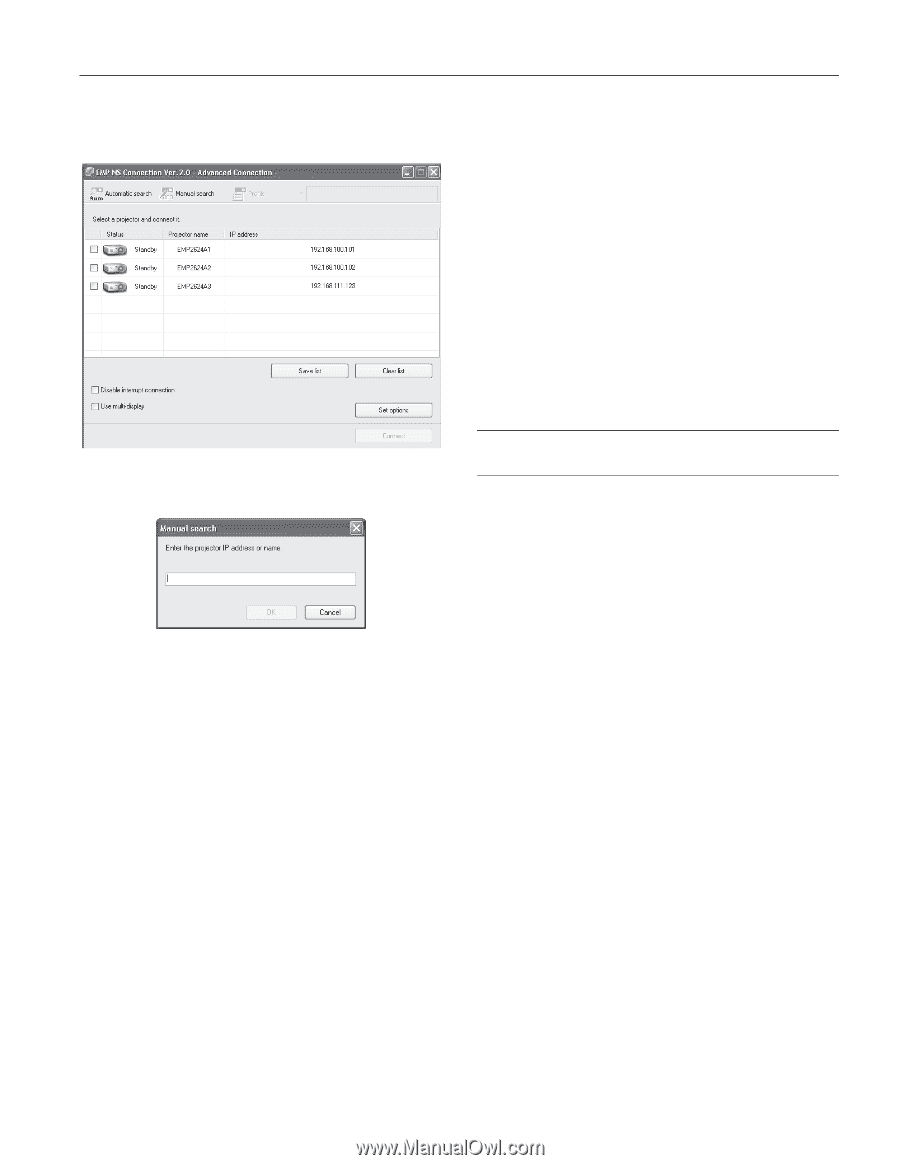
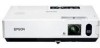
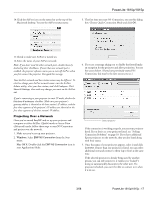
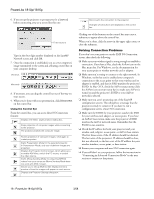
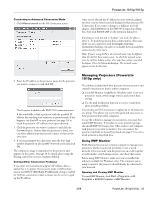
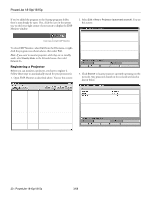
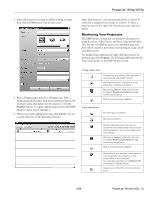
PowerLite 1810p/1815p Connecting in Advanced Connection Mode 1. Click Manual search on the NS Connection screen. Once you've selected the IP address for your network adapter, you won't see the Switch network dialog box when you start NS Connection. If you want to change to a different network adapter, click Extension on the EMP NS Connection dialog box, then click Switch LAN on the extension dialog box. If a projector is in use and is "locked," you won't be able to select it. To lock the projector from connection by other users while you are connected, click the Disable interrupt connection checkbox. De-select it to disable the lock and allow connection by other users. Note: If you're using AirPort, the network name may be different than the AirPort base station name. To check the network name, start the AirPort Admin utility, select your base station, and click Configure. Then click Show All Settings. The network name appears on the AirPort tab. 2. Enter the IP address or the projector name for the projector you want to connect to, and click OK. The Projector is added to the EMP NS Connection screen. If the search fails to find a projector with the specified IP address, the searching icon turns into a question mark. If this happens, run EasyMP on your projector (see page 10) to check the projector's IP address, then repeat this step. 3. Click the projector you want to connect to and click the Connect button. If more than one projector is listed, you can select additional projectors and connect to them at the same time. 4. If you are prompted for a keyword, enter the four-digit number displayed on the EasyMP Network screen and click OK. The computer's image is transmitted to the projector and appears on the screen. See page 18 for details about using the floating control bar on your computer desktop. Solving Other Connection Problems If you don't see your network adapter's IP address, allow a minute for it to appear. If your access point or AirPort base station uses DHCP (Distribute IP addresses setting is enabled for AirPort), sometimes it takes a minute for the server to pick up the IP address. Managing Projectors (PowerLite 1815p only) The software included with your projector lets you monitor and control your projectors from a remote computer. ❏ Use EMP Monitor (available for Windows only) to see your projectors' status, switch image sources, and control basic settings. ❏ Use the mail notification function to receive e-mail alerts about possible problems. You can also use NS Connection to register up to 16 projectors as a group. This allows you to provide quick and easy access to these projectors from other computers. To use the software to manage your projectors, you must first install EMP Monitor. If you plan to create projector groups, also install EMP NS Connection. Then connect and configure each projector you want to monitor. You can connect the projector wirelessly in Access Point mode (see page 13) or over a wired network as described here. Using EMP Monitor EMP Monitor lets you use a remote computer to manage your projectors, whether connected wirelessly or over a wired network. It lets you easily turn the projectors on or off (together or individually), switch image sources, and check their status. Before using EMP Monitor, make sure you've installed the software (available for Windows only). The computer you're using to monitor the projector should already be connected to your network. Opening and Closing EMP Monitor To start EMP Monitor, click Start > Programs or All Programs > EPSON Projector > EMP Monitor. 3/08 PowerLite 1810p/1815p - 19
-
 1
1 -
2
-
3
-
4
-
5
-
6
-
7
-
8
-
9
-
10
-
11
-
12
-
13
-
 14
14 -
 15
15 -
 16
16 -
 17
17 -
 18
18 -
 19
19 -
 20
20 -
 21
21 -
 22
22 -
 23
23 -
 24
24 -
25
-
26
 |
 |