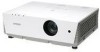
Epson 6110i Product Information Guide - Page 7
Adjusting the Image Shape, Correcting Computer Images, Adjusting the Volume, pointer button - powerlite projectors
 |
UPC - 010343867314
View all Epson 6110i manuals
Add to My Manuals
Save this manual to your list of manuals |
Page 7 highlights
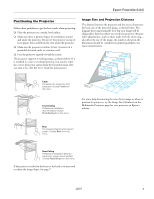
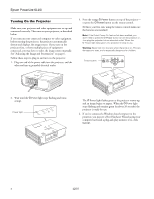
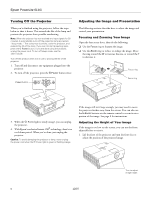
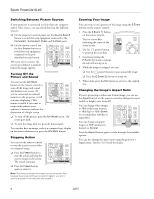
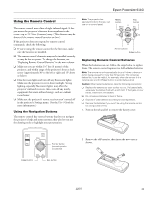
Epson PowerLite 6110i 2. If necessary, you can fine-tune the height by turning the projector's front feet without lifting the front of the projector. Raising the projector causes the image to become "keystone" shaped, but you can correct the distortion by pressing the or buttons on the projector as described in the next section. Adjusting the Image Shape In most cases, you can maintain a square or rectangular image by placing the projector directly in front of the center of the screen with the base of the lens level with the bottom of the screen. If the projector is slightly tilted (within a range of 30° up or down), you can use the Keystone buttons on the projector's control panel or the projector's Keystone menu (see "Using Keystone Correction" on page 7) to correct vertical keystone distortion. Projector tilted up Corrected image Projector tilted down If your image is shaped like or , you've placed the projector off to one side of the screen at an angle. Place it directly in front of the center of the screen, facing the screen squarely. Using Keystone Correction To adjust your image when it is wider on the top or bottom, do the following: ❏ Press the or buttons on the projector until you are satisfied with the shape of the image. Keystone buttons ❏ Or press the Menu button on the remote control, select the Settings menu, and press Enter. From the Settings menu, select Keystone and press Enter. Use the pointer button on the remote control to adjust the keystone setting as needed. Correcting Computer Images If the projector is connected to a computer and the image doesn't look right, press the Auto button on the remote control (or the Enter button on the projector's control panel). This automatically resets the projector's tracking, sync, resolution, and position settings. Note: You must be projecting an image for this button to have any effect. The Auto button works only with computer images. Make sure Auto Setup is turned on to adjust the source automatically. If vertical stripes appear in the projected image and the Auto button doesn't correct the problem, adjust the projector's Tracking setting. See the User's Guide for instructions. If the image appears fuzzy or flickers and the Auto button doesn't correct the problem, adjust the projector's Sync setting. See the User's Guide for instructions. Adjusting the Volume You can use the buttons on the remote control or projector to increase or decrease the volume for the projector's built-in speaker or an external speaker system connected to the projector. Press the button to increase the volume, or the button to decrease it. Note: You can also adjust the volume using the projector's menu system. See the User's Guide for instructions. Note: The image will be slightly shorter after adjusting. 12/07 7
-
 1
1 -
 2
2 -
 3
3 -
 4
4 -
 5
5 -
 6
6 -
 7
7 -
 8
8 -
 9
9 -
 10
10 -
 11
11 -
 12
12 -
13
-
14
-
15
-
16
 |
 |
