Epson C11C456021 Product Information Guide - Page 8
Testing the Printer, Cleaning the Print Head, Aligning the Print Head
 |
UPC - 010343844186
View all Epson C11C456021 manuals
Add to My Manuals
Save this manual to your list of manuals |
Page 8 highlights
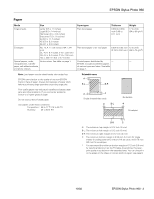
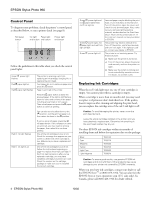
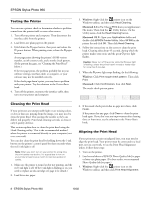
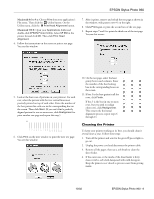
EPSON Stylus Photo 960 Testing the Printer You can run a printer check to determine whether a problem comes from the printer itself or some other source. 1. Turn off your printer and computer. Then disconnect the interface cable from the printer. 2. Load letter-size plain paper in the printer. 3. Hold down the m paper button, then press and release the P power button. When printing starts, release the m paper button. A test page prints showing the printer's ROM version number, an ink counter code, and a nozzle check pattern. (If the pattern has gaps, see "Cleaning the Print Head" below.) If the test page prints, the problem probably lies in your software settings, interface cable, or computer, or your software may not be installed correctly. If the check page doesn't print, you may have a problem with your printer. Try the solutions in the Printer Basics book. 4. Turn off the printer, reconnect the interface cable, then turn on your printer and computer. 3. Windows: Right-click the printer icon on the Windows taskbar, and then click Head Cleaning. Macintosh 8.6 to 9.x: Choose Print from your application's File menu. Then click the Utility button. On the Utility menu, click the Head Cleaning button. Macintosh OS X: Open your Applications folder and double-click EPSON Printer Utility. Select SP 960 in the printer list and click OK. Then click Head Cleaning. 4. Follow the instructions on the screen to clean the print head. Cleaning takes about 45 seconds, during which the printer makes some noise and the green Ppower light flashes. Caution: Never turn off the printer while the Ppower light is flashing, unless the printer hasn't moved or made noise for more than 5 minutes. 5. When the Ppower light stops flashing, do the following: Windows: Click Print nozzle check pattern. Then click Print. Macintosh: Click Confirmation, then click Next. The nozzle check pattern prints: Cleaning the Print Head If your printouts are unexpectedly light or are missing colors, or dots or lines are missing from the image, you may need to clean the print head. This unclogs the nozzles so they can deliver ink properly. Print head cleaning uses ink, so clean it only if quality declines. This section explains how to clean the print head using the Head Cleaning utility. This is the recommended method when the printer is connected directly to your computer (not over a network). You can also clean the print head by holding down the H ink button on the printer's control panel for three seconds when the red H ink light is off. Note: When you don't turn on your printer for a long time, the print quality may decline. It's a good idea to turn on your printer at least once a month to maintain good print quality. 1. Make sure the printer is turned on but not printing, and the red H ink light is off. (If the H ink light is flashing or on, you need to replace an ink cartridge; see page 4 for details.) 2. Load letter-size paper. 6. If the nozzle check pattern has no gaps in its lines, click Finish. If the pattern has any gaps, click Clean to clean the print head again. If you don't see any improvement after cleaning three or four times, see the solutions in the Printer Basics book. Aligning the Print Head If your printouts contain misaligned lines, you may need to align the print head. Your printer must be connected to a local port, not on a network, to use the Print Head Alignment utility. Follow these steps: 1. Turn on the printer. 2. Load several sheets of EPSON Photo Quality Ink Jet paper or letter-size plain paper. (For best results, we recommend Photo Quality Ink Jet paper.) 3. Windows: Right-click the printer icon on the Windows taskbar, and then click Print Head Alignment. 8 - EPSON Stylus Photo 960 10/02
-
 1
1 -
2
-
 3
3 -
 4
4 -
 5
5 -
 6
6 -
 7
7 -
 8
8 -
 9
9 -
 10
10
 |
 |
