Epson C1440AXIS User Setup Information - Page 6
Notes, Install, Properties, IP Address, Apply, Network - driver
 |
UPC - 667026001031
View all Epson C1440AXIS manuals
Add to My Manuals
Save this manual to your list of manuals |
Page 6 highlights
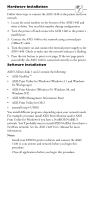
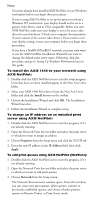
Notes: t You must already have installed AXIS NetPilot on you Windows workstation before you begin these procedures. t If you're using AXIS NetPilot to set up the print server from a Windows NT workstation, your display should not be set to a generic video driver, such as VGA compatible. Before you start AXIS NetPilot, make sure your display is set to the exact video driver for your hardware. (Check your computer documentation if you're unsure of the correct video driver.) If you need to reset your display setting, restart your computer before you begin these procedures. t If you have a NetBIOS/NetBEUI network, you may only want to use the AXIS NetPilot Installation Wizard if you want to change the default print server name. Otherwise, skip this procedure and go to Setting Up Windows Workstations later in this guide. To install the AXIS 1440 to your network using AXIS NetPilot: 1. Double-click the AXIS NetPilot icon to start the setup program. Units that have not been installed appear in the New Axis Units folder. 2. Select your AXIS 1440 Print Server from the New Axis Units folder and click the Install button on the toolbar. 3. Choose the Installation Wizard and click OK. The Installation Wizard launches. 4. Follow the Installation Wizard to complete setup. To change an IP address on an installed print server using AXIS NetPilot: 1. Double-click the AXIS NetPilot icon to start the program, if it's not already running. 2. Open the Network Print Servers folder and select the print server to which you want to assign an address. 3. Choose Properties from the Setup menu and click the TCP/IP tab. 4. Enter the new IP address in the IP Address field, then click Apply. To add print queues using AXIS NetPilot (NetWare): 1. Double-click the AXIS NetPilot icon to start the program, if it's not already running. 2. Open the Network Print Servers folder and select the print server to which you want to add print queues. 3. Choose Network from the Setup menu. The Network Environments window opens. From this window, you can create new print queues, delete queues, connect to previously established queues, and choose whether printers operate in Remote Printer or Print Server mode.
-
 1
1 -
 2
2 -
 3
3 -
 4
4 -
 5
5 -
 6
6 -
 7
7 -
 8
8 -
 9
9 -
 10
10 -
 11
11
 |
 |
