Epson C42UX Printer Basics - Page 15
setting from the Print Quality menu, and choose
 |
View all Epson C42UX manuals
Add to My Manuals
Save this manual to your list of manuals |
Page 15 highlights
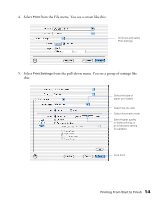
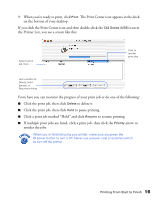
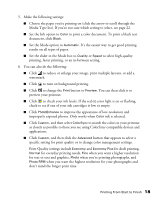
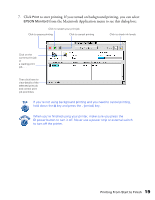
6. Select the following settings: I Load the right paper for your document in the printer. If you loaded special paper, choose the correct paper type in the Media Type list. If you're not sure which setting to choose, see page 22. I Set the Ink option to Color to print a color document. To print a black text document, click Black. I Set the Mode option to Automatic. It's the easiest way to get good printing results for most projects. I Set the slider to Quality or Speed to select high-quality printing, faster printing, or an in-between setting (if available). (The slider may not be available for some paper types.) 7. To select a specific print quality setting, click Advanced Settings and choose a setting from the Print Quality menu: I Economy or Economy Plus, for printing drafts. Saves ink. (Economy Plus is only available if you select Black as the ink color.) I Normal, for everyday printing needs I Fine, when you want a higher resolution for printing text or text and graphics I Photo, when you're printing photographs I Photo RPM, when you want the highest resolution for your photographs and you don't mind the longer print time. 8. You can also choose other print settings by selecting these options in the pull-down menu: I Copies & Pages, to select the number of copies or a page range I Layout, to select page layout options I Output Options, to save your print job as a PDF file I Color Management, to select ColorSync® or adjust the color controls or gamma setting I Summary, to view a list of all your selections I Save Custom Setting, to save your selections for future use. Printing From Start to Finish 15
-
 1
1 -
2
-
3
-
4
-
5
-
6
-
7
-
8
-
9
-
 10
10 -
 11
11 -
 12
12 -
 13
13 -
 14
14 -
 15
15 -
 16
16 -
 17
17 -
 18
18 -
 19
19 -
 20
20 -
21
-
22
-
23
-
24
-
25
-
26
-
27
-
28
-
29
-
30
-
31
-
32
-
33
-
34
-
35
-
36
-
37
-
38
-
39
-
40
-
41
-
42
-
43
-
44
-
45
-
46
-
47
-
48
-
49
-
50
-
51
-
52
-
53
-
54
-
55
-
56
-
57
-
58
-
59
 |
 |