Epson C84WN Product Information Guide - Page 7
Replacing a Cartridge When Print Quality Declines, Declines
 |
UPC - 010343849143
View all Epson C84WN manuals
Add to My Manuals
Save this manual to your list of manuals |
Page 7 highlights
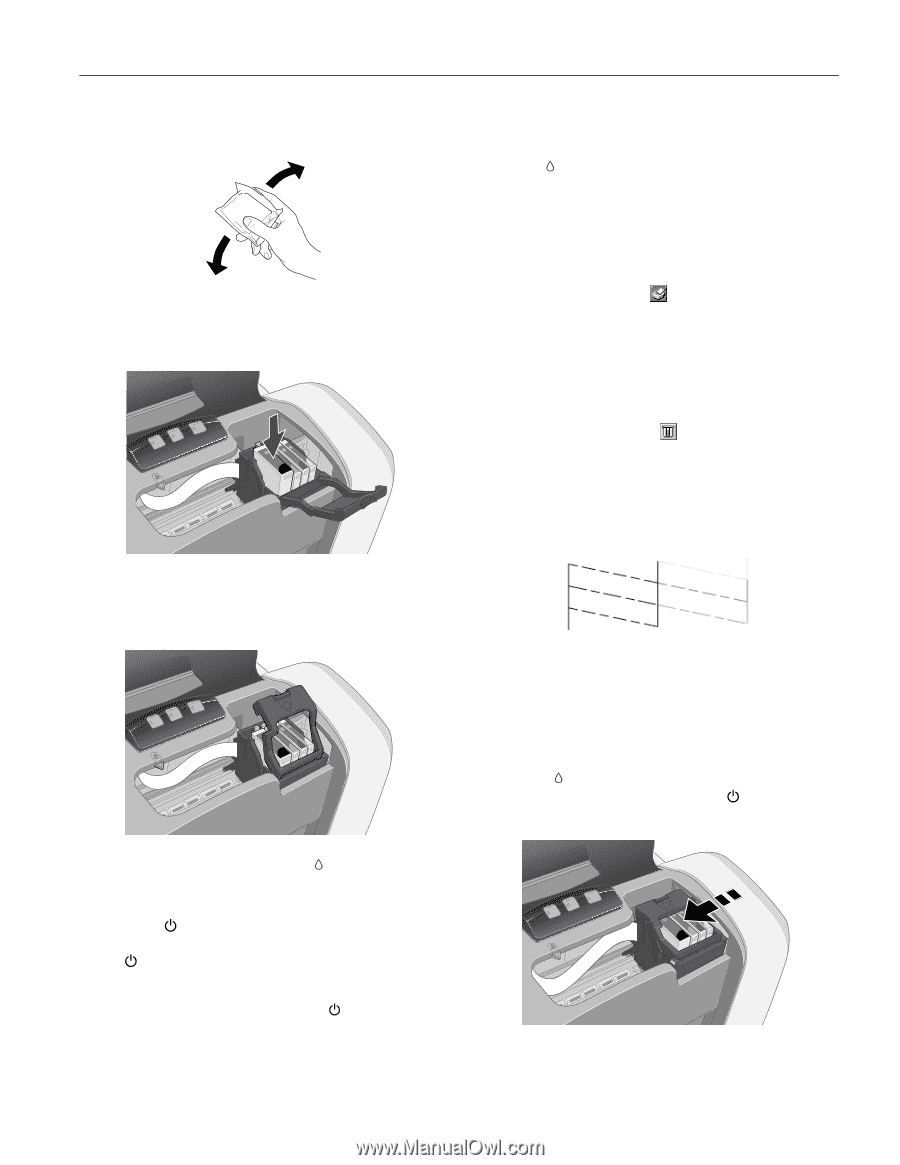
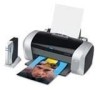
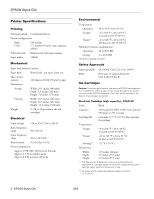
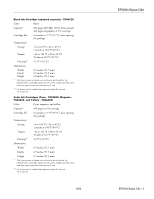
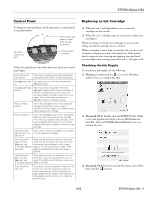
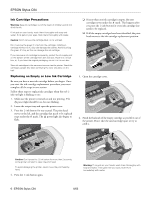
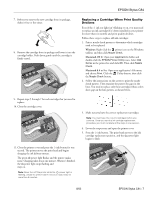
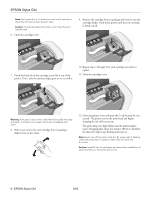
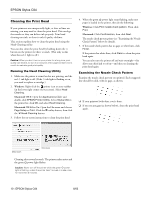
EPSON Stylus C84 7. Before you remove the new cartridge from its package, shake it four or five times. 8. Remove the cartridge from its package and lower it into the cartridge holder. Push down gently until the cartridge is firmly seated. Replacing a Cartridge When Print Quality Declines Even if the ink out light isn't flashing or on, you may need to replace an ink cartridge if it's been installed in your printer for more than six months and print quality declines. Follow these steps to replace old ink cartridges: 1. Print a nozzle check pattern to determine which cartridges need to be replaced: Windows: Right-click the printer icon on the Windows taskbar, and then click Nozzle Check. Macintosh OS X: Open your Applications folder and double-click the EPSON Printer Utility icon. Select C84 Series in the printer list and click OK. Then click Nozzle Check. Macintosh 8.6 to 9.x: Open your application's File menu and choose Print. Click the Utility button, then click the Nozzle Check button. 2. Follow the instructions on the screen to print the nozzle check pattern. Then examine the pattern for gaps in the lines. You need to replace only those cartridges whose colors show gaps in the line pattern, as shown below. 9. Repeat steps 5 through 7 for each cartridge that you need to replace. 10. Close the cartridge cover. 3. Make sure you have the correct replacement cartridges. Note: You must have the new ink cartridges before you continue. Once you start the ink cartridge replacement procedure, you must complete all the steps in one session. 4. Lower the output tray and open the printer cover. 5. Press the ink button. The print head moves to the ink cartridge replacement position, and the power light begins to flash. 11. Close the printer cover and press the ink button for one second. The printer moves the print head and begins charging the ink delivery system. The green power light flashes and the printer makes noise. Charging takes about one minute. When it's finished, the power light stops flashing and stays on. Note: Never turn off the printer while the power light is flashing, unless the printer hasn't moved or made noise for more than 5 minutes. 8/03 EPSON Stylus C84 - 7
-
 1
1 -
 2
2 -
 3
3 -
 4
4 -
 5
5 -
 6
6 -
 7
7 -
 8
8 -
 9
9 -
 10
10 -
 11
11 -
 12
12 -
13
 |
 |