Epson CX3810 Product Information Guide - Page 8
Related Documentation, Start Here, Quick Guide, User's Guide - stylus cartridges
 |
UPC - 010343855151
View all Epson CX3810 manuals
Add to My Manuals
Save this manual to your list of manuals |
Page 8 highlights
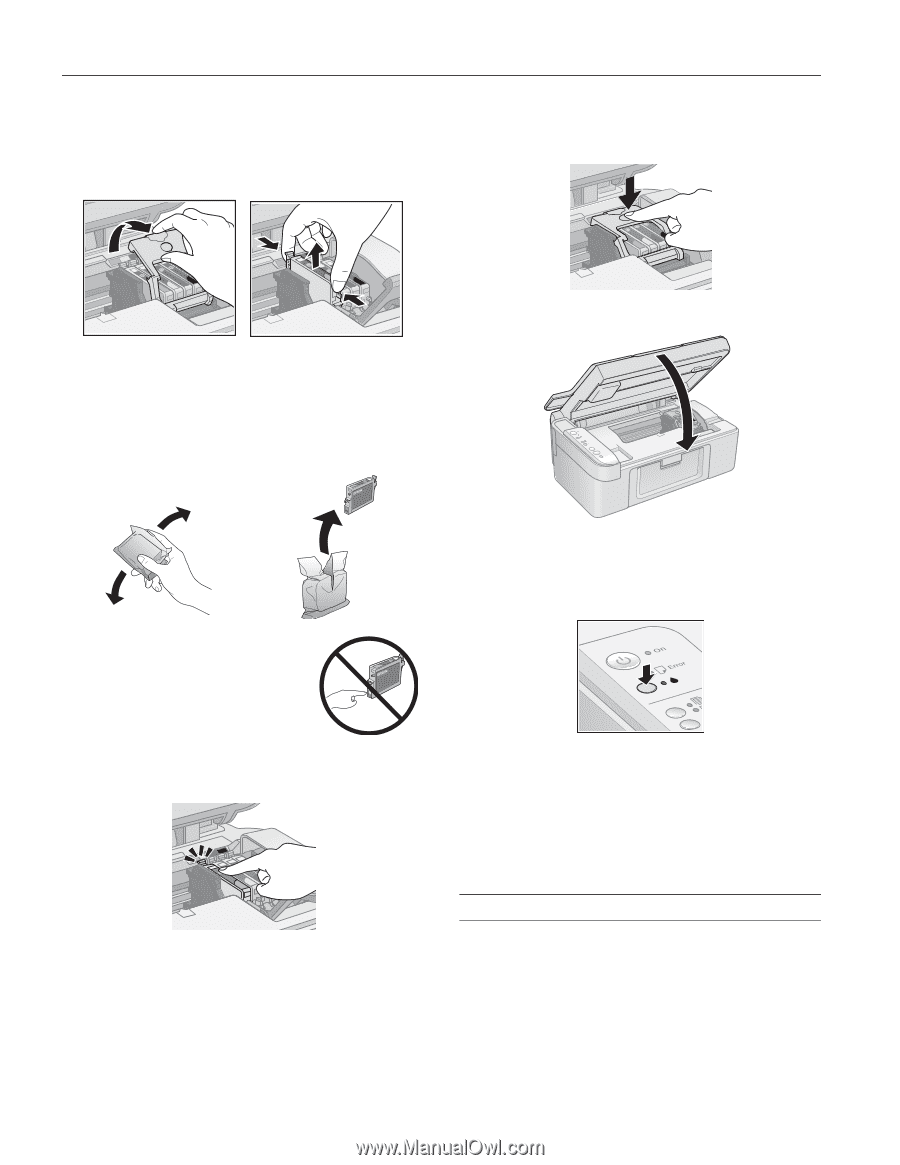
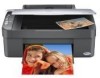
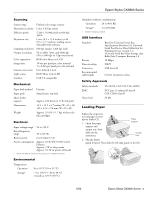
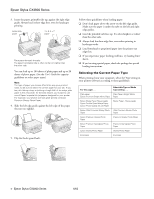
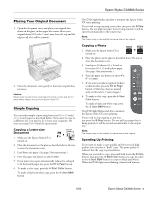
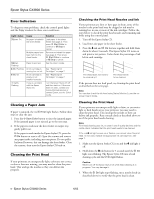
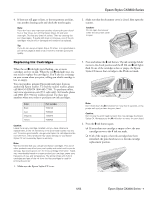
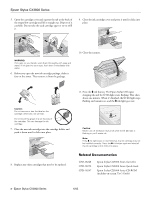
Epson Stylus CX3800 Series 5. Open the cartridge cover and squeeze the tab at the back of the empty/low cartridge and lift it straight out. Dispose of it carefully. Do not take the used cartridge apart or try to refill it. 9. Close the ink cartridge cover and press it until it clicks into place. WARNING: If ink gets on your hands, wash them thoroughly with soap and water. If ink gets into your eyes, flush them immediately with water. 6. Before you open the new ink cartridge package, shake it four or five times. Then remove it from the package. 10. Close the scanner. Caution: Do not remove or tear the label on the cartridge; otherwise, ink will leak. Do not touch the green chip on the side of the cartridge. This can damage the ink cartridge. 7. Place the new ink cartridge into the cartridge holder and push it down until it clicks into place. 8. Replace any other cartridges that need to be replaced. 11. Press the B ink button. The Epson Stylus CX begins charging ink and the P On light starts flashing. This takes about one minute. When it's finished, the P On light stops flashing and remains on, and the B ink light goes out. Caution: Never turn off the Epson Stylus CX while the P On light is flashing or you'll waste ink. Note: If the B ink light stays on (not flashing), the ink cartridge may not be installed correctly. Press the B ink button again and reinstall the ink cartridge until it clicks into place. Related Documentation CPD-18248 CPD-18250 CPD-18247 Epson Stylus CX3800 Series Start Here Epson Stylus CX3800 Series Quick Guide Epson Stylus CX3800 Series CD-ROM (includes on-screen User's Guide) 8 - Epson Stylus CX3800 Series 6/05
-
 1
1 -
2
-
 3
3 -
 4
4 -
 5
5 -
 6
6 -
 7
7 -
 8
8
 |
 |