Epson CX4800 Quick Reference Guide - Page 15
Selecting Photos on the Index Sheet - stylus flashing lights
 |
UPC - 010343855090
View all Epson CX4800 manuals
Add to My Manuals
Save this manual to your list of manuals |
Page 15 highlights
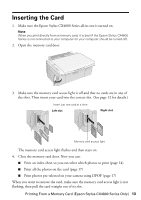
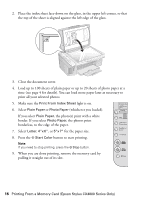
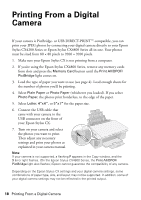
6. Press the x Start Color button. The P On light flashes, and the Epson Stylus CX4800 Series starts printing the index sheet(s). (This may take a few minutes.) For multiple index sheets, the pages containing the most recent images are printed first. If you want to cancel printing more sheets, press the y Stop button. Now follow the instructions below to select which photos to print. Selecting Photos on the Index Sheet 1. Once you have printed the index sheet, use a dark pen or pencil to fill in one of the ovals beneath each photo you want to print to indicate how many copies you want (1, 2, or 3). OK: No good: Make sure just one oval is filled in for each selected photo and mark the sheet carefully; once it has been scanned you will not be able to change your selections. Note: If you want one copy of all the photos on the index sheet, fill in the ALL oval at the top of the page. Printing From a Memory Card (Epson Stylus CX4800 Series Only) 15
-
 1
1 -
2
-
3
-
4
-
5
-
6
-
7
-
8
-
9
-
 10
10 -
 11
11 -
 12
12 -
 13
13 -
 14
14 -
 15
15 -
 16
16 -
 17
17 -
 18
18 -
 19
19 -
 20
20 -
21
-
22
-
23
-
24
-
25
-
26
-
27
-
28
-
29
-
30
-
31
-
32
-
33
-
34
-
35
-
36
-
37
-
38
-
39
-
40
-
41
-
42
-
43
-
44
-
45
-
46
-
47
-
48
 |
 |
