Epson CX5800F Product Information Guide - Page 22
Error Messages, After transporting the Epson Stylus CX5800F, remove - stylus installation cd
 |
UPC - 010343856264
View all Epson CX5800F manuals
Add to My Manuals
Save this manual to your list of manuals |
Page 22 highlights
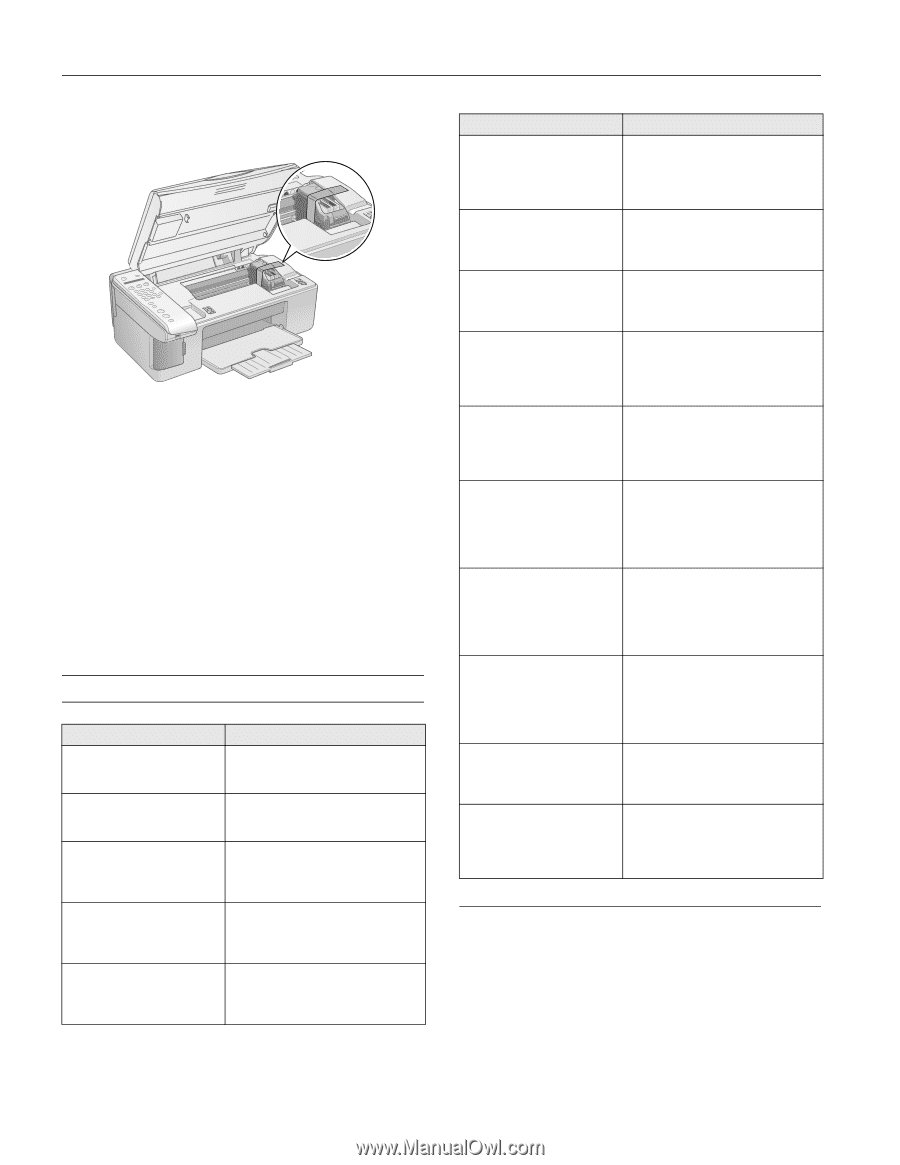
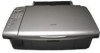
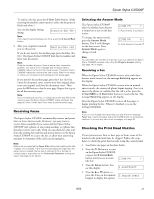
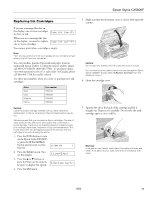
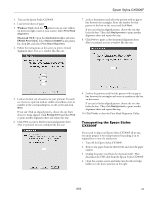
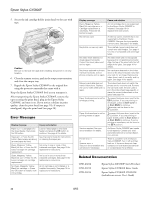
Epson Stylus CX5800F 5. Secure the ink cartridge holder (print head) to the case with tape. Caution: Be sure to remove the tape after installing the printer in its new location. 6. Close the scanner section, push in the output tray extension, and close the output tray. 7. Repack the Epson Stylus CX5800F in the original box using the protective materials that came with it. Keep the Epson Stylus CX5800F level as you transport it. After transporting the Epson Stylus CX5800F, remove the tape securing the print head, plug in the Epson Stylus CX5800F, and turn it on. If you notice a decline in print quality, clean the print head (see page 18); if output is misaligned, align the print head (see page 20). Error Messages Display message Paper out -> Load paper into the sheet feeder, then press the OK button. Paper jam -> Press the OK button. Remove any remaining jammed paper by hand. [Cyan, Magenta, Yellow, Black] ink low -> Press the OK button to begin ink cartridge replacement. [Cyan, Magenta, Yellow, Black] ink out -> Press the OK button to begin ink cartridge replacement. No [Cyan, Magenta, Yellow, Black] ink cartridge -> Press the OK button to install a new ink cartridge. Cause and solution Load or reload paper in the sheet feeder and press the OK button to continue. See page 4 for details. See the User's Guide for instructions on clearing the paper jam. Ink is low in one or more of the indicated cartridges. See page 19 for replacement instructions. Ink is out in one or more of the indicated cartridges. See page 19 for replacement instructions. An ink cartridge is not installed or is installed incorrectly. See page 19 for replacement instructions. Display message [Cyan, Magenta, Yellow, Black] Ink cartridge error -> Cartridge replacement is necessary. Press the OK button to begin. No memory card No photos on memory card No index sheet detected or sheet placed incorrectly. Correct the sheet placement and try again. No photos selected or photos marked incorrectly. Select photos correctly and try again. Memory card data does not match index sheet. Replace the card or index sheet and try again. Paper thickness lever is set for envelope printing. Paper thickness lever is set for printing sheets of paper. Service required. See your documentation for details. Printer error -> or Scanner error -> See your documentation and call service if necessary. Cause and solution An ink cartridge that is not supported by the Epson Stylus CX5800F is installed. See page 19 for replacement instructions. A memory card is inserted that is not supported by the Epson Stylus CX5800F. Remove the incompatible memory card. See page 3 for details. The inserted memory card does not contain any valid images. See page 4 for a list of compatible card and image types. An index sheet was not recognized because it is not positioned correctly. Align the top of the sheet with the left edge of the glass. See page 10 for details. No marks are detected on the index sheet or the sheet includes more than one mark for an image. Remove the index sheet, mark it correctly, and try again. See page 10 for details. The index sheet does not match the photos on the memory card. Remove the card and insert the one used to print the index sheet (see page 8), or place the correct index sheet on the glass (see page 10). The paper thickness lever is set to the ^ H position. If you are printing on envelopes, press x Start Color or x Start B&W to continue. Otherwise, set the lever to the m L position. The paper thickness lever is set to the m L position. If you are printing on paper sheets, press x Start Color or x Start B&W to continue. If you're printing on envelopes, set the lever to the ^ H position. An Epson Stylus CX5800F part needs to be replaced. Contact your local authorized servicer or contact Epson for a referral. There is a problem with the Epson Stylus CX5800F. Turn it off and then back on. If the error does not clear, contact your local authorized servicer or contact Epson for a referral. Related Documentation CPD-20212 CPD-20213 CPD-20214 Epson Stylus CX5800F Start Here sheet Epson Stylus CX5800F Basics Guide Epson Stylus CX5800F CD-ROM (includes on-screen User's Guide) 22 8/05
-
 1
1 -
2
-
3
-
4
-
5
-
6
-
7
-
8
-
9
-
10
-
11
-
12
-
13
-
14
-
15
-
16
-
 17
17 -
 18
18 -
 19
19 -
 20
20 -
 21
21 -
 22
22
 |
 |