Epson ELPDC04 User Manual - Page 29
Pausing the Main Display, Adjusting Settings with the On-Screen Display
 |
View all Epson ELPDC04 manuals
Add to My Manuals
Save this manual to your list of manuals |
Page 29 highlights
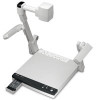
note The pause feature only works when the document camera is in the Main display mode. It does not work then the document camera is in the RGB1 display mode. Pausing the Main Display During a presentation, it may be necessary to change the material you are displaying. Press the Pause button before switching your material. This freezes the image on screen, allowing you to change your material. When you are ready to display the next item, press the Pause button again. Adjusting Settings with the On-Screen Display The on-screen display allows access to many of the settings available with the document camera's remote control. To access the on-screen display, you must have the mouse connected to the document camera's RS-232C port (See "Connecting a Mouse to the Document Camera" on page 14). When the left mouse button is clicked, the on-screen display and the pointer appears. The table below lists the various functions and their descriptions. Icon Name Lighting Unit On/Off Color/B&W Function Turns off the lamps individually. Click once to turn off the right lamp. Click a second time to turn off the left lamp. Click a third time to turn on both lamps (this may take a few seconds). Switches the display from Color to B&W (black and white). Pause On/Off Switches the screen from Live to Still. 24 Using the Document Camera
-
 1
1 -
2
-
3
-
4
-
5
-
6
-
7
-
8
-
9
-
10
-
11
-
12
-
13
-
14
-
15
-
16
-
17
-
18
-
19
-
20
-
21
-
22
-
23
-
 24
24 -
 25
25 -
 26
26 -
 27
27 -
 28
28 -
 29
29 -
 30
30 -
 31
31 -
 32
32 -
 33
33 -
 34
34 -
35
-
36
-
37
-
38
-
39
-
40
-
41
-
42
-
43
-
44
-
45
-
46
-
47
-
48
-
49
-
50
-
51
-
52
-
53
-
54
-
55
-
56
-
57
-
58
 |
 |
