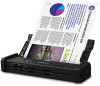
Epson ES-200 Users Guide
Epson ES-200 Manual
 |
View all Epson ES-200 manuals
Add to My Manuals
Save this manual to your list of manuals |
Epson ES-200 manual content summary:
- Epson ES-200 | Users Guide - Page 1
ES-200/ES-300W User's Guide - Epson ES-200 | Users Guide - Page 2
- Epson ES-200 | Users Guide - Page 3
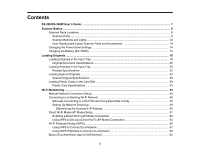
Contents ES-200/ES-300W User's Guide ...7 Scanner Basics...8 Scanner Parts Locations ...8 Scanner Parts...8 Scanner Buttons and Lights...12 User Replaceable Epson Scanner Parts and Accessories 14 Changing the Power Save Settings...14 Charging the Battery (ES-300W)...15 Loading Originals...18 - Epson ES-200 | Users Guide - Page 4
Document Capture Pro and Document Capture 71 Scanning in Epson Scan 2 ...74 Additional Scanning Settings - Main Windows 94 Scanning to a SharePoint Server or Cloud Service 95 Cleaning and Transporting Your Scanner 98 Cleaning Your Problems ...118 Scanner Light Status ...118 Solving Scanning - Epson ES-200 | Users Guide - Page 5
Access Point 129 Solving Scanned Image Quality Problems 130 Back of Original Image Appears in Scanned Image is Cropped ...133 Resetting the Epson Scan 2 Settings 133 Uninstall Your Scanner Software ES-300W 142 Safety and Approvals Specifications 142 Notices ...144 Important Safety Instructions - Epson ES-200 | Users Guide - Page 6
Battery Safety Instructions (ES-300W 146 Restrictions on Copying ...146 Default Delay Times for Power Management for Epson Products 147 Binding Arbitration and Class Waiver 147 Trademarks ...150 Copyright Notice...151 libTIFF Software Acknowledgment 151 A Note Concerning Responsible Use of - Epson ES-200 | Users Guide - Page 7
ES-200/ES-300W User's Guide Welcome to the ES-200/ES-300W User's Guide. For a printable PDF copy of this guide, click here. 7 - Epson ES-200 | Users Guide - Page 8
Scanner Parts Locations Changing the Power Save Settings Charging the Battery (ES-300W) Scanner Parts Locations See these sections to identify the Lights User Replaceable Epson Scanner Parts and Accessories Parent topic: Scanner Basics Scanner Parts Note: The illustrations show the ES-300W, but the - Epson ES-200 | Users Guide - Page 9
2 Cover latch 1 Output slot 2 Card slot 3 Mode selector 4 Edge guides 5 Paper guide 6 Input tray 9 - Epson ES-200 | Users Guide - Page 10
7 ADF (Automatic Document Feeder) 8 Connection mode switch (ES-300W only) 1 Power inlet 10 - Epson ES-200 | Users Guide - Page 11
2 USB port 1 Scanner cover 2 Pickup roller 3 Separation pad 1 AC adapter 11 - Epson ES-200 | Users Guide - Page 12
2 Power cord 3 SuperSpeed USB 3.0 cable Parent topic: Scanner Parts Locations Scanner Buttons and Lights ES-200 1 power button 2 ! error light 3 automatic feeding mode light 4 stop button 5 Ready light 6 start button 12 - Epson ES-200 | Users Guide - Page 13
ES-300W 1 power button 2 ! error light 3 automatic feeding mode light 4 stop button 5 Ready light 6 start button 7 Wi-Fi connect button 8 Wi-Fi on/off light 9 battery light Parent topic: Scanner Parts Locations 13 - Epson ES-200 | Users Guide - Page 14
Part Pickup roller Separation pad Part number B12B819251 B12B819271 Parent topic: Scanner Parts Locations Changing the Power Save Settings You can use the Epson Scan 2 Utility to change the time period before the scanner enters sleep mode and turns off automatically. 1. Do one of the following to - Epson ES-200 | Users Guide - Page 15
Select a power off timer setting for the AC power or AC adapter and Battery or USB power settings. 5. Close the Epson Scan 2 Utility. Parent topic: Scanner Basics Charging the Battery (ES-300W) The scanner runs on battery power when it is connected to the computer with a USB cable or WiFi. You can - Epson ES-200 | Users Guide - Page 16
To charge the battery with the power cord, connect the power cord to the AC adapter, connect the AC adapter to the scanner, and then plug in the power cord. The battery charging light turns orange while the battery is charging. When charging is complete, the light turns blue (if the scanner is on) - Epson ES-200 | Users Guide - Page 17
2. Connect the scanner to the computer using the micro USB cable. 3. Press the power button to turn on the scanner. The battery charging light turns orange while the battery is charging. When charging is complete, the light turns blue (if the scanner is on) or turns off (if the scanner is off). Note - Epson ES-200 | Users Guide - Page 18
Loading Originals Follow the instructions here to load your originals into the scanner. Note: The illustrations show the ES-300W, but the steps are the same for the ES-200. Loading Originals in the Input Tray Loading Receipts in the Input Tray Loading Special Originals Loading Plastic Cards in the - Epson ES-200 | Users Guide - Page 19
2. Press the power button to turn on the scanner, if necessary. 19 - Epson ES-200 | Users Guide - Page 20
3. Extend the paper guide. Note: If you are loading an original that is 14.5 inches (368.3 mm) or longer, do not extend the paper guide. 20 - Epson ES-200 | Users Guide - Page 21
4. Raise the input tray edge guides and slide them all the way out. 5. If you are loading a multi-page original, fan your stack of originals. Note: If you are loading an original that is 14.5 inches (368.3 mm) or longer, load only one sheet at a time. 21 - Epson ES-200 | Users Guide - Page 22
6. Stack the originals with the printed side facing down and slide the stack so the leading edge is at an angle as shown. 22 - Epson ES-200 | Users Guide - Page 23
7. Slide the mode selector to ADF and load standard originals into the input tray printed side down and top edge first. Slide in the originals until they meet resistance and the Ready light becomes brighter. 23 - Epson ES-200 | Users Guide - Page 24
8. Slide the edge guides against the edges of the original. Note: If you are scanning originals that are 14.5 inches (368.3 mm) or longer, support the original as it enters into and ejects from the scanner as shown. 24 - Epson ES-200 | Users Guide - Page 25
Original Document Specifications Parent topic: Loading Originals Related references Original Document Specifications Related topics Scanning Original Document Specifications You can load original documents that meet these specifications in your scanner. Paper type Plain paper Fine paper Recycled - Epson ES-200 | Users Guide - Page 26
Paper type Post cards Paper business cards Paper size 3.9 × 5.8 inches (100 × 148 mm) 2.1 × 3.4 inches (55 × 89 mm) Paper weight 34 to 61 lb (128 to 230 g/m²) 34 to 61 lb (128 to 230 g/m²) Loading capacity 51 lb (190 g/m²): 8 cards 58 lb (220 g/m²): 6 cards Caution: Do not load the following - Epson ES-200 | Users Guide - Page 27
1. Slide the cover latch to open the scanner. Note: Do not extend the paper guide. 2. Press the power button to turn on the scanner, if necessary. 27 - Epson ES-200 | Users Guide - Page 28
Settings tab, then click Scan. The Automatic Feeding Mode light on the scanner turns on. Note: Make sure to specify the correct Document Size in Epson Scan 2. If the receipt length is 34 inches (863.6 mm) or less, select Auto Detect (Long Paper) to detect the size automatically. If the receipt - Epson ES-200 | Users Guide - Page 29
4. Raise the input tray edge guides and adjust them to the width of the receipt. 29 - Epson ES-200 | Users Guide - Page 30
5. Slide the mode selector to ADF and load the receipt into the input tray printed side down and top edge first. 30 - Epson ES-200 | Users Guide - Page 31
6. Guide the receipt into the ADF and support it as it enters automatically into the scanner. (You can continue feeding receipts into the scanner, one after another, while the scanner is in Automatic - Epson ES-200 | Users Guide - Page 32
up to 44 inches (1,117.6 mm) long at a resolution of 300 dpi or less as long as you support the original as it enters into and exits out of the scanner. Parent topic: Loading Receipts in the Input Tray originals, turn off the Detect Double Feed setting on the Main Settings tab in Epson Scan 2. 32 - Epson ES-200 | Users Guide - Page 33
1. Slide the cover latch to open the scanner. 2. Press the power button to turn on the scanner, if necessary. 33 - Epson ES-200 | Users Guide - Page 34
3. Extend the paper guide. 34 - Epson ES-200 | Users Guide - Page 35
4. Raise the input tray edge guides and slide them all the way out. 5. Slide the mode selector to ADF. 35 - Epson ES-200 | Users Guide - Page 36
6. Do one of the following: • For an envelope, load it vertically in the input tray with the printable side down and the flap facing as shown. Slide in the envelope until it meets resistance and the Ready light becomes brighter. 36 - Epson ES-200 | Users Guide - Page 37
• For thick originals, load them vertically in the input tray printable side down and top edge first. Slide in the originals until they meet resistance and the Ready light becomes brighter. 37 - Epson ES-200 | Users Guide - Page 38
7. Slide the edge guides against the edges of the original. Special Original Specifications Parent topic: Loading Originals Related references Special Original Specifications Related topics Scanning Special Original Specifications You - Epson ES-200 | Users Guide - Page 39
Paper type Thick originals Paper size 2 × 2.28 inches (50.8 × 70 mm) to 3.9 × 5.8 inches (100 × 148 mm) Paper thickness Loading capacity 34 to 61 lb (128 to 230 51 lb (190 g/m²): 8 g/m²) sheets (vertical) 58 lb (220 g/m²): 6 sheets (vertical) Parent topic: Loading Special Originals Loading - Epson ES-200 | Users Guide - Page 40
2. Press the power button to turn on the scanner, if necessary. 3. Slide the mode selector to card. 40 - Epson ES-200 | Users Guide - Page 41
4. Load the card into the card slot face up and top edge first until the leading edge of the card is pulled into the scanner. Make sure to insert the card according to the white guidelines on the card slot. 41 - Epson ES-200 | Users Guide - Page 42
Note: Do not load plastic cards horizontally or at an angle. When scanning starts, the card is taken into the scanner, protrudes slightly from the slot at the back, and then returns through the scanner and ejects from the card slot at the front. Do not touch the card until it is fully ejected or a - Epson ES-200 | Users Guide - Page 43
Related references Plastic Card Specifications Related topics Scanning Plastic Card Specifications You can load original plastic and laminated cards that meet these specifications in your scanner's card slot. Card type Card size Plastic cards, 2.1 × 3.3 inches standard (ISO7810 ID- (54 × 85.6 - Epson ES-200 | Users Guide - Page 44
Wi-Fi network (ES-300W). Manual Network Connection Setup Connecting to an Existing Wi-Fi Network Direct Wi-Fi Mode (AP Mode) Setup Wi-Fi Protected Setup (WPS) Epson DocumentScan App for the networked scanner. Follow the links here for instructions on each procedure. Parent topic: Wi-Fi Networking 44 - Epson ES-200 | Users Guide - Page 45
can be connected to your computer over a wireless or wired network. 1 Epson scanner 2 Wireless router or access point 3 Computer with a wireless interface only for wired connection to the wireless router or access point) Manually Connecting to a Wi-Fi Router Using EpsonNet Config Setting Up Network - Epson ES-200 | Users Guide - Page 46
Manually Connecting to a Wi-Fi Router Using EpsonNet Config You can use EpsonNet Config to connect the scanner to an must have a computer with a wireless adapter to set up the connection. If EpsonNet Config is not installed, go to the Epson website. 1. Slide the cover latch to open the scanner. 46 - Epson ES-200 | Users Guide - Page 47
or Start, and select All Programs or Programs. Select EpsonNet > EpsonNet Config > EpsonNet Config. • Mac: Open the Applications folder, select Epson Software > EpsonNet > EpsonNet Config > EpsonNet Config. 6. Select your scanner from the list and click Configuration. 7. Select Network Interface - Epson ES-200 | Users Guide - Page 48
• Security level: Select the wireless connection's security level. • WEP Settings or WPA Settings: Enter the wireless connection's security key. 9. Click Transmit. 10. Open the Device menu and select Quit. 11. Turn off the scanner. 12. Disconnect the computer or device's direct Wi-Fi connection, - Epson ES-200 | Users Guide - Page 49
Setting Up Network Scanning After manually configuring your scanner to connect to your network, you must set up the computer to connect to the scanner using the Epson Scan 2 Utility. Your scanner must be turned on and connected to the network. Note: Make a note of the IP address or host name of the - Epson ES-200 | Users Guide - Page 50
address setting, type in the IP address or host name of your scanner, and click Add. 5. Click OK to save your settings and then close Epson Scan 2 Utility. Determining the Scanner's IP Address Parent topic: Connecting to an Existing Wi-Fi Network Determining the Scanner's IP Address If you have - Epson ES-200 | Users Guide - Page 51
or Start, and select All Programs or Programs. Select EpsonNet > EpsonNet Config > EpsonNet Config. • Mac: Open the Applications folder and select Epson Software > EpsonNet > EpsonNet Config > EpsonNet Config. 2. Locate your scanner in the list and write down the IP address. Parent topic: Setting - Epson ES-200 | Users Guide - Page 52
cannot communicate with each other through the scanner. Make sure to set the connection mode switch on the scanner to the AP mode position. 1 Epson scanner 2 Computer with a wireless interface 3 Other wireless devices Enabling a Direct Wi-Fi (AP Mode) Connection Using WPS to Set Up a Direct Wi-Fi - Epson ES-200 | Users Guide - Page 53
Note: If you are connecting a smart device to the scanner using a direct Wi-Fi (AP mode) connection, the scanner is connected to the same Wi-Fi network (SSID) as the smart device. When you turn off the scanner, the smart device is automatically connected to other Wi-Fi networks, so you must - Epson ES-200 | Users Guide - Page 54
2. Set the connection mode switch on the scanner to the AP mode position. 3. Turn on the scanner. 4. From your computer or device, search for and select the SSID shown on the label on the back of the scanner. 5. Enter the password shown on the label on the back of the scanner. When the ready and Wi- - Epson ES-200 | Users Guide - Page 55
1. Slide the cover latch to open the scanner. 2. Set the connection mode switch on the scanner to the AP mode position. 55 - Epson ES-200 | Users Guide - Page 56
3. Turn on the scanner. Wait for the ready and Wi-Fi lights on the scanner to stay on. 4. Press and hold the Wi-Fi connect button on the scanner for at least 3 seconds, then release it when the ready and Wi-Fi lights flash alternately. The scanner enters standby mode for WPS connection for two - Epson ES-200 | Users Guide - Page 57
Note: To check if your router is WPS-enabled, look for a button labeled WPS on your router or access point. If there is no hardware button, there may be a virtual WPS button in the software for the device. Check your network product documentation for details. Using WPS to Connect to a Network Using - Epson ES-200 | Users Guide - Page 58
2. Set the connection mode switch on the scanner to the Wi-Fi position. 3. Turn on the scanner. Wait for the ready and Wi-Fi lights on the scanner to flash simultaneously. 4. Press and hold the WPS button on your wireless router or access point until the security light flashes. Note: If you cannot - Epson ES-200 | Users Guide - Page 59
) Related tasks Setting Up Network Scanning Using WPS PIN Mode to Connect to a Network If you have a WPS-enabled wireless router or access point that supports PIN mode, you can use Wi-Fi Protected Setup (WPS) PIN mode to connect your scanner to the network. 59 - Epson ES-200 | Users Guide - Page 60
1. Slide the cover latch to open the scanner. 2. Set the connection mode switch on the scanner to the AP mode position. 60 - Epson ES-200 | Users Guide - Page 61
3. Press and hold the Wi-Fi connect button and press the power button to turn on the scanner. 4. Hold the Wi-Fi connect button until the ready and Wi-Fi lights on the scanner flash alternately. 5. Use your computer to enter the PIN code 01234565 into the wireless router or access point within two - Epson ES-200 | Users Guide - Page 62
9. Set up network scanning on your computer. Parent topic: Wi-Fi Protected Setup (WPS) Related tasks Setting Up Network Scanning Epson DocumentScan App for iOS/Android You can use the Epson DocumentScan app to scan from a network scanner to an iOS or Android device over a direct Wi-Fi connection. 62 - Epson ES-200 | Users Guide - Page 63
You can find more information about Epson DocumentScan by searching for the app on the App a Direct Wi-Fi (AP Mode) Connection Restoring Default Network Settings If you need to solve a problem with your network connection, you can restore all network settings to their defaults. 1. Set the connection - Epson ES-200 | Users Guide - Page 64
2. Press and hold the Wi-Fi connect button and press the power button to turn on the scanner. 3. Hold the Wi-Fi connect button until the ready and 4. Turn off the scanner. The default network settings are restored. Parent topic: Wi-Fi Networking Wi-Fi lights on the scanner flash alternately. 64 - Epson ES-200 | Users Guide - Page 65
Capture (Mac) do not support scanning from the start button on your scanner over a wireless network. Launch Epson Scan 2 before scanning from the start button on your scanner. 1. Make sure the scanner is connected to your computer or network (ES-300W). - Epson ES-200 | Users Guide - Page 66
Capture (Mac) program. Note: Document Capture Pro (Windows) and Document Capture (Mac) do not support scanning from the start button on your scanner over a wireless network (ES-300W). Launch Epson Scan 2 before scanning from the start button on your scanner. 1. Start Document Capture Pro or - Epson ES-200 | Users Guide - Page 67
2 program to select scan settings, scan, and save the scanned image to a file. • Windows 10: Click and select All apps > EPSON > Epson Scan 2. • Windows 8.x: Navigate to the Apps screen and select Epson Scan 2. • Windows (other versions): Click or Start, and select All Programs or Programs. Select - Epson ES-200 | Users Guide - Page 68
You see an Epson Scan 2 window like this: 68 - Epson ES-200 | Users Guide - Page 69
Scanning Program You can start Epson Scan 2 from a TWAIN-compliant scanning program to select scan settings, scan, and open the scanned image in the program. 1. Open your scanning program and select its scanning option. (See your scanning program help for instructions.) 2. Select your product. Note - Epson ES-200 | Users Guide - Page 70
You see an Epson Scan 2 window like this: 70 - Epson ES-200 | Users Guide - Page 71
. 1. Do one of the following to start Document Capture Pro (Windows) or Document Capture (Mac): • Windows 10: Click and select All Apps > Epson Software > Document Capture Pro. • Windows 8.x: Navigate to the Apps screen and select Document Capture Pro. • Windows (other versions): Click or Start, and - Epson ES-200 | Users Guide - Page 72
You see a window like this: 3. Click the Scan icon. 72 - Epson ES-200 | Users Guide - Page 73
you want to use and click . • Mac: Close the Scan window. Open the Scan menu at the top of the screen and select Displays the EPSON Scan Setup Screen. Click the Scan icon and select any displayed scan settings you want to use. 73 - Epson ES-200 | Users Guide - Page 74
, click OK or Send to complete the operation. Parent topic: Scanning Related tasks Loading Originals in the Input Tray Scanning in Epson Scan 2 Scanning in Epson Scan 2 Epson Scan 2 automatically scans your document and saves the scanned file in PDF format in your operating system's Documents or My - Epson ES-200 | Users Guide - Page 75
You see this window: 75 - Epson ES-200 | Users Guide - Page 76
the original that you want to scan. 4. Select the Document Size setting that matches the size of your original, or select Auto Detect to have Epson Scan 2 automatically detect the size. You can select Customize to enter a custom size, if necessary. 5. Select your original image type and how you want - Epson ES-200 | Users Guide - Page 77
2 previews your original and displays the results in the Epson Scan 2 window. 11. Reinsert your original into the ADF or card slot. 12. Select any additional settings that you want to use on the Main - Epson ES-200 | Users Guide - Page 78
Main Settings Tab You can select these additional scanning settings on the Epson Scan 2 Main Settings tab. Stitch Images When scanning double-sided the scanned pages as one file. Note: You must select a file format that supports multi-page such as PDF or Multi-TIFF. Detect Double Feed If you are - Epson ES-200 | Users Guide - Page 79
Additional Scanning Settings - Advanced Settings Tab You can select these additional scanning settings on the Epson Scan 2 Advanced Settings tab. Not all adjustment settings may be available, depending on other settings you have chosen. Unsharp Mask Makes the edges of certain - Epson ES-200 | Users Guide - Page 80
length is more than 34 inches (863.6 mm), select Customize to create a custom document size up to 44 inches (1,117.6 mm). Parent topic: Scanning in Epson Scan 2 Image Format Options You can select different image formats and related options. For details on available options, click the ? icon on the - Epson ES-200 | Users Guide - Page 81
the resolution setting you need: • You will scan the image at its original size but enlarge it later in an image-editing program. Increase the Epson Scan 2 Resolution setting in your scan. Increase the resolution by the same amount you will increase the image size to retain a high image quality. For - Epson ES-200 | Users Guide - Page 82
dpi. • You will scan the image at 100% or smaller size. Select the Epson Scan 2 Resolution setting based on how you will use the scanned image: • Email to Editable Text (OCR) Scanning to a SharePoint Server or Cloud Service Parent topic: Scanning Scanning Two Originals onto One Sheet (Stitching - Epson ES-200 | Users Guide - Page 83
You see this window: 4. Click the Scan icon, then click Detailed Settings. You see an Epson Scan 2 window like this: 5. Select Double-Sided as the Scanning Side setting. 6. Select the original document size as the Document Size setting. 7. Select one of - Epson ES-200 | Users Guide - Page 84
you want to start a new scanned file. 2. Do one of the following to start Document Capture Pro: • Windows 10: Click and select All Apps > Epson Software > Document Capture Pro. • Windows 8.x: Navigate to the Apps screen and select Document Capture Pro. • Windows (other versions): Click or Start, and - Epson ES-200 | Users Guide - Page 85
3. Click the Scan icon. 4. Select any displayed scan settings you want to use. Note: See the Help information in Document Capture Pro for details. 5. Click Scan. You see a preview of your scan in the Document Capture Pro window. 6. Click one of the Destination icons to choose where to send your - Epson ES-200 | Users Guide - Page 86
Parent topic: Scanning Special Projects Scanning Using OCR - Windows You can use the ABBYY FineReader OCR program to convert scanned documents to editable text. 1. If you are scanning using the ADF, slide the mode selector to ADF. If you are scanning using the card slot, slide the mode selector to - Epson ES-200 | Users Guide - Page 87
You see a window like this: 7. Select your scanner settings. 8. Click Preview and adjust the area you want to scan, if necessary. 9. Reload the ejected original in the scanner. 10. Click Scan to Document. 11. Select the program or format you want to scan to. You see the Save As window. 12. Select a - Epson ES-200 | Users Guide - Page 88
Your document is scanned and processed into editable text. The file is then saved and opened in an application associated with the file type you selected, if available on your system. 13. When you are finished scanning, close the ABBYY FineReader window. Parent topic: Convert Scanned Documents to - Epson ES-200 | Users Guide - Page 89
You see a window like this: 7. Select your scan settings and click Scan. Then click Finish Import. 89 - Epson ES-200 | Users Guide - Page 90
You see your scanned image. 8. Click on the Export icon 90 - Epson ES-200 | Users Guide - Page 91
9. Select the program or format you want to scan to and click Next. 91 - Epson ES-200 | Users Guide - Page 92
Optical Character Recognition (OCR) and then embedded in the scanned original. Note: The required Epson Scan 2 OCR Component is installed automatically when you install your scanner software as instructed on the Start Here sheet. If you install your scanner software programs individually, be sure - Epson ES-200 | Users Guide - Page 93
2. Load your original in the scanner. 3. Start Epson Scan 2. 4. Select your scan settings. 5. Click Preview and adjust the area you want to scan, if necessary. 6. Reload the ejected original in the scanner. 7. Select - Epson ES-200 | Users Guide - Page 94
1. Load your original in the scanner. 2. Do one of the following to start Document Capture Pro: • Windows 10: Click and select All Apps > Epson Software > Document Capture Pro. • Windows 8.x: Navigate to the Apps screen and select Document Capture Pro. • Windows (other versions): Click or Start, and - Epson ES-200 | Users Guide - Page 95
Capture (Mac) to upload scanned images to a SharePoint server or a cloud service. 1. Do one of the following to start Document Capture Pro (Windows) or Document Capture (Mac): • Windows 10: Click and select All Apps > Epson Software > Document Capture Pro. • Windows 8.x: Navigate to the Apps screen - Epson ES-200 | Users Guide - Page 96
Destination icons to choose where to save your scanned file. (If you cannot see all of the icons below, the service software may not be installed, the service may not be available on your platform, or you need to click the arrow next to the icons.) • Web Folder (WebDAV) • Microsoft SharePoint - Epson ES-200 | Users Guide - Page 97
• Google Drive • SugarSync You see the Transfer Settings window. 6. Enter any required information to set up the destination. If you have previously created a saved setting for the destination, select it from the drop-down list. 7. Adjust any save settings, then click OK or Send, depending on - Epson ES-200 | Users Guide - Page 98
up on the glass scanning surfaces. Dust can cause spots or lines in your scanned images. Note: The illustrations show the ES-300W, but the instructions are the same for the ES-200. Caution: Do not use a hard brush, alcohol, or paint thinner to clean the product or you may damage it. Do - Epson ES-200 | Users Guide - Page 99
2. Disconnect any connected cables. 3. Pull the edge of the scanner cover firmly at the arrow mark to open it. 99 - Epson ES-200 | Users Guide - Page 100
4. Use a soft, moist cloth to wipe off any dust or dirt on the glass scanning surfaces and the rollers inside the scanner cover. Caution: Do not spray glass cleaner directly on the scanning surfaces. Be careful not to place too much force on the glass. 100 - Epson ES-200 | Users Guide - Page 101
5. Squeeze the tabs on the sides of the separation pad and pull up to remove it. 6. Use a soft cloth to wipe off any dust or dirt on the separation pad. 101 - Epson ES-200 | Users Guide - Page 102
7. To replace the separation pad, slide it into the groove as shown and push it in until you hear it click into place. 102 - Epson ES-200 | Users Guide - Page 103
8. Press the pickup roller cover latch and pull up the cover to remove it. 103 - Epson ES-200 | Users Guide - Page 104
9. Slide the pickup roller to the right and lift up to remove it. 10. Wipe off any dust or dirt on the pickup roller using a soft, moist cloth. Caution: Use only a soft, moist cloth to clean the roller; using a dry cloth may damage the surface of the roller. 104 - Epson ES-200 | Users Guide - Page 105
11. To replace the pickup roller, align the notch on the roller unit and slide it to the left. Press down to secure the roller. 105 - Epson ES-200 | Users Guide - Page 106
12. Align the left edge of the pickup roller cover into the notches as shown and press it down until you hear it click into place. Note: If you are not able to close the cover, the pickup roller is not installed correctly. Remove the roller unit and reinstall it, then try to close the cover again. - Epson ES-200 | Users Guide - Page 107
button several times to rotate the rollers shown here. Use a soft, moist cloth to wipe off any dust or dirt on the rollers as they rotate. Repeat this step until the rollers are clean. 15. Close the scanner cover. Press the edge of the scanner cover firmly at the arrow mark until the scanner cover - Epson ES-200 | Users Guide - Page 108
Scan 2 Utility. • Windows (other versions): Click or Start > All Programs or Programs > EPSON > Epson Scan 2 > Epson Scan 2 Utility. • Mac: Open the Applications folder, click Epson Software, and click Epson Scan 2 Utility. 3. Click the Counter tab. You see a screen like this: 4. If the number of - Epson ES-200 | Users Guide - Page 109
5. Close the Epson Scan 2 Utility screen. Parent topic: Cleaning and Transporting Your Scanner to see when you need to replace the rollers. Note: The illustrations show the ES-300W, but the instructions are the same for the ES-200. 1. Turn off the scanner. 2. Unplug the AC adapter. 3. Disconnect any - Epson ES-200 | Users Guide - Page 110
5. Press the pickup roller cover latch and pull up the cover to remove it. 110 - Epson ES-200 | Users Guide - Page 111
6. Slide the pickup roller to the right and lift up to remove it. 7. To install the new pickup roller, align the notch on the roller unit and slide it to the left. Press down to secure the roller. 111 - Epson ES-200 | Users Guide - Page 112
8. Align the left edge of the pickup roller cover into the notches as shown and press it down until you hear it click into place. Note: If you are not able to close the cover, the pickup roller is not installed correctly. Remove the roller unit and reinstall it, then try to close the cover again. - Epson ES-200 | Users Guide - Page 113
9. Squeeze the tabs on the sides of the separation pad and pull up to remove it. 113 - Epson ES-200 | Users Guide - Page 114
10. To install a new separation pad, slide it into the groove as shown and push it in until you hear it click into place. 11. Close the scanner cover. Press the edge of the scanner cover firmly at the arrow mark until the scanner cover clicks into place. 12. Plug in the AC adapter and turn on the - Epson ES-200 | Users Guide - Page 115
Navigate to the Apps screen and select Epson Scan 2 Utility. • Windows (other versions): Click or Start > All Programs or Programs > EPSON > Epson Scan 2 > Epson Scan 2 Utility. • Mac: Open the Applications folder, click Epson Software, and click Epson Scan 2 Utility. 3. Click the Counter tab. 115 - Epson ES-200 | Users Guide - Page 116
You see a screen like this: 4. Click Reset. The Number of Scans field changes to 0 (zero). 5. Close the Epson Scan 2 Utility screen. Parent topic: Replacing the Scanner Rollers Transporting Your Scanner If you need to ship your product, transport it a long distance, or store - Epson ES-200 | Users Guide - Page 117
3. Close the input tray extension and the input tray. 4. Place the scanner in its original packing materials, if possible, or use equivalent materials with cushioning around the product. Parent topic: Cleaning and Transporting Your Scanner 117 - Epson ES-200 | Users Guide - Page 118
Light Status Solving Scanning Problems Solving Network Scanning Problems Solving Scanned Image Quality Problems Uninstall Your Scanner Software Where to Get Help Scanner Light Status You can often diagnose problems with your scanner by checking its lights. ES-200 1 ! error light 2 automatic - Epson ES-200 | Users Guide - Page 119
ES-300W 1 ! error light 2 automatic feeding mode light 3 Ready light 4 Wi-Fi light 5 battery light 119 - Epson ES-200 | Users Guide - Page 120
: (ES-300W) • ! error • Wi-Fi Condition/solution A paper jam or a double feed has occurred. Remove any paper loaded in the input tray. If the light continues to flash, a scanner error may have occurred. Turn the scanner off and then back on again. If the error continues, contact Epson for support - Epson ES-200 | Users Guide - Page 121
at the end of its service life and, therefore, unable to charge. Charge the battery within an ambient temperature range of 46 to 95 °F (8 to 35 °C). If the error continues, the scanner may be malfunctioning. Contact Epson for support. Parent topic: Solving Problems Related references Original Jams - Epson ES-200 | Users Guide - Page 122
. • If the scanner does not turn off when operating on the battery (ES-300W), disconnect the AC adapter and USB cable and press the reset button on reconnect the scanner and try again. Parent topic: Solving Scanning Problems Related tasks Changing the Power Save Settings Scanner Button Does Not - Epson ES-200 | Users Guide - Page 123
) and Document Capture (Mac) do not support using the button to scan over a wireless connection. Connect the scanner using a USB cable or launch Epson Scan 2 before scanning from the button on your scanner. Parent topic: Solving Scanning Problems Related tasks Assigning Start Button Settings or Scan - Epson ES-200 | Users Guide - Page 124
power-saving mode, such as sleep or standby. If so, wake your system and restart Epson Scan 2. • If you connected the scanner using a USB cable, make sure it is is ready to scan. Parent topic: Solving Scanning Problems Related concepts Uninstall Your Scanner Software Related references Windows - Epson ES-200 | Users Guide - Page 125
setting. Parent topic: Solving Scanning Problems Related tasks Cleaning Inside Your Scanner Related topics Loading Originals Original Jams in Scanner If an original has jammed inside the scanner, follow these steps: Note: The illustrations show the ES-300W, but the instructions are the same for the - Epson ES-200 | Users Guide - Page 126
3. Pull the edge of the scanner cover firmly at the arrow mark. 126 - Epson ES-200 | Users Guide - Page 127
any jammed originals from inside the scanner. 5. Close the scanner cover. 6. Carefully follow all loading instructions when you reload originals. Parent topic: Solving Scanning Problems Related tasks Cleaning Inside Your Scanner Related topics Loading Originals Scanning is Slow If scanning becomes - Epson ES-200 | Users Guide - Page 128
your virus protection or security software instructions for details. The TWAIN.log problems scanning over a network (ES-300W). Cannot Scan Over a Network Scanner Cannot Connect to a Wireless Router or Access Point Parent topic: Solving Problems Cannot Scan Over a Network If you cannot start Epson - Epson ES-200 | Users Guide - Page 129
the scanner. • Epson Scan 2 does not support networks that use only IPv6. Use Epson Scan 2 on a network that supports IPv4. • If the Problems Related topics Wi-Fi Networking Scanner Cannot Connect to a Wireless Router or Access Point If your scanner has trouble service provider for instructions. 129 - Epson ES-200 | Users Guide - Page 130
SSID), follow the instructions that came with your scanner to enter your wireless network name manually. • If your Point Mode, you may have trouble accessing a low-priority Internet connection Network Scanning Problems Related topics Wi-Fi Networking Solving Scanned Image Quality Problems Check these - Epson ES-200 | Users Guide - Page 131
Image Type setting for your original and select the Text Enhancement setting in Epson Scan 2. Parent topic: Solving Scanned Image Quality Problems Related references Image Format Options Related tasks Scanning in Epson Scan 2 Scanned Characters are Blurry If characters in your scanned images are - Epson ES-200 | Users Guide - Page 132
straight. • Use an original with clear text. • Adjust these Epson Scan 2 settings (if available) and try scanning again: • Select manual for any additional adjustments. Parent topic: Solving Scanned Image Quality Problems Related references Image Format Options Related tasks Scanning in Epson - Epson ES-200 | Users Guide - Page 133
Auto" setting. Parent topic: Solving Scanned Image Quality Problems Resetting the Epson Scan 2 Settings If you continue to experience image quality problems after trying all possible solutions, you may need to reset the Epson Scan 2 Settings using the Epson Scan 2 Utility. 1. Do one of the following - Epson ES-200 | Users Guide - Page 134
2 settings does not solve your problem, uninstall Epson Scan 2 and reinstall it. Parent topic: Solving Scanned Image Quality Problems Uninstall Your Scanner Software If you have a problem that requires you to uninstall and re-install your software, follow the instructions for your operating system - Epson ES-200 | Users Guide - Page 135
for instructions. Note: If you find that re-installing your scanner software does not solve a problem, contact Epson. Parent topic: Uninstall Your Scanner Software Where to Get Help If you need to contact Epson for technical support services, use the following support options. Internet Support Visit - Epson ES-200 | Users Guide - Page 136
product. You can download utilities and documentation, get FAQs and troubleshooting advice, or e-mail Epson with your questions. Speak to a Support Representative Before you call Epson for support, please have the following information ready: • Product name • Product serial number (located on a - Epson ES-200 | Users Guide - Page 137
Epson products for proper disposal. Windows System Requirements Mac System Requirements General Specifications Dimension Specifications Electrical Specifications Environmental Specifications Network Interface Specifications (ES x64 Edition Service Pack 2, Windows XP (32-bit) Service Pack 3 - Epson ES-200 | Users Guide - Page 138
General Specifications Scanner type Photoelectric device Effective pixels Document size Paper input Paper output Paper capacity Scanning resolution Output resolution Portable, sheet feed, one pass duplex, color CIS 5100 × 8700 pixels at 600 dpi 5100 × 13200 pixels at 300 dpi Maximum: 8.5 × 44 - Epson ES-200 | Users Guide - Page 139
external Black and white: 16 bits per pixel internal 8 bits per pixel external Super-Speed USB port IEEE802.11b/g/n (ES-300W) (You cannot use a USB and network connection at the same time [ES-300W].) RGB LED Parent topic: Technical Specifications Dimension Specifications Height Width Depth Weight - Epson ES-200 | Users Guide - Page 140
(USB connection): Operating: 8 W (approximately) Ready mode: 2.6 W (approximately) Sleep mode: 1.2 W (approximately) Power off mode: 0.5 W or less ES-300W (Wi-Fi connection): Operating: 10 W (approximately) Ready mode: 3.9 W (approximately) Sleep mode: 2.4 W (approximately) Power off mode: 0.5 W or - Epson ES-200 | Users Guide - Page 141
output voltage Rated output current 100 to 240 V model: A491H 220 to 240 V model: A492E 0.6 A 50 to 60 Hz DC 5 V 3A Battery (ES-300W) Type Rated voltage Rated capacity Charging time Li-ion 3.6 V 2090mAh AC adapter: 3 hours (approximately) USB 3.0 port: 4 hours (approximately) USB 2.0 port: 20 - Epson ES-200 | Users Guide - Page 142
. Parent topic: Technical Specifications Network Interface Specifications (ES-300W) Wireless LAN standard Wireless security Frequency range -PSK (AES); WPA2 compliant with support for WPA/WPA2 Personal WEP (64/128 bit) 2.4 GHz Infrastructure mode AP mode; not supported for IEEE802.11b 18.2 dBm ( - Epson ES-200 | Users Guide - Page 143
ES-300W: This equipment contains the following wireless module: • Manufacturer: Askey Computer Corporation. • Type: WLU6117-D69 (RoHS) This product conforms to Part 15 of FCC Rules and RSS-210 of the IC Rules. Epson To prevent radio interference to the licensed service, this device is intended to be - Epson ES-200 | Users Guide - Page 144
this site for information on how to return your Epson products for proper disposal. Important Safety Instructions Battery Safety Instructions (ES-300W) Restrictions on Copying Default Delay Times for Power Management for Epson Products Binding Arbitration and Class Waiver Trademarks Copyright Notice - Epson ES-200 | Users Guide - Page 145
as specifically explained in this guide. Caution: Radio waves from this and the AC adapter, and refer servicing to qualified service personnel under the following conditions: The adjust controls that are not covered by the operating instructions.) • Unplug the scanner and the AC adapter before - Epson ES-200 | Users Guide - Page 146
to use the scanner for a long period, be sure to unplug the AC adapter from the electrical outlet. Parent topic: Notices Battery Safety Instructions (ES-300W) • If the battery is not fully charged within the specified time, stop charging. Otherwise, the battery could become hot, emit smoke, rupture - Epson ES-200 | Users Guide - Page 147
checks, etc.), monthly passes, concession tickets, etc. • Passports, driver's licenses, warrants of fitness, road passes, food stamps, tickets, this product. Parent topic: Notices Default Delay Times for Power Management for Epson Products This product will enter sleep mode after a period of nonuse. - Epson ES-200 | Users Guide - Page 148
if your address changes by emailing us at [email protected] or writing us at the Epson Address above. Notice of the Dispute shall include the that court. 1.5 WAIVER OF CLASS ACTIONS AND CLASS ARBITRATIONS. YOU AND EPSON AGREE THAT EACH PARTY MAY BRING DISPUTES AGAINST THE OTHER PARTY ONLY IN - Epson ES-200 | Users Guide - Page 149
any settlement offer made shall not be disclosed to the arbitrator until after the arbitrator determines the amount, if any, to which you or Epson is entitled. The discovery or exchange of non-privileged information relevant to the Dispute may be allowed during the arbitration. c) Arbitration Fees - Epson ES-200 | Users Guide - Page 150
of your assent to this Agreement (including without limitation the purchase, download, installation of the Software or other applicable use of Epson Hardware, products and services) that specifies (i) your name, (ii) your mailing address, and (iii) your request to be excluded from the final, binding - Epson ES-200 | Users Guide - Page 151
or alterations to this product, or (excluding the U.S.) failure to strictly comply with Seiko Epson Corporation's operating and maintenance instructions. Seiko Epson Corporation shall not be liable for any damages or problems arising from the use of any options or any consumable products other than - Epson ES-200 | Users Guide - Page 152
THIS SOFTWARE. Parent topic: Copyright Notice A Note Concerning Responsible Use of Copyrighted Materials Epson encourages each user to be responsible and respectful of the copyright laws when using any Epson product. While some countries' laws permit limited copying or reuse of copyrighted material
-
 1
1 -
 2
2 -
 3
3 -
 4
4 -
 5
5 -
 6
6 -
 7
7 -
8
-
9
-
10
-
11
-
12
-
13
-
14
-
15
-
16
-
17
-
18
-
19
-
20
-
21
-
22
-
23
-
24
-
25
-
26
-
27
-
28
-
29
-
30
-
31
-
32
-
33
-
34
-
35
-
36
-
37
-
38
-
39
-
40
-
41
-
42
-
43
-
44
-
45
-
46
-
47
-
48
-
49
-
50
-
51
-
52
-
53
-
54
-
55
-
56
-
57
-
58
-
59
-
60
-
61
-
62
-
63
-
64
-
65
-
66
-
67
-
68
-
69
-
70
-
71
-
72
-
73
-
74
-
75
-
76
-
77
-
78
-
79
-
80
-
81
-
82
-
83
-
84
-
85
-
86
-
87
-
88
-
89
-
90
-
91
-
92
-
93
-
94
-
95
-
96
-
97
-
98
-
99
-
100
-
101
-
102
-
103
-
104
-
105
-
106
-
107
-
108
-
109
-
110
-
111
-
112
-
113
-
114
-
115
-
116
-
117
-
118
-
119
-
120
-
121
-
122
-
123
-
124
-
125
-
126
-
127
-
128
-
129
-
130
-
131
-
132
-
133
-
134
-
135
-
136
-
137
-
138
-
139
-
140
-
141
-
142
-
143
-
144
-
145
-
146
-
147
-
148
-
149
-
150
-
151
-
152
 |
 |

ES-200/ES-300W User's Guide