Epson Ensemble HD 6100 Installation Guide - Page 31
Installing the Projector
 |
View all Epson Ensemble HD 6100 manuals
Add to My Manuals
Save this manual to your list of manuals |
Page 31 highlights
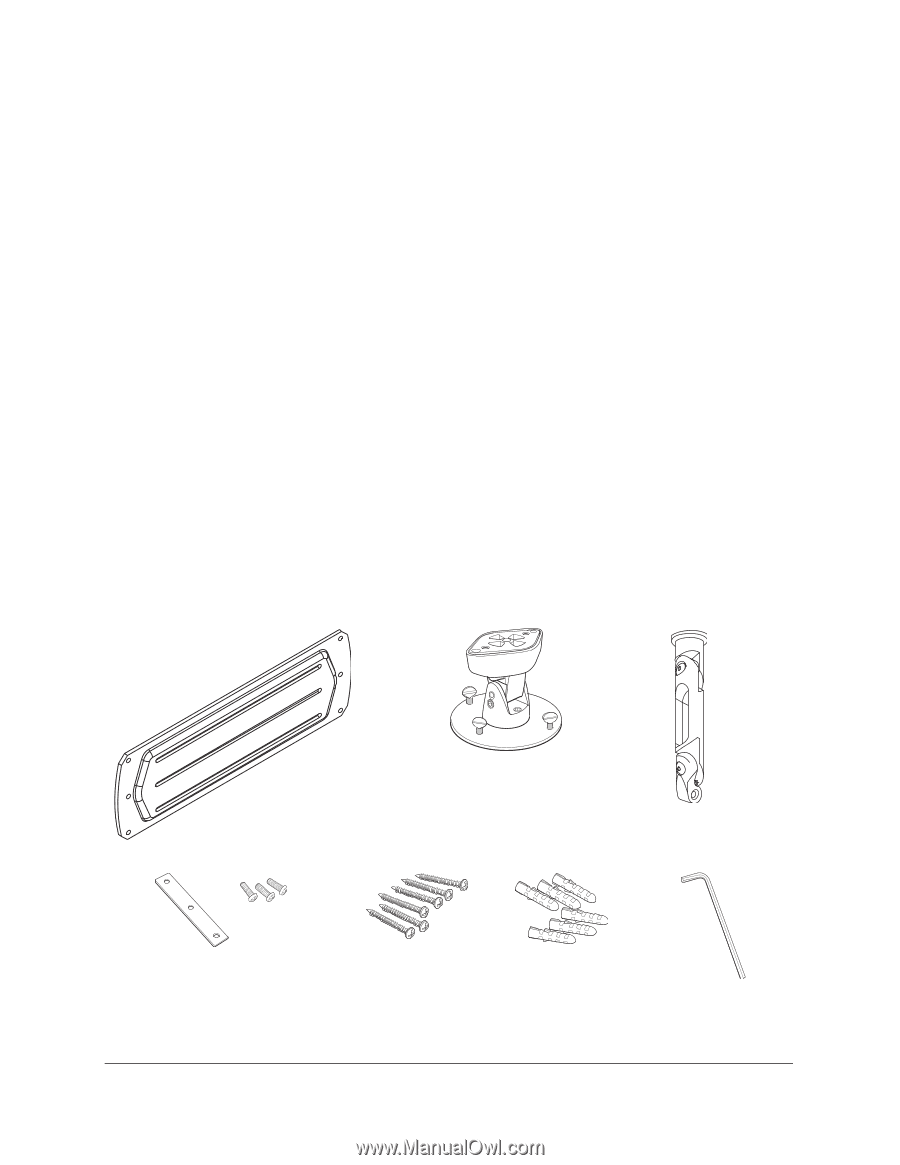
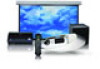
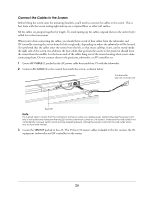
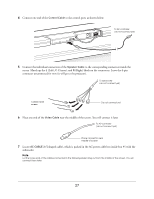
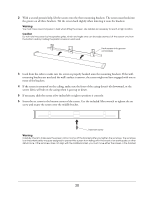
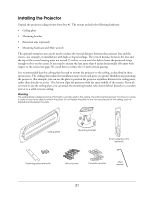
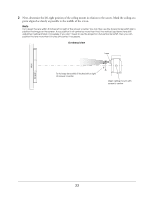
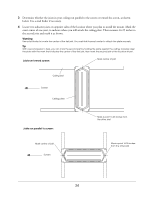
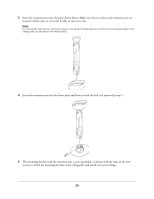
Installing the Projector Unpack the projector ceiling mount from box #1. The mount includes the following hardware: • Ceiling plate • Mounting bracket • Extension arm (optional) • Mounting hardware and Allen wrench The optional extension arm can be used to reduce the vertical distance between the projector lens and the screen-for example, in installations with high or sloped ceilings. The vertical distance between the lens and the top of the screen housing must not exceed 15 inches, or you won't be able to lower the projected image enough to fit it on the screen. If you need to mount the lens more than 8 inches horizontally off-center with respect to the screen (see page 33), you'll have to reduce the 15-inch vertical spacing. It is recommended that the ceiling plate be used to mount the projector to the ceiling, as described in these instructions. The ceiling plate makes the installation more secure and gives you greater flexibility in positioning the projector. (For example, you can use the plate to position the projector anywhere between two ceiling joists, rather than directly on a joist. This lets you align the projector with the exact middle of the screen). If you do not want to use the ceiling plate, you can attach the mounting bracket (also shown below) directly to a wooden joist or to a solid concrete ceiling. Warning The ceiling plate is designed to be attached to wooden joists in the ceiling. The joists must be spaced 16 inches on center in order for you to be able to attach the plate. Do not fasten the plate to any non-secure part of the ceiling, such as plasterboard between the joists. Ceiling plate Mounting bracket 8-inch extension arm (optional) Fastening plate and bolts Wood screws Concrete anchors Allen wrench 31
-
 1
1 -
2
-
3
-
4
-
5
-
6
-
7
-
8
-
9
-
10
-
11
-
12
-
13
-
14
-
15
-
16
-
17
-
18
-
19
-
20
-
21
-
22
-
23
-
24
-
25
-
 26
26 -
 27
27 -
 28
28 -
 29
29 -
 30
30 -
 31
31 -
 32
32 -
 33
33 -
 34
34 -
 35
35 -
 36
36 -
37
-
38
-
39
-
40
-
41
-
42
-
43
-
44
-
45
-
46
-
47
-
48
-
49
-
50
-
51
-
52
-
53
-
54
-
55
-
56
-
57
-
58
-
59
-
60
-
61
-
62
-
63
-
64
-
65
-
66
-
67
-
68
-
69
-
70
-
71
 |
 |