Epson Ensemble HD 6100 Installation Guide - Page 51
Adjusting the Image, Insert Batteries, Turn On the System
 |
View all Epson Ensemble HD 6100 manuals
Add to My Manuals
Save this manual to your list of manuals |
Page 51 highlights
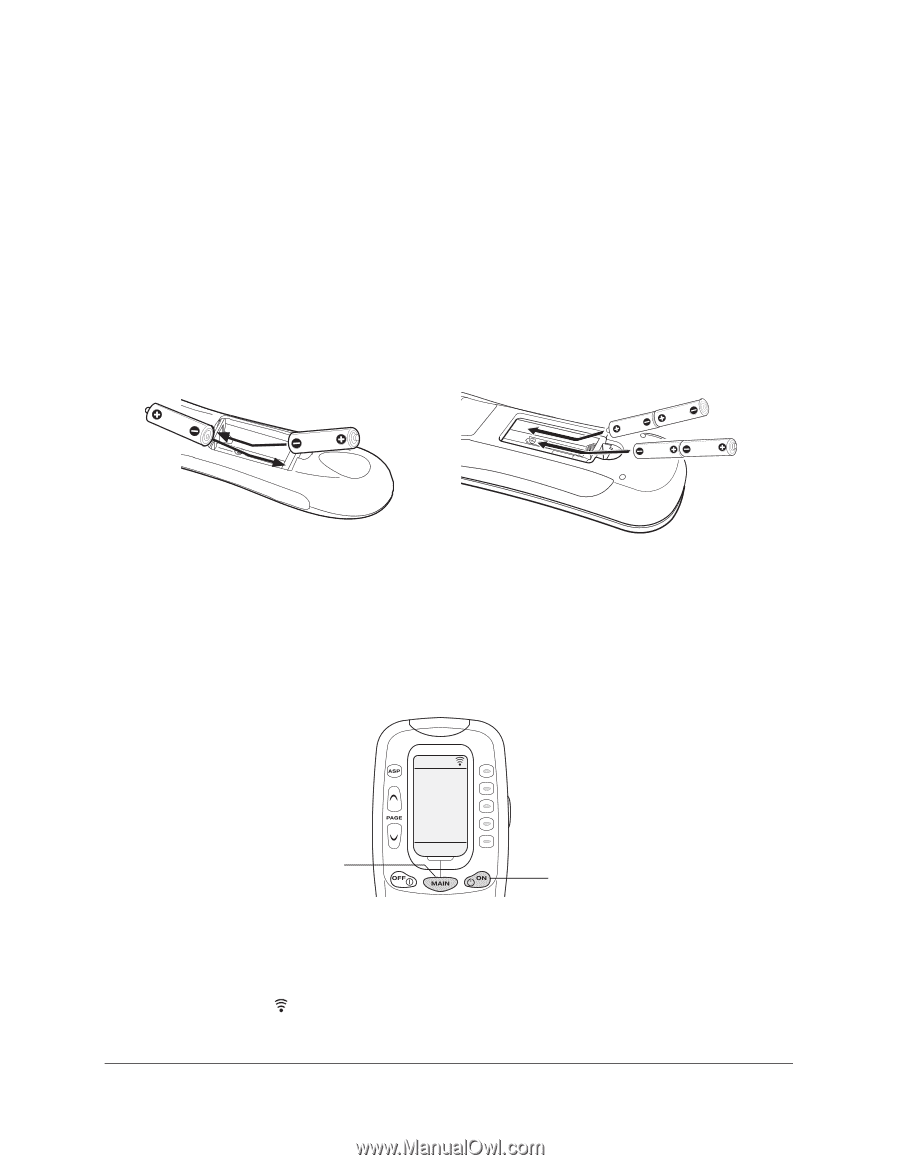
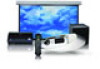
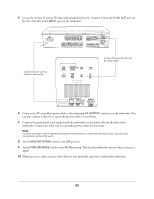
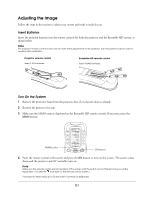
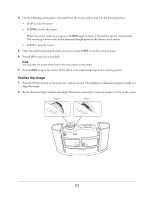
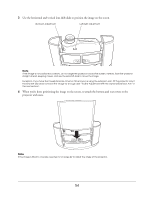
Adjusting the Image Follow the steps in this section to adjust your system and make it ready for use. Insert Batteries Insert the included batteries into the remote controls for both the projector and the Ensemble HD system, as shown below. Note The projector remote control is used only to make initial adjustments to the projector, but it should be saved in case it's needed after installation. Projector remote control Insert 2 AA batteries: Ensemble HD remote control Insert 4 AAA batteries: Turn On the System 1 Remove the protective foam from the projector lens, if you haven't done so already. 2 Remove the projector lens cap. 3 Make sure the MAIN menu is displayed on the Ensemble HD remote control. If necessary, press the MAIN button. MAIN button MAIN DVD CABLE SAT HD RADIO 1 OF 2 ON button 4 Point the remote control at the screen and press the ON button to turn on the system. The screen comes down and the projector and AV controller turn on. Note Make sure the remote control remains pointed at the screen until the built-in macro finishes turning on all the equipment. (You see the icon flash on the remote control screen.) The projector lamp takes up to 30 seconds to achieve full brightness. 51
-
 1
1 -
2
-
3
-
4
-
5
-
6
-
7
-
8
-
9
-
10
-
11
-
12
-
13
-
14
-
15
-
16
-
17
-
18
-
19
-
20
-
21
-
22
-
23
-
24
-
25
-
26
-
27
-
28
-
29
-
30
-
31
-
32
-
33
-
34
-
35
-
36
-
37
-
38
-
39
-
40
-
41
-
42
-
43
-
44
-
45
-
 46
46 -
 47
47 -
 48
48 -
 49
49 -
 50
50 -
 51
51 -
 52
52 -
 53
53 -
 54
54 -
 55
55 -
 56
56 -
57
-
58
-
59
-
60
-
61
-
62
-
63
-
64
-
65
-
66
-
67
-
68
-
69
-
70
-
71
 |
 |