Epson Expression 800 User Setup Information - Page 28
Install EPSON TWAIN Pro, If You’re Running Windows
 |
View all Epson Expression 800 manuals
Add to My Manuals
Save this manual to your list of manuals |
Page 28 highlights
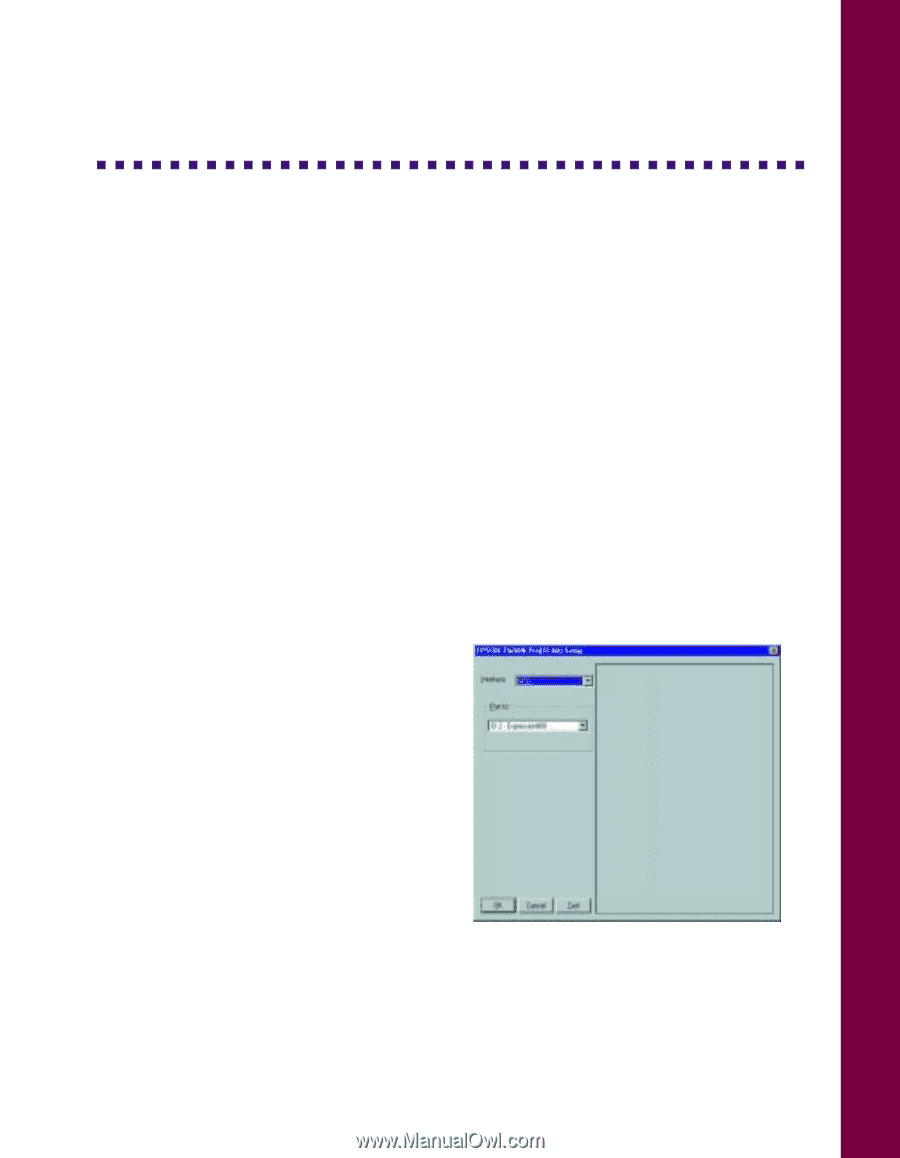
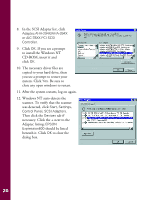
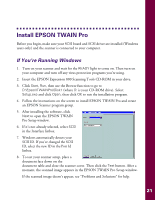
Install EPSON TWAIN Pro Before you begin, make sure your SCSI board and SCSI driver are installed (Windows users only) and the scanner is connected to your computer. If You're Running Windows 1. Turn on your scanner and wait for the READY light to come on. Then turn on your computer and turn off any virus protection programs you're using. 2. Insert the EPSON Expression 800 Scanning Tools CD-ROM in your drive. 3. Click Start, Run, then use the Browse function to go to D:\Epson\TWAINPro\Disk1 (where D: is your CD-ROM drive). Select Setup.exe and click Open, then click OK to run the installation program. 4. Follow the instructions on the screen to install EPSON TWAIN Pro and create an EPSON Scanner program group. 5. After installing the software, click Next to open the EPSON TWAIN Pro Setup window. 6. If it's not already selected, select SCSI in the Interface listbox. 7. Windows automatically detects your SCSI ID. If you've changed the SCSI ID, select the new ID in the Port Id listbox. 8. To test your scanner setup, place a document face down on the document table and close the scanner cover. Then click the Test button. After a moment, the scanned image appears in the EPSON TWAIN Pro Setup window. If the scanned image doesn't appear, see "Problems and Solutions" for help. 21
-
 1
1 -
2
-
3
-
4
-
5
-
6
-
7
-
8
-
9
-
10
-
11
-
12
-
13
-
14
-
15
-
16
-
17
-
18
-
19
-
20
-
21
-
22
-
 23
23 -
 24
24 -
 25
25 -
 26
26 -
 27
27 -
 28
28 -
 29
29 -
 30
30 -
 31
31 -
 32
32 -
 33
33 -
34
-
35
-
36
-
37
-
38
-
39
-
40
-
41
-
42
-
43
-
44
-
45
-
46
-
47
-
48
-
49
-
50
-
51
-
52
-
53
-
54
-
55
-
56
-
57
-
58
-
59
-
60
-
61
-
62
-
63
-
64
-
65
-
66
-
67
-
68
-
69
-
70
-
71
-
72
-
73
-
74
-
75
-
76
-
77
-
78
-
79
-
80
-
81
 |
 |