Epson G5000 User's Guide
Epson G5000 - PowerLite XGA LCD Projector Manual
 |
UPC - 010343873285
View all Epson G5000 manuals
Add to My Manuals
Save this manual to your list of manuals |
Epson G5000 manual content summary:
- Epson G5000 | User's Guide - Page 1
PowerLite® G5000 Multimedia Projector User's Guide - Epson G5000 | User's Guide - Page 2
cover on the projector, except the lamp and filter covers. Dangerous electrical voltages inside the projector can severely injure you. Except as specifically explained in this User's Guide, do not attempt to service this product yourself. Refer all servicing to qualified service personnel. WARNING - Epson G5000 | User's Guide - Page 3
20 Playing Sound 21 Connecting a Network Cable 23 Turning the Projector On and Off 24 Using the Direct Power On Function 25 Shutting Down the Projector 26 2 Displaying and Adjusting the Image 27 Displaying an Image 28 Troubleshooting Display Problems 28 You Can't Project an Image 28 The - Epson G5000 | User's Guide - Page 4
Setting the Remote Control ID 44 4 Fine-Tuning the Projector 45 Using the Menu System 46 Restoring the Default Settings 47 Adjusting the Image 48 Six-Axis Color Adjustment 49 Adjusting Signal Settings 50 Customizing Projector Features 52 Using the Projector Security Features 54 Enabling - Epson G5000 | User's Guide - Page 5
With the Image or Sound 85 Solving Network Problems 91 Solving Problems With the Remote Control 92 Where To Get Help 93 Speak to a Support Representative 93 A Projector Installation 95 Installation Guidelines 95 Security Features 96 Installing and Removing the Lens 97 Removing the - Epson G5000 | User's Guide - Page 6
B Technical Specifications 99 C Notices 105 Important Safety Instructions 105 FCC Compliance Statement 108 Index 111 6 - Epson G5000 | User's Guide - Page 7
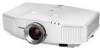
- Welcome The PowerLite® G5000 is an easy-to-use, flexible for installation projector. It offers up to 4000 lumens of brightness (white and color light output) and provides a native XGA resolution. You can connect it to a wide range of computers and video sources. Your projector offers these easy - Epson G5000 | User's Guide - Page 8
assistance for common problems. Available from the Help button on the projector or the remote control. See page 82 for details. ■ epson.com/support Download FAQs and e-mail your questions to Epson support. ■ PrivateLine support If you still need help after checking this User's Guide and the sources - Epson G5000 | User's Guide - Page 9
CareSM Road Service. In the unlikely event of an equipment failure, you won't have to wait for your unit to be repaired. Instead, Epson will ship you a replacement unit anywhere in the United States or Canada, usually via next business day delivery. See the brochure included with your projector for - Epson G5000 | User's Guide - Page 10
enhance your use of the projector, Epson offers the following optional accessories: Product Replacement lamp for PowerLite G5000 Replacement air filter Wireless IR mouse receiver for remote control Replacement remote control Advanced projector ceiling mount with precision gear Adjustable suspended - Epson G5000 | User's Guide - Page 11
equipment (such as a VCR, DVD player, or video camera), and to a local area network. Follow the instructions in this chapter for: ■ Unpacking the projector ■ Positioning the projector ■ Connecting to a computer ■ Connecting to video equipment ■ Playing Sound ■ Connecting a network cable ■ Turning - Epson G5000 | User's Guide - Page 12
, make sure you have all these parts: Projector and lens cap PDF manuals and registration CD-ROM Projector software CD-ROM Lens theft deterrent screw Remote control and 2 AA batteries Password Protected sticker Power cord VGA computer cable Save all packaging in case you need to ship - Epson G5000 | User's Guide - Page 13
depending on how you position the zoom ring and whether you've adjusted the image with other settings. (4:3 image) note You can mount the projector on the ceiling, or place it behind a translucent screen for rear projection. See page 95 for details. TBD 26.5 to 47.8 ft (8.1 to 14.6 m) 5.2 to - Epson G5000 | User's Guide - Page 14
, you may want to connect a Kensington MicroSaver® anti-theft device to the lock port on the projector. You can purchase this from Epson; see page 10. Ideally, you should place the projector directly in front of the center of the screen, facing it toward the screen squarely. The base of the - Epson G5000 | User's Guide - Page 15
You can connect the projector to any computer that has a standard video output (monitor) port, including desktop models, PC notebook computers, MacBook®, PowerBook®, and iBook® computers, and hand-held devices. If you have the optional wireless mouse receiver, you can use your remote control as - Epson G5000 | User's Guide - Page 16
"Connecting an S-Video Source" on page 18. S-video connector ■ If your video player has an RGB video port (either a single connector for a VGA monitor cable or three connectors labeled R/G/B), see "Connecting an RGB Video Source" on page 20. VGA connector (RGB video) 16 Setting Up the Projector - Epson G5000 | User's Guide - Page 17
your video device, you can purchase one from an electronics dealer. 2. To play sound, you can connect an optional stereo mini-jack audio cable and optional external speakers (see page 21). 3. When you've finished making any connections, see page 24 for instructions on turning on the projector and - Epson G5000 | User's Guide - Page 18
video device, you can purchase one from Epson; see page 10. Connecting an S-Video Source 1. Connect the S-video cable to the S-video connector on your player and the S-Video connector on the projector for instructions on turning on the projector and Chapter 2 for instructions on displaying and adjusting the - Epson G5000 | User's Guide - Page 19
You will need a special cable to connect your component video equipment to the VGA-style connector on the projector. You can order a component-to-VGA cable (part number ELPKC19) from Epson; see page 10 for more information. 1. Locate a component-to-VGA cable. 2. Connect the cable to your player and - Epson G5000 | User's Guide - Page 20
video player's documentation. Connecting an RGB Video Source 1. Locate the VGA computer cable provided with the projector (or if your video player has three connectors labeled R/G/B, locate a component-to-VGA instructions on turning on the projector and Chapter 2 for instructions on displaying and adjusting - Epson G5000 | User's Guide - Page 21
to the audio port(s) on the projector. ■ If you have equipment connected to the Computer1 or Computer2 ports, use a stereo mini-jack cable. Connect the cable to the Audio port beneath the Computer2 port. ■ If you have equipment connected to the Video1, Video2, or S-Video ports, connect an RCA audio - Epson G5000 | User's Guide - Page 22
other end of the cable to the audio output connector(s) on your computer or video equipment. 3. Locate the appropriate cable to connect your speakers. Depending on your audio cable to the Audio Out port on the projector. 5. Connect the other end of the cable to your speakers. 22 Setting Up the - Epson G5000 | User's Guide - Page 23
Connecting a Network Cable To connect the projector to your local area network (LAN), use a commercially available 100BaseTX or 10BaseT network cable. To ensure proper data transmission, use a Category 5 shielded cable or better. Connect the cable to the projector and your network port as shown: LAN - Epson G5000 | User's Guide - Page 24
video equipment before starting the projector so it can automatically detect and display the image source. If you turn on the projector first, or have multiple pieces of connected equipment, you may have to select the image source manually projector, and extends the life of the lamp. If you - Epson G5000 | User's Guide - Page 25
the projector is ready for use. 4. If you are prompted to enter a password, see page 55. warning Never look into the lens when the lamp is on to enable Direct Power On: 1. Press the Menu button on the remote control or projector, then select the Extended menu and press Enter. 2. Choose Operation - Epson G5000 | User's Guide - Page 26
first. 1. To turn off the projector, press the Ppower button on the remote control or projector. You see a confirmation message. (If you don't want to turn it off, press any other button.) 2. Press the Ppower button again. The projection lamp turns off and the projector beeps twice. You can unplug - Epson G5000 | User's Guide - Page 27
2 Displaying and Adjusting the Image Follow the guidelines in this chapter for: ■ Displaying an image ■ Troubleshooting display problems ■ Adjusting the image 27 - Epson G5000 | User's Guide - Page 28
button on the projector until you see the image you want to project. You can also use the Source buttons on the remote control to switch between devices connected to the ports identified on each button. Troubleshooting Display Problems Follow these guidelines if you're having trouble displaying an - Epson G5000 | User's Guide - Page 29
more than one computer and/or video source, you may need to press the Source Search button on the projector's control panel, or the Search button or one of the Source buttons on the remote control to select the correct source. (Allow a few seconds for the projector to sync up after pressing the - Epson G5000 | User's Guide - Page 30
to set up your system to display on the projector screen as well as the LCD screen. Follow these steps: 1. From the Apple® menu, select System Preferences. 2. Select Displays, then click Detect Displays. 3. Make sure the VGA Display or Color LCD dialog box is selected. 4. Click the Arrangement or - Epson G5000 | User's Guide - Page 31
to lock the foot in position. 3. If necessary, you can fine-tune the height or level the image by turning any of the projector's adjustable feet. Raising the projector causes the image shape to distort or "keystone," but you can correct the shape as described on page 33. Displaying and Adjusting the - Epson G5000 | User's Guide - Page 32
the image. Focus Zoom If the image still isn't large enough, you may need to move the projector farther away from the screen. You can also use the E-Zoom buttons on the remote control to zoom in on a portion of the image. See page 40 for instructions. 32 Displaying and Adjusting the Image - Epson G5000 | User's Guide - Page 33
size of the image when it's uneven on all sides. Follow these steps to select Quick Corner: 1. Press the Menu button on the remote control or the projector. 2. Select the Settings menu and press Enter. 3. From the Settings menu, select Keystone and press Enter. 4. Select Quick Corner and press Enter - Epson G5000 | User's Guide - Page 34
Correction You can manually adjust the shape of the image to compensate for vertical and horizontal keystone distortion. First make sure the Keystone setting in the projector's menu system is set to H-Keystone or V-Keystone: 1. Press the Menu button on the remote control or projector. 2. Select the - Epson G5000 | User's Guide - Page 35
setting to quickly obtain a good picture. Press the Color Mode button on the remote control, and then select from one of these options: ■ Presentation: For point). ■ Customized: For manual color adjustment (see page 49). ■ Game: Increases brightness when playing video games or watching TV in a - Epson G5000 | User's Guide - Page 36
Resizing Video Images You can use the Aspect button on the remote control to change the aspect (width to height off if the resolution is over 1024 × 768. Press the Aspect button repeatedly to cycle through the available options. You can also change the aspect ratio using the projector's Signal menu. - Epson G5000 | User's Guide - Page 37
a pointer to highlight your presentation (page 41), or to control two or more projectors at the same time (page 43). If you have the optional wireless mouse receiver, you can also use your remote control as a wireless mouse when projecting from a computer (page 42). This chapter covers: ■ Using the - Epson G5000 | User's Guide - Page 38
Make sure batteries are installed as described on page 78. Follow these tips for using the remote control: ■ Point the remote control at the front of the projector or at the screen. ■ Stand within 49 feet (15 meters) of the projector. note Using the remote under bright fluorescent lamps or in - Epson G5000 | User's Guide - Page 39
press the button again. note In order to play sound with this projector, you must connect optional external speakers (see page 21). You can have image.) Stopping Action Press the Freeze button on the remote control to stop the action in your video or computer image. The image freezes but the sound - Epson G5000 | User's Guide - Page 40
the ESC button to return the image to its original size. Controlling the Volume To change the volume, press the or control. button on the remote You can also adjust the volume using the projector's menu system. See page 53. 40 Presenting With the - Epson G5000 | User's Guide - Page 41
control. A pointer appears on the screen. Pointer If you prefer to use a different style of pointer, see the instructions in the next section. 2. Use the pointer button on the remote control to position the pointer on the screen. 3. When you're done using the pointer, press the Pointer button to - Epson G5000 | User's Guide - Page 42
Operating Your Computer With the Remote Control With the optional wireless mouse receiver (see page 10), you can use the remote control in place of your computer's mouse. This gives you more flexibility when delivering slideshow-style presentations, since you won't have to stand next to the computer - Epson G5000 | User's Guide - Page 43
-or just selected ones-by using the projector ID system. To operate a projector, set the remote control's ID to match that of the projector. Or you can control all the projectors at once by setting the remote control's ID to zero. Setting the Projector ID The projector's default ID is set to Off - Epson G5000 | User's Guide - Page 44
have to set the ID each time you turn on the projector. Setting the Remote Control ID The remote control's default ID is zero. This lets you operate any projector. To set it to operate a specific projector, follow these steps: 1. Move the remote control ID switch to the On position. note When the - Epson G5000 | User's Guide - Page 45
to adjust the image, sound, and other features. This chapter covers the following information: ■ Using the menu system ■ Adjusting the image ■ Adjusting signal settings ■ Customizing projector features ■ Using the projector security features ■ Customizing power and operation ■ Multi-screen color - Epson G5000 | User's Guide - Page 46
's control panel to access the menus and change settings. Follow these steps: 1. To display the menu screen, press the Menu button on the remote control or on the projector. You see a menu screen similar to the one below: Options Menu list note For a complete list of menus and options, see page 62 - Epson G5000 | User's Guide - Page 47
needed. (The example below shows how to reset the Image menu.) Reset settings for current menu Reset settings for all menus To restore all the projector settings to their factory-default values, select the Reset menu, highlight Reset All, and press Enter. note When you select Reset All in the - Epson G5000 | User's Guide - Page 48
the Menu button on the projector or remote control and select the projector's LCD panels. You can also change the lamp's brightness. Select Brightness Control in the Settings menu, then choose High or Low (the default setting is High). Computer/RGB Video Component Video/ Composite Video/ S-Video - Epson G5000 | User's Guide - Page 49
or artwork, you can adjust the hue, saturation, and brightness for six different color axes. 1. Follow the instructions on page 48 to open the Image menu and select Color Mode. 2. Press the Enter button to select steps 4 and 5 for each color axis you want to adjust. Fine-Tuning the Projector 49 - Epson G5000 | User's Guide - Page 50
You may need to readjust the color as the lamp in your projector changes over time. Adjusting Signal Settings Although the projector normally detects and optimizes the input signal automatically, you can use the Signal menu to make manual adjustments. In addition to changing the position of the - Epson G5000 | User's Guide - Page 51
a component video signal (with connectors labeled Y/Cb/Cr or Y/Pb/Pr). note You can also use the remote control's Auto button to automatically reset the projector's Tracking, Sync, and Position settings. See page 89 for details. note The Noise Reduction setting cannot be set for digital RGB signals - Epson G5000 | User's Guide - Page 52
Through; see page 36 for more information. Customizing Projector Features You can use the Settings menu to lock the buttons on the projector, adjust audio volume, and customize several other features. ■ Keystone Adjusts the shape of the image if the projector has been tilted upward or placed at an - Epson G5000 | User's Guide - Page 53
of brightness. The Low setting reduces power consumption and noise, and extends the lamp's operating life. ■ Volume Raises or lowers the volume if you have connected optional external speakers. ■ Remote Receiver Deactivates the projector's front and/or back sensors that detect signals from the - Epson G5000 | User's Guide - Page 54
to the projector, and use the lens theft deterrent screw (see page 96). Using the Projector Security Features To prevent unauthorized use of the projector, you steps to create a new password: 1. Press the Freeze button on the remote control for about five seconds. You see this screen: 2. Use the - Epson G5000 | User's Guide - Page 55
Num button on the remote control and use the numeric keypad to enter a four digit password. (The projector. For details, see "Starting the Projector with a Password" below. ■ User's Logo Protect to prevent your custom screen and display settings from being changed. None of the User's Logo features - Epson G5000 | User's Guide - Page 56
you have forgotten the password, contact Epson with the request code number that appears in the Password screen for assistance. See "Where To Get Help" on page 93. Creating Your Own Startup Screen You can transfer any image from your computer or video source to the projector and then use it as your - Epson G5000 | User's Guide - Page 57
from either a computer or video source, such as a DVD player or digital camera. Then follow these steps to capture the image and transfer it to the projector: 1. Press the Menu button on the remote control, highlight the Extended menu, and press Enter. 2. Highlight User's Logo and press Enter. note - Epson G5000 | User's Guide - Page 58
When you enable the Control Panel Lock function, you can lock all of the projector's buttons, or all of the buttons except the Ppower button. The remote control can still be used to operate the projector. 1. Press the Menu button, highlight the Settings menu, and press Enter. 2. Select Control Panel - Epson G5000 | User's Guide - Page 59
when you use EMP Monitor to access the projector through your network. ■ User's Logo Create a custom startup screen, as Ceiling (to project from behind onto a transparent screen when the projector is mounted upside-down from the ceiling). note If you hold down the A/V Mute button on the remote - Epson G5000 | User's Guide - Page 60
can use the ID to select the one you want to operate with the remote control. See page 43 for instructions. ■ Multi-screen Use this option if you want to color-match two or more projectors that are being used to display images near each other. You can make image adjustments at each - Epson G5000 | User's Guide - Page 61
of brightness and color correction. 1. Before starting, you may want to assign a numeric ID to each projector. This lets you use the remote control to select the projector you want to adjust. See page 43 for instructions. To match the display colors as closely as possible, make sure that all the - Epson G5000 | User's Guide - Page 62
Abs. Color Temp. Color Adjustment Reset Auto Setup Resolution Tracking Sync. Position Progressive Noise Reduction Input Signal Video Signal Aspect Reset Keystone Control Panel Lock Pointer Shape Brightness Control Volume Remote Receiver User Button Test Pattern Reset 62 Fine-Tuning the Projector - Epson G5000 | User's Guide - Page 63
Reset Options Display Closed Caption User's Logo Projection Operation Standby Mode Projector ID Multi-screen Language Reset Wired LAN PJLink Password Web Control Password SNMP Mail AMX Device Discovery Projector Name Reset Lamp Hours Source Input Signal Resolution Video Signal Refresh Rate Sync - Epson G5000 | User's Guide - Page 64
64 Fine-Tuning the Projector - Epson G5000 | User's Guide - Page 65
on and off, control basic settings, and register projectors and projector groups. See the EMP Monitor Operation Guide for more information. ■ Use the mail notification function to receive e-mail alerts about possible problems. See page 67 for more information. This chapter covers the following - Epson G5000 | User's Guide - Page 66
DHCP setting. ■ If your network does not assign addresses automatically, turn off DHCP and enter the projector's IP Address, Subnet Mask, and Gateway Address. To enter numbers, use the pointer button on the remote control to highlight the number you want to input, then press Enter. 6. When you're - Epson G5000 | User's Guide - Page 67
this feature is enabled, the projector sends you an e-mail alert if it has any problems. 1. Press the Menu button on the remote control, select the Network menu, then press Enter. You see the following screen: note You can also set e-mail alerts from EMP Monitor (see the EMP Monitor Operation Guide - Epson G5000 | User's Guide - Page 68
the specified notification addresses. The subject line of the e-mail is EPSON Projector. The e-mail includes the following information: ■ Line 1: The name of the projector where the problem has occurred ■ Line 2: The IP address of the projector where the problem has occurred ■ Line 3: Details of the - Epson G5000 | User's Guide - Page 69
the projector, except the lamp cover. Dangerous electrical voltages in the projector can injure you severely. Do not try to service this product yourself, except as specifically explained in this User's Guide. Refer all other servicing to qualified service personnel. Maintaining the Projector Your - Epson G5000 | User's Guide - Page 70
dust on the surface. To remove dirt or smears on the lens, use a commercially available cloth for cleaning glasses. Cleaning the Projector Case Before you clean the case, turn off the projector and unplug the power cord. ■ To remove dirt or dust, wipe the case with a soft, dry, lint-free cloth. ■ To - Epson G5000 | User's Guide - Page 71
office equipment to clean the front. If you don't have one, gently clean the vent with a soft brush (such as an artist's paintbrush). Maintaining the Projector 71 - Epson G5000 | User's Guide - Page 72
. 8. If the dirt is difficult to remove or the filter is broken, replace the filter as described on page 73. Contact your dealer or call Epson at 800-GO-EPSON (800-463-7766) to obtain a new filter. 72 Maintaining the Projector - Epson G5000 | User's Guide - Page 73
Replacing the Air Filter Follow these steps to replace the air filter: 1. Grip the air filter cover tab and remove the air filter cover as shown. 2. Place your finger into the groove and remove the air filter as shown. Maintaining the Projector 73 - Epson G5000 | User's Guide - Page 74
cover in until you feel resistance. note Turn off this product when not in use to prolong the life of the projector. Replacing the Lamp The life span of the projection lamp is about 2000 hours if Brightness Control in the Settings menu is set to High (default), and 3000 hours if Brightness - Epson G5000 | User's Guide - Page 75
a lamp replacement message appears, replace the lamp with a new one as soon as possible, even if it is still working. note Even when the lamp cover is removed, it is still attached to the projector to prevent it from falling when the projector is mounted on the ceiling. Maintaining the Projector 75 - Epson G5000 | User's Guide - Page 76
lamp(s) in this product contain mercury. Please consult your state and local regulations regarding disposal or recycling. Do not put in the trash. 5. Hold the lamp as shown and pull it straight out. 6. Gently insert the new lamp. (If it doesn't fit easily, make - Epson G5000 | User's Guide - Page 77
, then tighten its screws. 9. Reset the lamp timer as described in the next section. Resetting the Lamp Timer After you replace the lamp, you need to reset the lamp timer using the projector's menu. 1. Press the Menu button on the remote control or on the projector's control panel. You see the main - Epson G5000 | User's Guide - Page 78
if the usage hours on this menu are close to the life span of your lamp. Replacing the Batteries Replace the batteries in the remote control as described below: 1. Turn the remote control over. 2. Press down on the tab on the battery cover as you lift the cover off. 78 Maintaining the Projector - Epson G5000 | User's Guide - Page 79
batteries, inserting the + and - ends as shown. 4. Position the cover as shown, then press down until it snaps into place. Transporting the Projector The projector around the projector. ■ When transporting the projector a long lens. ■ Return the projector feet to their stored (highest) positions. - Epson G5000 | User's Guide - Page 80
80 Maintaining the Projector - Epson G5000 | User's Guide - Page 81
is included: ■ Using the projector's on-screen help system ■ What to do when the projector's status lights flash ■ Solving projector operation problems ■ Solving problems with the image or sound ■ Solving network problems ■ Solving problems with the remote control ■ Contacting technical support 81 - Epson G5000 | User's Guide - Page 82
to highlight menu items. 3. Press the Enter button on the remote control or on the projector to select the menu item. 4. To exit the help system, press the ? Help button. If none of the suggestions solve your problem, see additional solutions to problems in the following sections. 82 Solving - Epson G5000 | User's Guide - Page 83
the power cord back in and turn on the projector. If this doesn't solve the problem, check the lights on top of the projector. What To Do When the Lights Flash The lights on top of the projector indicate the projector's status. Temperature light Lamp light Power light Refer to the following table - Epson G5000 | User's Guide - Page 84
explained in this User's Guide, do not attempt to service this product yourself. Power is cut off because of an internal problem. Unplug the power cord and contact Epson for help, as described on page 93. There is a problem with the fan or temperature sensor. Stop using the projector, disconnect the - Epson G5000 | User's Guide - Page 85
function has been enabled, you can't use the buttons on the projector. Try using the remote control instead (make sure it is set to the correct ID). See page 58 for information about the Control Panel Lock function. Solving Problems With the Image or Sound No image appears on the screen. ■ Check - Epson G5000 | User's Guide - Page 86
video sources, you may need to press the Source Search button on the projector or one of the source buttons on the remote control to select the correct source. Allow a few seconds for the projector LCD. Allow a few seconds for the projector to sync up after pressing it. Check your notebook's manual - Epson G5000 | User's Guide - Page 87
's resolution and frequency or refresh rate is supported by the projector ( remote control. ■ Press the Esc button on the remote control to cancel the E-Zoom function. ■ Make sure your computer's resolution setting is correct. See the compatible video formats listed on page 101. Solving Problems - Epson G5000 | User's Guide - Page 88
the Resolution video signal may be split between the computer and the projector. If you notice a decline in the projected image quality when the image is displayed simultaneously on your notebook computer and the projector, turn off the notebook's LCD is compatible with the projector. See page 101. - Epson G5000 | User's Guide - Page 89
button on the remote control or the Enter button on the projector to reset the projector's Tracking, Sync, and Position settings. ■ If further adjustment is needed, you can fine-tune the Tracking and Sync settings manually VGA port. Solving Problems 89 - Epson G5000 | User's Guide - Page 90
Problems The image is too light or dark, or colors are incorrect. ■ Use the Color Mode option in the projector's Image menu to adjust the color (see page 48). ■ If you're displaying video projector's lamp may need to be replaced. See page 74 for instructions buttons on the remote control to adjust - Epson G5000 | User's Guide - Page 91
jack or audio out jack. Connect the other end to the projector's Audio port (beneath the Computer2 port) when the computer's video cable is connected to the Computer1 or Computer2 ports. Solving Network Problems The projector does not send e-mail alerts even though the e-mail notification function - Epson G5000 | User's Guide - Page 92
control towards the receiver. ■ Make sure the projector and remote control IDs match. To operate all projectors by remote control regardless of ID settings, set the ID switch on the side of the remote control to Off. ■ The remote control's batteries may not be installed correctly or may be low - Epson G5000 | User's Guide - Page 93
Where To Get Help Epson provides these technical support services: Internet Support Visit Epson's support website for solutions to common problems with the PowerLite G5000. You can download utilities and documentation, get FAQs and troubleshooting advice, or e-mail Epson with your questions. Speak - Epson G5000 | User's Guide - Page 94
you call for support, please have the following information ready: ■ Product name (PowerLite G5000) ■ Product serial number (located on the projector) ■ Proof of purchase (such as a store receipt) and date of purchase ■ Computer or video configuration ■ Description of the problem Purchase Supplies - Epson G5000 | User's Guide - Page 95
, as shown: Front projection Rear projection Ceiling projection Rear/ceiling projection To project from overhead, you'll need the optional ceiling mounting hardware (see page 10). You'll also need to select the appropriate Projection setting in the projector's Extended menu to flip the image - Epson G5000 | User's Guide - Page 96
page 33. Security Features The projector includes security features to prevent its theft when installed or used in public locations: ■ Security cable attachment. You can attach a commercially available security cable as shown below to secure the projector to a table or ceiling mount. Security cable - Epson G5000 | User's Guide - Page 97
the supplied screw, so that the lens cannot be removed. In addition, the projector includes several menu-operated security features (see page 54). Installing and Removing the Lens See the following sections for instructions on removing and installing the lens. Removing the Lens 1. Turn off the - Epson G5000 | User's Guide - Page 98
hand or fingers. If fingerprints or oils are left on the surface of the lens, projection quality will deteriorate. Installing the Lens 1. Turn off the projector and unplug the power cord. 2. Turn the focus ring clockwise until it stops moving. 3. Make sure the white dot on the lens is facing up - Epson G5000 | User's Guide - Page 99
Specifications General Type of display Epson poly-silicon TFT active matrix Resolution (native format) 1024 × 768 pixels (XGA) Color reproduction 16.8 million colors Brightness High mode: White light output 4000 lumens (ISO 21118 standard) Color light output 4000 lumens Low mode: White light - Epson G5000 | User's Guide - Page 100
over time. Turn off this product when not in use to prolong the life of the projector. Projection Lamp Type Power consumption Lamp life Part number Remote Control Range Batteries (2) UHE (Ultra High Efficiency) 210 W Approx. 2000 hours (High Brightness mode) Approx. 3000 hours (Low Brightness - Epson G5000 | User's Guide - Page 101
-1 First Edition (cTUVus Mark) Canada ICES-003 Class B CSA C22.2 No. 60950-1 CE Marking EMC Directive (2004/108/EC) IEC 60950-1 First edition Pixelworks™ DNX™ ICs are used in this projector. Compatible Video Formats The projector supports the high definition video and computer display formats - Epson G5000 | User's Guide - Page 102
Compatible video formats Mode Refresh Rate (Hz) VGA EGA* 70 VGA-60 60 VESA-72* 72 VESA-75* 75 VESA- WXGA+60** 60 WXGA+75** 75 WXGA+85** 85 SXGA+60 60 SXGA+75* 75 SXGA+85* 85 UXGA-60 60 Resolution 640 × 350 640 × 480 640 × 480 640 × 480 640 × 480 800 × 600 800 × 600 800 × 600 - Epson G5000 | User's Guide - Page 103
Compatible video formats (continued) Mode iMAC VGA** iMAC SVGA** iMAC XGA** MAC13* MAC16* MAC19* MAC19-60* MAC21* NTSC NTSC 4:43 PAL N-PAL 75 75 59 75 60 60 50 50 60 60 50 60 50 60 50 60 50 60 50 60 50 Resolution 640 × 480 800 × 600 1024 × 768 640 × 480 832 × 624 1024 × 768 1024 × 768 1152 × - Epson G5000 | User's Guide - Page 104
104 Technical Specifications - Epson G5000 | User's Guide - Page 105
if you use lubricants or oils on the projector, the projector case may crack and the projector may fall from its ceiling mount. This could cause serious injury to anyone under the mount and could damage the projector. When installing or adjusting a ceiling mount, do not use adhesives to prevent the - Epson G5000 | User's Guide - Page 106
as specifically explained in this User's Guide, do not attempt to service this product yourself. Refer all servicing to qualified personnel. Opening or removing covers may expose you to dangerous voltages and other hazards. ■ Never open any covers on the projector except as specifically explained in - Epson G5000 | User's Guide - Page 107
the power cord away from hot electrical appliances. ■ If the lamp breaks, ventilate the room to prevent gases contained in the lamp from being inhaled or coming in contact with the eyes or mouth. ■ If the projector is mounted overhead and the lamp breaks, be careful to prevent pieces of glass from - Epson G5000 | User's Guide - Page 108
.) FCC Compliance Statement For United States Users This equipment has been tested and found to comply with the limits for a Class B digital device, pursuant to Part 15 of generates, uses, and can radiate radio frequency energy and, if not installed and used in accordance with the instructions, - Epson G5000 | User's Guide - Page 109
For Canadian Users This Class B digital apparatus meets all requirements of the Canadian Interference-Causing Equipment Regulations. Cet appareil numérique de la classe B respecte toutes les exigences du Règlement sur le materiel brouilleur du Canada. Notices 109 - Epson G5000 | User's Guide - Page 110
110 Notices - Epson G5000 | User's Guide - Page 111
, 10 security, 96 S-video, 10, 18 VGA, 15, 20 Capturing image, 57 Ceiling mount, 10, 95 to 96 Chalkboard, projecting on, 35 Cleaning air filter, 70 to 72 lens, 70 projector case, 70 Closed captions, 59 Color correcting, 35, 48 to 50 multi-screen adjustment, 61 problems, 90 saturation, 48 settings - Epson G5000 | User's Guide - Page 112
problems, 91 Environmental specifications, 101 Epson accessories, 10 PrivateLine Support, 8 technical support Game color mode, 35 Gateway address, 66 H HDTV images, video formats, 103 Height of image, adjusting, 31 to 32 Help, 93 to 94 Help system, using, 82 Help, Epson , projector, 95 to 96 Instant Off, 26 - Epson G5000 | User's Guide - Page 113
display problems, 87 Manuals, 8 Menus changing settings, 46 to 47 default settings, restoring, 47 Extended, 59 to 60 Image, 48 to 49 Info, 78 network, 66, 67 Settings, 52 to 53 Signal, 50 to 52 User's Logo, 57 Monitoring projector, e-mail notifications, 67 to 68 Mouse compatibility, 99 using remote - Epson G5000 | User's Guide - Page 114
mouse, 42 battery used, 100 controlling multiple projectors, 43 to 44 correcting color, 35, 48 to 50 E-Zoom button, 40 Freeze button, 39 ID, 44 numeric keypad, using, 55 pointer tool, using, 41 problems, 92 range, 100 specifications, 100 switching sources, 38 troubleshooting, 92 Remote Receiver - Epson G5000 | User's Guide - Page 115
, 86 to 87 projector problems, 81 to 94 remote control problems, 92 tapered image, 33 to 34 Turning off picture (using A/V Mute), 39 Turning off projector, 26 U Unpacking projector, 12 User's Logo creating, 57 display settings, 58 V VCR, connecting, 16 to 20 VGA video cable, 15, 20 Video cables, 10 - Epson G5000 | User's Guide - Page 116
-
 1
1 -
 2
2 -
 3
3 -
 4
4 -
 5
5 -
 6
6 -
 7
7 -
8
-
9
-
10
-
11
-
12
-
13
-
14
-
15
-
16
-
17
-
18
-
19
-
20
-
21
-
22
-
23
-
24
-
25
-
26
-
27
-
28
-
29
-
30
-
31
-
32
-
33
-
34
-
35
-
36
-
37
-
38
-
39
-
40
-
41
-
42
-
43
-
44
-
45
-
46
-
47
-
48
-
49
-
50
-
51
-
52
-
53
-
54
-
55
-
56
-
57
-
58
-
59
-
60
-
61
-
62
-
63
-
64
-
65
-
66
-
67
-
68
-
69
-
70
-
71
-
72
-
73
-
74
-
75
-
76
-
77
-
78
-
79
-
80
-
81
-
82
-
83
-
84
-
85
-
86
-
87
-
88
-
89
-
90
-
91
-
92
-
93
-
94
-
95
-
96
-
97
-
98
-
99
-
100
-
101
-
102
-
103
-
104
-
105
-
106
-
107
-
108
-
109
-
110
-
111
-
112
-
113
-
114
-
115
-
116
 |
 |

PowerLite
®
G5000
Multimedia Projector
User’s Guide