Epson Perfection 1670 Photo Start Here Card - Page 5
Scanning Tips - software
 |
View all Epson Perfection 1670 Photo manuals
Add to My Manuals
Save this manual to your list of manuals |
Page 5 highlights
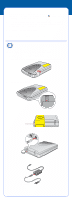
Scanning Tips Selecting the Scanning Mode EPSON Scan has three scanning modes: • Full Auto Mode allows the software to automatically select the best settings for your scan. • Home Mode lets you adjust some of the basic settings before you scan. • Professional Mode gives full control over all scan settings. You can sharpen, correct, or enhance your images before scanning. Choose your scanning mode You can choose the scanning mode from the list box at the top right of the window. To change settings in Full Auto Mode, click the Pause button, then click Options. If you're using Home or Professional Mode, the options window automatically appears. Then select the settings you want to use for your scan. Note: The selected mode and settings remain in effect until they are changed. For more information on the scanning modes and available settings, see the on-screen Reference Guide. Restoring Color in Photos If you have faded photos or negatives, you can use the Color Restoration setting in your software to improve the color of your scan. You can select this setting in Smart Panel or in EPSON Scan. Smart Panel To select the Color Restoration setting, open Smart Panel and select Photo. You see the screen below. Click the Color Restoration Icon. RePrint Select Color Restoration EPSON Scan Color Restoration is available in Home and Professional Modes. To select Color Restoration, start EPSON Scan. You see a screen similar to this. Click the Preview button at the bottom of the screen. Then select the Color Restoration checkbox. (If you're using Professional Mode, you may need to scroll to the bottom of the screen.) Select Color Restoration
-
 1
1 -
 2
2 -
 3
3 -
 4
4 -
 5
5 -
 6
6 -
 7
7 -
 8
8
 |
 |
