Epson Perfection 3200 Photo Color Management Workbook - Page 27
Configuring Adobe Photoshop 7.0.1, Scanning with LaserSoft SilverFast
 |
View all Epson Perfection 3200 Photo manuals
Add to My Manuals
Save this manual to your list of manuals |
Page 27 highlights
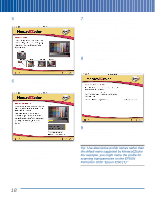
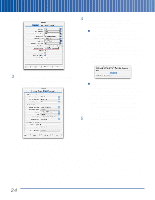
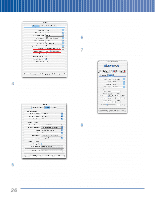
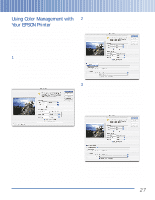
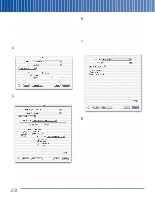
Configuring Adobe Photoshop 7.0.1 Adobe Photoshop offers powerful but sometimes complicated color management features. To configure Adobe Photoshop for the EPSON Scanto-Print workflow, follow these simple steps. 1 Choose Color Settings from the Edit menu (Mac OS 9, Windows), or the Photoshop Elements menu (Mac OS X). The Color Settings window appears: Scanning with LaserSoft SilverFast The instructions given for configuring SilverFast apply whether you're using the standalone SilverFast application or the SilverFast Import plug-in. The procedure is identical for both. However, the settings for scanning reflective copy are slightly different from those for scanning transparencies. Reflective Scanning with SilverFast 1 Launch the SilverFast application, or open the File menu and choose Import> SilverFast (Epson) in Photoshop or Photoshop Elements. SilverFast appears: 2 For Settings, choose U.S. Prepress Defaults, then click OK. Choosing this option sets Photoshop to use the Adobe RGB (1998) color space for all your RGB work. Adobe RGB (1998) is large enough to hold all the colors you can print on your EPSON printer. That's all you need to do to configure Photoshop for the workflow. 2 On the main SilverFast screen, click the General Tab. Make sure that Original is set to Reflective and Pos./Neg. is set to Positive, then click the Options button. 23
-
 1
1 -
2
-
3
-
4
-
5
-
6
-
7
-
8
-
9
-
10
-
11
-
12
-
13
-
14
-
15
-
16
-
17
-
18
-
19
-
20
-
21
-
 22
22 -
 23
23 -
 24
24 -
 25
25 -
 26
26 -
 27
27 -
 28
28 -
 29
29 -
 30
30 -
 31
31 -
 32
32 -
33
-
34
 |
 |
