Epson PhotoPC L-410 Product Information Guide - Page 5
Playing Back Photos and Videos, Printing Photos, Connecting the Camera to Your Printer
 |
View all Epson PhotoPC L-410 manuals
Add to My Manuals
Save this manual to your list of manuals |
Page 5 highlights
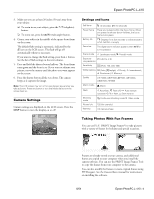
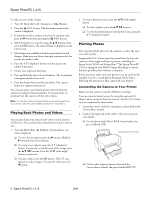
Epson PhotoPC L-410 To take a picture with a frame: 1. Turn the Mode dial to Automatic or Manual. 2. Press the P.I.F. button. The first frame stored in the camera is displayed. 3. If you want to select a frame stored on the memory card, press the r button after pressing the P.I.F. button. 4. Select the frame you want by using the u d buttons, then press the OK button. The selected frame is displayed on the LCD screen. 5. Most frames are available in both horizontal and vertical designs. Make sure you choose the right orientation for the picture you want to take. 6. Press the T (telephoto) button to zoom in on your subject if necessary. 7. Center your subject in the frame. 8. Press and hold the shutter button halfway. The focus frame turns green and the focus is set. 9. Press the shutter button all the way down. The camera beeps as it captures your picture. You can now print your framed picture directly from the camera on supported Epson printers. For instructions on printing from the camera, see the next column. Note: You can also add or change a frame on an existing picture in your camera. See the Camera Basics manual for instructions. Playing Back Photos and Videos You can play back your pictures and videos on the camera's LCD screen. You can also delete any photos you don't want to save. 1. Turn the Mode dial to Playback. The last photo you took is displayed. ❏ To view the next photo, press the r button. Hold the r button down to fast-forward. ❏ To zoom in on a photo, press the T (telephoto) button. To pan over to another part of the image, press the u d l r buttons. Press the W (wide-angle) button to zoom out. ❏ To play a video, press the OK button. (The icon appears on video images.) To stop the video, press the l button. 2. To view 6 photos at once, press the W (wide-angle) button. ❏ To select a photo, press the u d l r buttons. ❏ To view the selected photo with the full screen, press the T (telephoto) button. Printing Photos You can print all the photos in the camera, or select the ones you want to print. Images with P.I.F. frames must be printed directly from the camera or from supported Epson printers, including the Epson Stylus® R300 and PictureMate.™ The Epson PhotoPC L-410 is equipped with PRINT Image Matching® to ensure that best possible prints without a computer. Before you start, make sure your printer is set up and has ink installed. Load 4 × 6 inch Epson Premium Glossy Paper, following the instructions that came with your printer. Connecting the Camera to Your Printer Make sure the camera is turned off before you begin. You can conserve battery power by using the optional AC adapter when you print from the camera. See the User's Guide on your computer for instructions. 1. Locate the correct cable for your printer, as described in the Camera Basics manual. 2. Connect the large end of the cable to the correct port on your printer. ❏ On the Epson Stylus Photo R200, shown below, the port is labeled USB. Epson Stylus Photo R200 ❏ On the other supported printers listed in the Camera Basics manual, the port is labeled EXT I/F. 5 - Epson PhotoPC L-410 8/04
-
 1
1 -
 2
2 -
 3
3 -
 4
4 -
 5
5 -
 6
6 -
 7
7
 |
 |
