Epson PictureMate Deluxe Viewer Edition Using PictureMate With a Computer - Page 2
Installing Software and Connecting PictureMate, Installing PictureMate for Windows - photo
 |
View all Epson PictureMate Deluxe Viewer Edition manuals
Add to My Manuals
Save this manual to your list of manuals |
Page 2 highlights
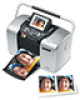
Installing Software and Connecting PictureMate To connect PictureMate® Deluxe Viewer Edition, you'll need this cable: Type A to B USB cable If you don't have a USB cable, you can buy one from your local computer dealer or from Epson®. See the inside back cover for details. When you're ready to start, see the section for your computer system: ■ For Windows®, see below. ■ For Macintosh,® see page 9. Installing PictureMate for Windows First make sure PictureMate is NOT CONNECTED to your computer, and REMOVE your memory card, if it's inserted. Then: 1. Load a sheet of PictureMate Photo Paper, glossy side up, against the right edge of the paper feeder. Slide the edge guide against the paper and open the output tray. 2. Press the On button to turn On button on PictureMate. 3. Turn on your computer. 1
-
 1
1 -
 2
2 -
 3
3 -
 4
4 -
 5
5 -
 6
6 -
 7
7 -
 8
8 -
9
-
10
-
11
-
12
-
13
-
14
-
15
-
16
-
17
-
18
-
19
 |
 |
