Epson PowerLite 71c Product Information Guide - Page 7
Adjusting the Image Size, Caution - remote
 |
View all Epson PowerLite 71c manuals
Add to My Manuals
Save this manual to your list of manuals |
Page 7 highlights
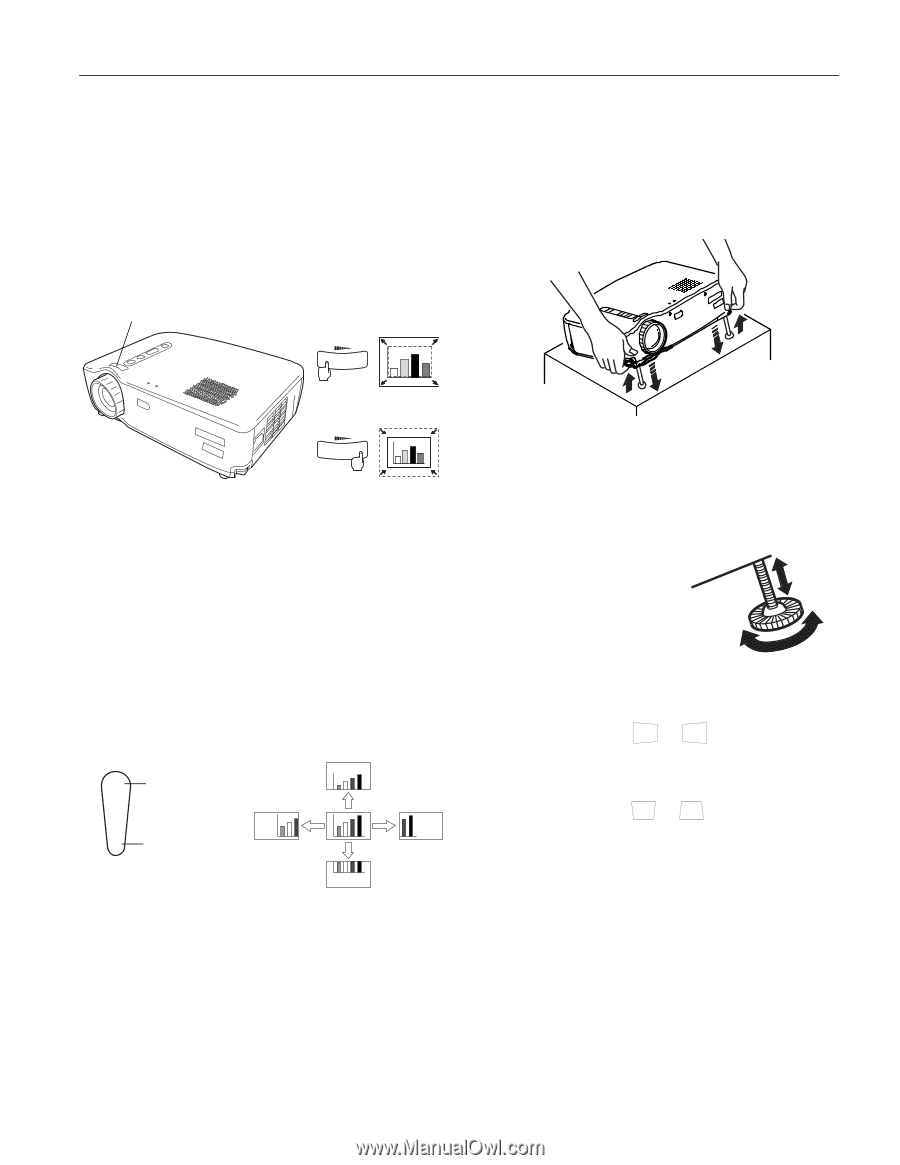
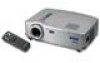
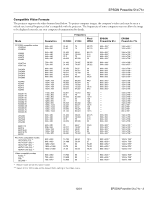
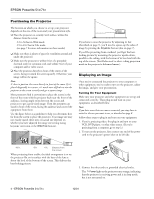
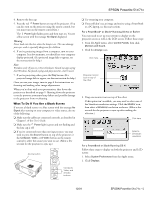
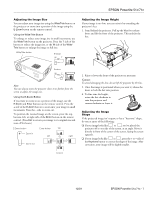
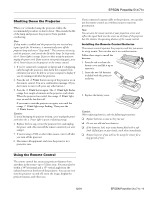
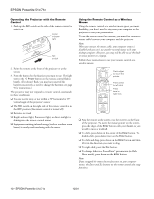
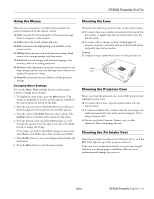
EPSON Powerlite 51c/71c Adjusting the Image Size You can adjust your image size using the Wide/Tele button on the projector or zoom into a portion of the image using the E-Zoom button on the remote control. Using the Wide/Tele Button To enlarge or reduce your image size in small increments, use the Wide/Tele button on the projector. Press the T side of the button to reduce the image size, or the W side of the Wide/ Tele button to enlarge the image to full size. Wide/Tele button Enlarge WT Adjusting the Image Height If your image is too low, you can raise it by extending the projector's feet. 1. Stand behind the projector. Pull up the blue foot release levers and lift the front of the projector. This unlocks the feet. Reduce WT Note: You can always move the projector closer to or farther from the screen to adjust the image size. Using the E-Zoom Button If you want to zoom in on a portion of the image, use the E-Zoom and Enter buttons on the remote control. Press the + side of the E-Zoom button to zoom into your image in small increments. Press the - side to zoom out. To position the zoomed image on the screen, press the top, bottom, left, or right side of the Enter button on the remote control. (Press Esc to return your image to its original size and turn off E-Zoom.) E-Zoom button Enter button top + Zoom in left right - Zoom out 2. Raise or lower the front of the projector as necessary. Caution: To avoid damaging the lens, do not lift the projector by the lens. 3. Once the image is positioned where you want it, release the levers to lock the feet into position. 4. To fine-tune the height, rotate the feet clockwise to raise the projector and counterclockwise to lower it. Adjusting the Image Shape If the projected image isn't square or has a "keystone" shape, do one or more of the following: ❏ If your image looks like or , you've placed the projector off to one side of the screen, at an angle. Move it directly in front of the center of the screen, facing the screen squarely. ❏ If your image looks like or , press the + or - side of the Keystone button to correct the shape of the image. After correction, your image will be slightly smaller. bottom 12/01 EPSON Powerlite 51c/71c - 7
-
 1
1 -
 2
2 -
 3
3 -
 4
4 -
 5
5 -
 6
6 -
 7
7 -
 8
8 -
 9
9 -
 10
10 -
 11
11 -
 12
12 -
13
 |
 |