Epson PowerLite 9300i Product Information Guide - Page 13
Registering a Projector in EMP Monitor, Monitoring Your Projector(s), Open EMP Monitor by selecting
 |
View all Epson PowerLite 9300i manuals
Add to My Manuals
Save this manual to your list of manuals |
Page 13 highlights
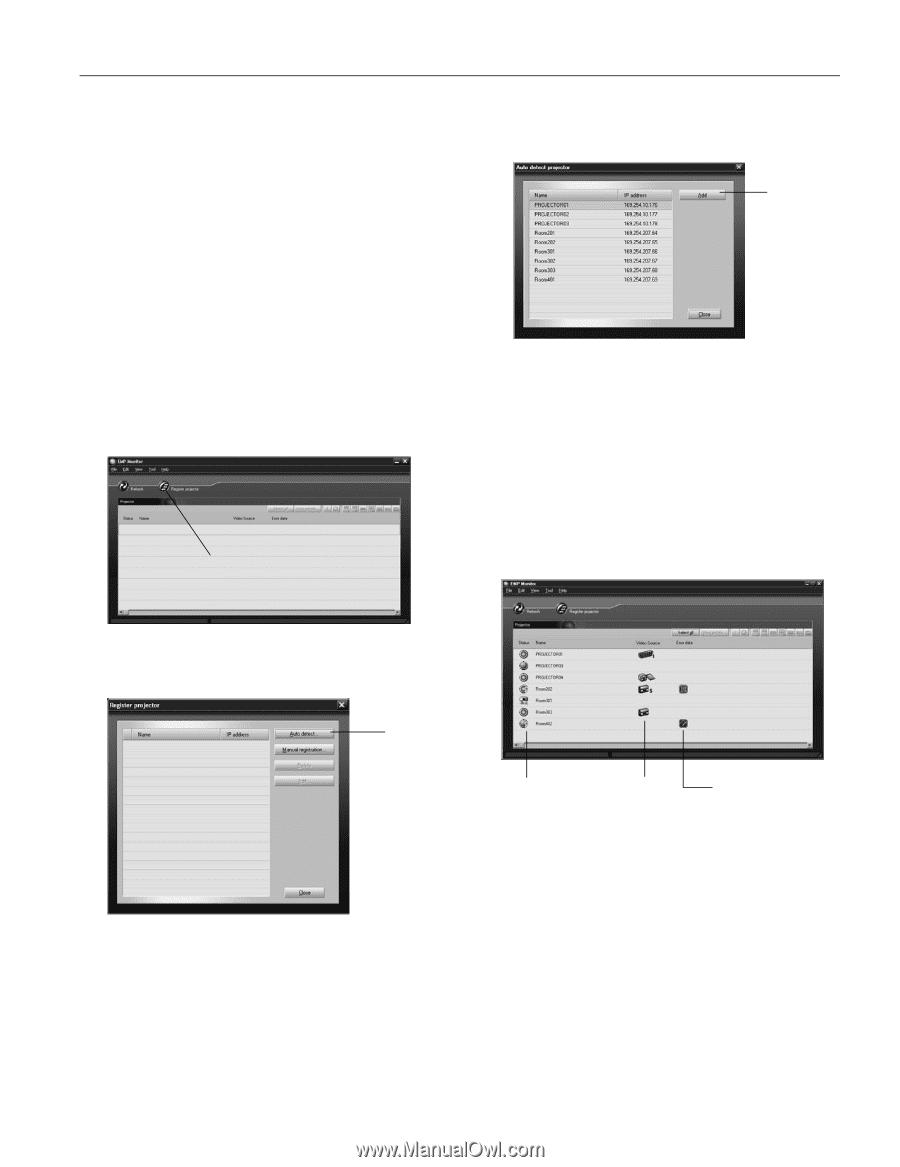
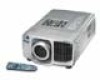
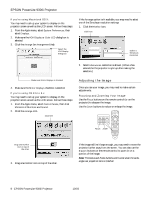
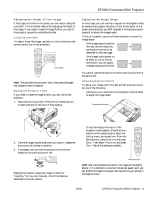
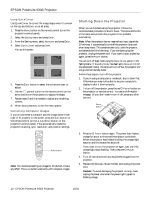
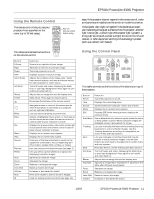
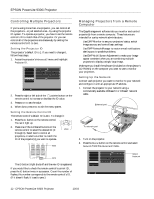
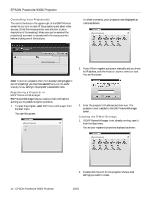
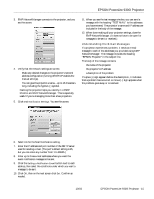
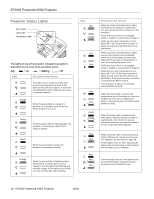
EPSON PowerLite 9300i Projector 4. If your network assigns addresses automatically, turn on DHCP. 5. If your network does not assign addresses automatically, turn off DHCP and enter the projector's IP Address, Subnet Mask, and Gateway Address, as needed. Note: To enter numbers using the remote control, press the Num button until it lights, then use the number keypad. 6. After changing an address in the network menu, press the Enter button. This stores the value. 7. When done making all necessary changes, press ESC to exit the menu system. Registering a Projector in EMP Monitor Before you can monitor a projector, you have to register it. Follow these steps: 1. Open EMP Monitor by selecting EMP Monitor from the Start menu. You see this screen: Click here Any projectors found on the network are listed as shown below: Click here 4. Select the projectors you want to add by clicking their name. Then click Add, and on the next screen click Close. You see your registered projectors listed on the main EMP Monitor screen. Monitoring Your Projector(s) The EMP Monitor screen lets you monitor your projectors using the Status, Video Source, and Error icons shown below. This lets you see which projectors are currently being used, from which source (or port) they are projecting an image, and if a problem occurs. 2. Click Register projector as shown. You see this screen: Click here 3. Click Auto detect to locate projectors currently operating on the network. Or click Manual registration and enter the projector's name and network address. Status icon Video Source icon Error icon For detailed status information, select the projector in question and click View details. Note: To monitor a projector when it's in standby mode (plugged in but not projecting), you must have selected Network ON as the Standby Mode setting in the projector's Advanced1 menu. 10/03 EPSON PowerLite 9300i Projector - 13
-
 1
1 -
2
-
3
-
4
-
5
-
6
-
7
-
 8
8 -
 9
9 -
 10
10 -
 11
11 -
 12
12 -
 13
13 -
 14
14 -
 15
15 -
 16
16 -
 17
17 -
 18
18 -
19
 |
 |