Epson PowerLite Home Cinema 5025UB User Manual - Page 57
Using Picture in Picture, Auto Iris, High Speed, Normal, Parent topic, P-in-P
 |
View all Epson PowerLite Home Cinema 5025UB manuals
Add to My Manuals
Save this manual to your list of manuals |
Page 57 highlights
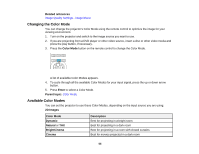
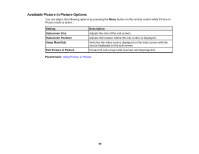
4. Select the Auto Iris setting and choose one of the following: • High Speed to adjust brightness as soon as the scene changes. • Normal for standard brightness adjustment. Note: You can set Auto Iris for each Color Mode that supports the feature. 5. Press Menu or Esc to exit the menus. Parent topic: Color Mode Using Picture in Picture You can use Picture in Picture mode to view two image sources simultaneously. Note: You can display only HDMI video sources when Picture in Picture mode is active. 1. Turn on the projector and switch to the HDMI image source you want to use. 2. Press the P-in-P button on the remote control. The second HDMI video source appears as a sub-screen in the corner of the image. Note: While Picture in Picture mode is active, press the Menu button on the remote control to adjust the size and position of the sub-screen. 3. To swap the main screen and sub-screen video sources, press and hold the P-in-P button for at least three seconds. 4. Press the P-in-P button again to close the sub-screen and resume normal projection. Available Picture in Picture Options Parent topic: Using Basic Projector Features 57
-
 1
1 -
2
-
3
-
4
-
5
-
6
-
7
-
8
-
9
-
10
-
11
-
12
-
13
-
14
-
15
-
16
-
17
-
18
-
19
-
20
-
21
-
22
-
23
-
24
-
25
-
26
-
27
-
28
-
29
-
30
-
31
-
32
-
33
-
34
-
35
-
36
-
37
-
38
-
39
-
40
-
41
-
42
-
43
-
44
-
45
-
46
-
47
-
48
-
49
-
50
-
51
-
 52
52 -
 53
53 -
 54
54 -
 55
55 -
 56
56 -
 57
57 -
 58
58 -
 59
59 -
 60
60 -
 61
61 -
 62
62 -
63
-
64
-
65
-
66
-
67
-
68
-
69
-
70
-
71
-
72
-
73
-
74
-
75
-
76
-
77
-
78
-
79
-
80
-
81
-
82
-
83
-
84
-
85
-
86
-
87
-
88
-
89
-
90
-
91
-
92
-
93
-
94
-
95
-
96
-
97
-
98
-
99
-
100
-
101
-
102
-
103
-
104
-
105
-
106
-
107
-
108
-
109
-
110
-
111
-
112
-
113
-
114
-
115
-
116
-
117
-
118
-
119
-
120
-
121
-
122
-
123
-
124
-
125
-
126
-
127
-
128
-
129
-
130
-
131
-
132
-
133
-
134
-
135
-
136
-
137
-
138
-
139
-
140
-
141
-
142
-
143
-
144
-
145
-
146
-
147
-
148
-
149
-
150
-
151
-
152
-
153
-
154
-
155
-
156
-
157
-
158
-
159
-
160
-
161
-
162
-
163
-
164
-
165
-
166
-
167
-
168
-
169
-
170
-
171
 |
 |
