Epson PowerLite Home Cinema 700 User's Guide - Page 30
to other image sources using the, desktop displayed by the projector. You can switch the projector
 |
View all Epson PowerLite Home Cinema 700 manuals
Add to My Manuals
Save this manual to your list of manuals |
Page 30 highlights
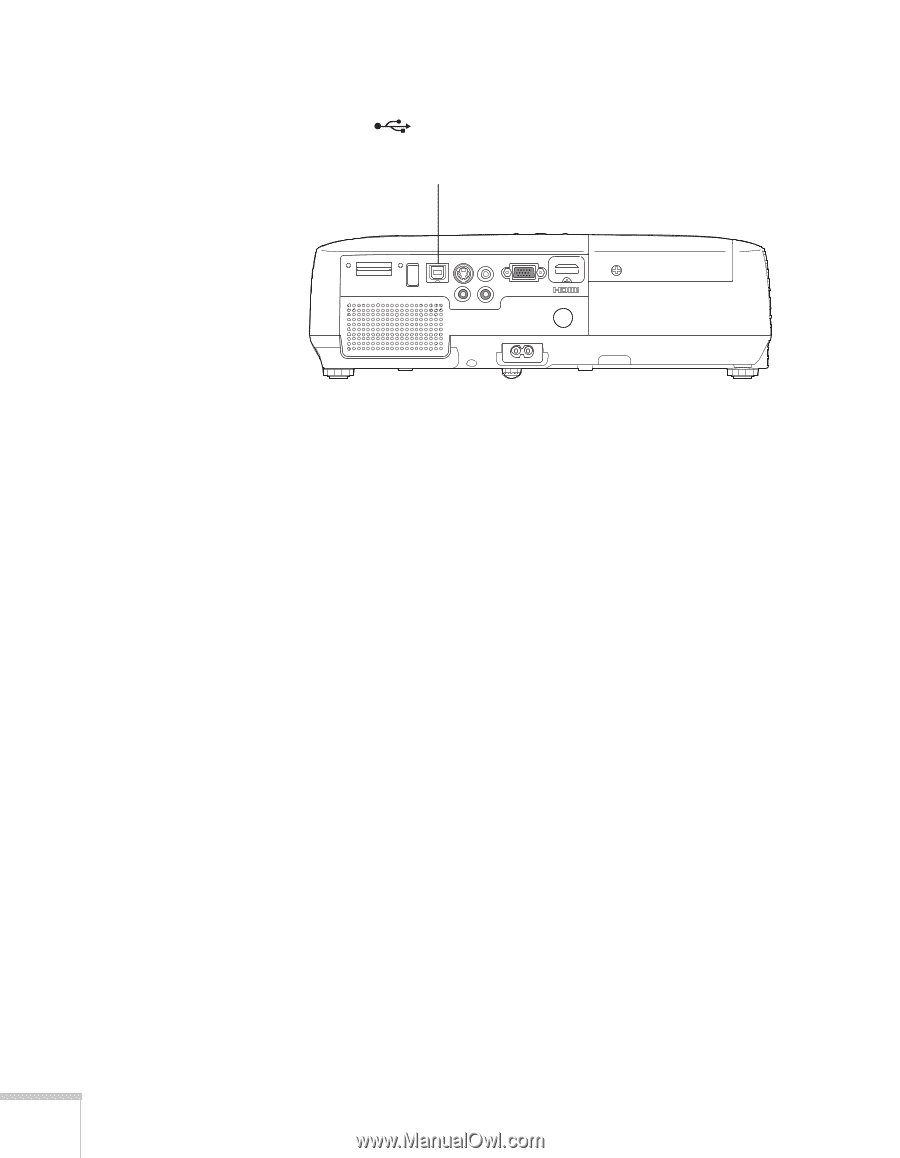
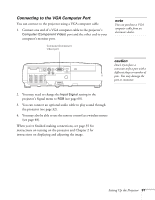
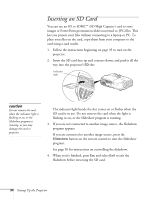
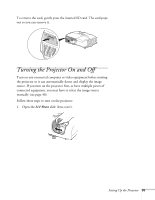
4. Connect the square end of a USB cable to the projector's TypeB (square) USB port. USB TypeB port 5. Connect the flat end of the cable to any available USB port on your notebook or desktop computer. Messages appear on your computer screen as the projector is recognized and the software is installed automatically. 6. Follow the instructions on the screen to install the Epson USB Display software. If you see a "Digital Signature Warning," select Continue or Continue Anyway. (You will see these instructions only the first time you connect.) After the software is installed, you see your computer's current desktop displayed by the projector. You can switch the projector to other image sources using the Source Search or Search button on the remote control or the projector. 7. You can connect an optional audio cable if you want to play sound through the projector (see page 32). When you've finished making connections, see Chapter 2 for instructions on displaying and adjusting the image. When you're done projecting from your computer, disconnect the USB cable. 30 Setting Up the Projector
-
 1
1 -
2
-
3
-
4
-
5
-
6
-
7
-
8
-
9
-
10
-
11
-
12
-
13
-
14
-
15
-
16
-
17
-
18
-
19
-
20
-
21
-
22
-
23
-
24
-
 25
25 -
 26
26 -
 27
27 -
 28
28 -
 29
29 -
 30
30 -
 31
31 -
 32
32 -
 33
33 -
 34
34 -
 35
35 -
36
-
37
-
38
-
39
-
40
-
41
-
42
-
43
-
44
-
45
-
46
-
47
-
48
-
49
-
50
-
51
-
52
-
53
-
54
-
55
-
56
-
57
-
58
-
59
-
60
-
61
-
62
-
63
-
64
-
65
-
66
-
67
-
68
-
69
-
70
-
71
-
72
-
73
-
74
-
75
-
76
-
77
-
78
-
79
-
80
-
81
-
82
-
83
-
84
-
85
-
86
-
87
-
88
-
89
-
90
-
91
-
92
-
93
-
94
-
95
-
96
-
97
-
98
-
99
-
100
-
101
-
102
-
103
-
104
-
105
-
106
-
107
-
108
-
109
-
110
 |
 |