Epson PowerLite Pro Cinema 9700 UB User's Guide - Page 27
Choosing the Aspect Ratio
 |
View all Epson PowerLite Pro Cinema 9700 UB manuals
Add to My Manuals
Save this manual to your list of manuals |
Page 27 highlights
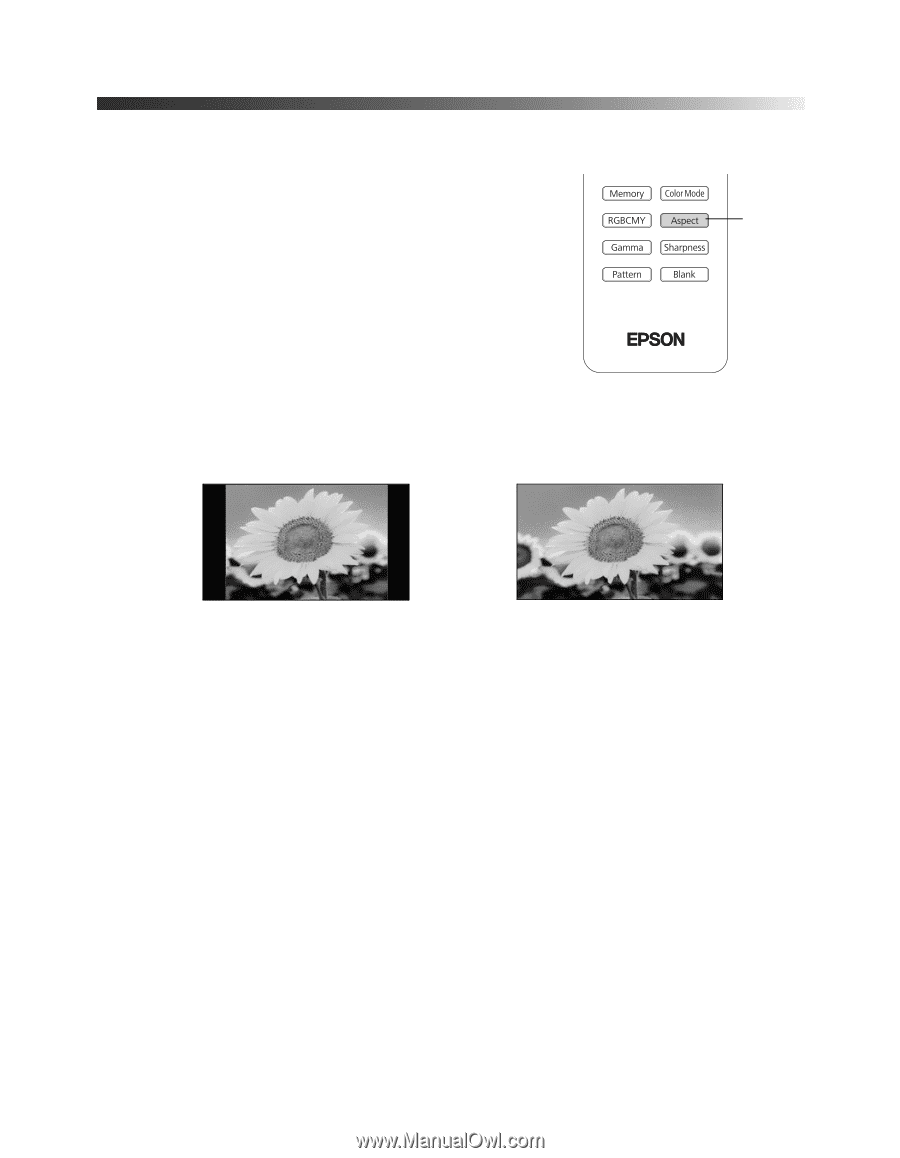
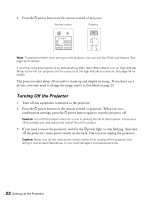
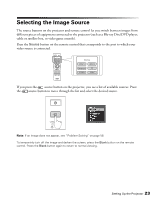
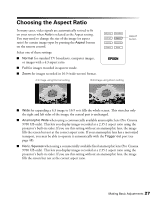
Choosing the Aspect Ratio In many cases, video signals are automatically resized to fit on your screen when Auto is selected as the Aspect setting. You may need to change the size of the image (or aspect ratio) for certain image types by pressing the Aspect button on the remote control. Select one of these settings: ■ Normal for standard TV broadcasts, computer images, or images with a 4:3 aspect ratio. ■ Full for images recorded in squeeze mode. ■ Zoom for images recorded in 16:9 (wide-screen) format. 4:3 image using Normal setting 16:9 image using Zoom setting Aspect button ■ Wide for expanding a 4:3 image to 16:9 so it fills the whole screen. This stretches only the right and left sides of the image; the central part is unchanged. ■ Anamorphic Wide when using a commercially available anamorphic lens (Pro Cinema 9700 UB only). This lets you display images recorded at a 2.35:1 aspect ratio using the projector's built-in scaler. If you use this setting without an anamorphic lens, the image fills the screen but not at the correct aspect ratio. If your anamorphic lens has a motorized transport, you may be able to operate it automatically with the Trigger out port (see page 48). ■ Horiz. Squeeze when using a commercially available fixed anamorphic lens (Pro Cinema 9700 UB only). This lets you display images recorded at a 2.35:1 aspect ratio using the projector's built-in scaler. If you use this setting without an anamorphic lens, the image fills the screen but not at the correct aspect ratio. Making Basic Adjustments 27
-
 1
1 -
2
-
3
-
4
-
5
-
6
-
7
-
8
-
9
-
10
-
11
-
12
-
13
-
14
-
15
-
16
-
17
-
18
-
19
-
20
-
21
-
 22
22 -
 23
23 -
 24
24 -
 25
25 -
 26
26 -
 27
27 -
 28
28 -
 29
29 -
 30
30 -
 31
31 -
 32
32 -
33
-
34
-
35
-
36
-
37
-
38
-
39
-
40
-
41
-
42
-
43
-
44
-
45
-
46
-
47
-
48
-
49
-
50
-
51
-
52
-
53
-
54
-
55
-
56
-
57
-
58
-
59
-
60
-
61
-
62
-
63
-
64
-
65
-
66
-
67
-
68
-
69
-
70
-
71
-
72
-
73
-
74
-
75
-
76
-
77
-
78
-
79
-
80
 |
 |