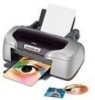
Epson R800 Product Information Guide - Page 6
Installing the First Ink Cartridges, into place. - stylus photo printer
 |
UPC - 010343848849
View all Epson R800 manuals
Add to My Manuals
Save this manual to your list of manuals |
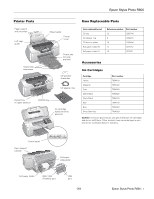
Page 6 highlights
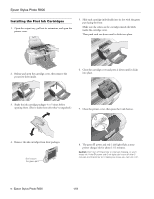
Epson Stylus Photo R800 Installing the First Ink Cartridges 1. Open the output tray, pull out its extensions, and open the printer cover. 5. Slide each cartridge individually into its slot with the green part facing the front. Make sure the colors on the cartridges match the labels inside the cartridge cover. Then push each one down until it clicks into place. 2. Release and open the cartridge cover, then remove the protective sheet inside. 6. Close the cartridge cover and press it down until it clicks into place. 3. Shake the ink cartridge packages 4 or 5 times before opening them. (Don't shake them after they're unpacked.) 7. Close the printer cover, then press the H ink button. 4. Remove the ink cartridges from their packages. Don't touch the green part 8. The green P power and red H ink lights flash as your printer charges ink for about 2 1/2 minutes. Caution: Don't turn off the printer or interrupt charging, or you'll waste ink. If the P power and H ink lights don't turn off after 5 minutes, and the printer isn't making any noise, you can turn it off. 6 - Epson Stylus Photo R800 1/04
-
 1
1 -
 2
2 -
 3
3 -
 4
4 -
 5
5 -
 6
6 -
 7
7 -
 8
8 -
 9
9 -
 10
10 -
 11
11 -
 12
12 -
13
-
14
-
15
-
16
 |
 |
