Epson Stylus NX430 Quick Guide - Page 13
Scanning a Document or Photo, Quick Scanning From the Control Panel - scan to mac
 |
View all Epson Stylus NX430 manuals
Add to My Manuals
Save this manual to your list of manuals |
Page 13 highlights
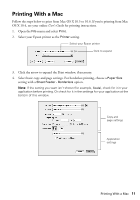
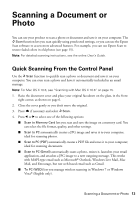
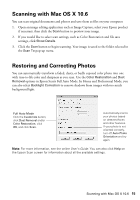
Scanning a Document or Photo You can use your product to scan a photo or document and save it on your computer. The u Scan function lets you scan quickly using preselected settings, or you can use the Epson Scan software to access more advanced features. For example, you can use Epson Scan to restore faded colors in old photos (see page 15). Note: For detailed scanning instructions, see the online User's Guide. Quick Scanning From the Control Panel Use the u Scan function to quickly scan a photo or document and save it on your computer. You can even scan a photo and have it automatically included in an email message. Note: For Mac OS X 10.6, see "Scanning with Mac OS X 10.6" on page 15. 1. Raise the document cover and place your original facedown on the glass, in the front right corner, as shown on page 6. 2. Close the cover gently so you don't move the original. 3. Press if necessary and select u Scan. 4. Press l or r to select one of the following options: ■ Scan to Memory Card lets you scan and save the image on a memory card. You can select the file format, quality, and other settings. ■ Scan to PC automatically creates a JPG image and saves it to your computer; ideal for scanning photos. ■ Scan to PC (PDF) automatically creates a PDF file and saves it to your computer; ideal for scanning documents. ■ Scan to PC (Email) automatically scans a photo, resizes it, launches your email application, and attaches a JPG image to a new outgoing message. This works with MAPI-type email such as Microsoft® Outlook, Windows Live Mail, Mac Mail, and Entourage, but not web-based email such as Gmail. ■ To PC (WSD) lets you manage wireless scanning in Windows 7 or Windows Vista® (English only). Scanning a Document or Photo 13
-
 1
1 -
2
-
3
-
4
-
5
-
6
-
7
-
 8
8 -
 9
9 -
 10
10 -
 11
11 -
 12
12 -
 13
13 -
 14
14 -
 15
15 -
 16
16 -
 17
17 -
 18
18 -
19
-
20
-
21
-
22
-
23
-
24
-
25
-
26
-
27
-
28
-
29
-
30
-
31
-
32
 |
 |
