Epson Stylus Pro 10600 - UltraChrome Ink Product Information Guide - Page 14
Aligning the Print Head, button. You see
 |
View all Epson Stylus Pro 10600 - UltraChrome Ink manuals
Add to My Manuals
Save this manual to your list of manuals |
Page 14 highlights
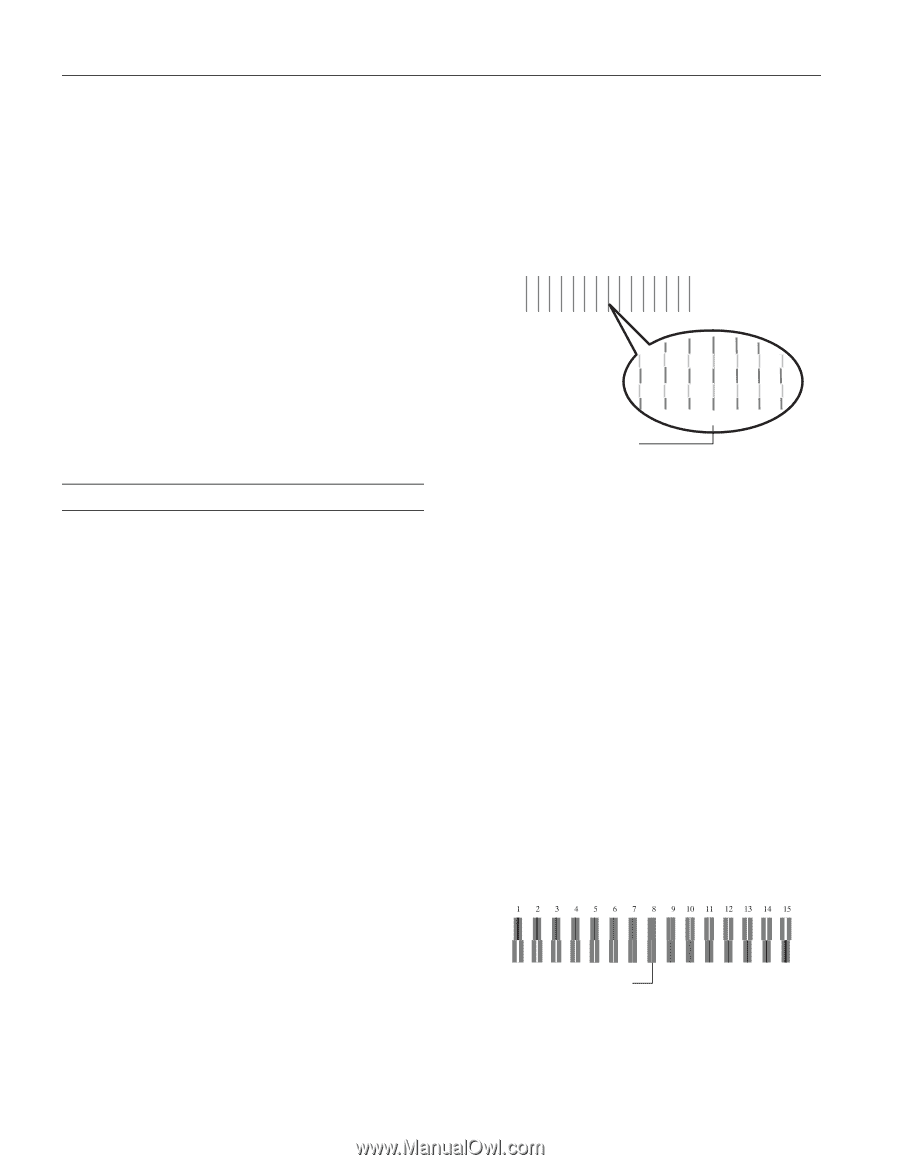
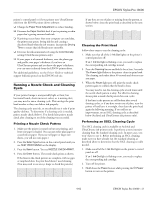
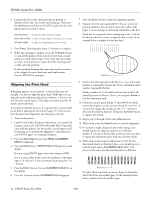
EPSON Stylus Pro 10600 4. Examine the last nozzle check pattern you printed to identify which color ink nozzles need cleaning. Then press the Item button until you see the SSCL option for the color ink nozzle(s) you need to clean: SSCL B/C=EXEC to clean the black and cyan nozzles SSCL LM/LC=EXEC to clean the light magenta and light cyan nozzles SSCL M/Y=EXEC to clean the magenta and yellow nozzles 5. Press Enter. Cleaning takes about 15 minutes to complete. 6. When the cleaning is complete, press the P Power button to turn off the printer. Then turn the power back on and perform a nozzle check (page 13) to verify that the nozzles are clean. You may have to repeat the SSCL cleaning cycle to fully solve the problem. If after repeated cleanings the same color nozzles continue to be clogged, the print head may need replacement. Contact EPSON for assistance. Aligning the Print Head If banding appears on your prints, or vertical lines are not straight, you need to align the print head. Although you can align the print head using the printer software, it's best to do this from the control panel. This aligns the print head for all modes and resolutions. If you haven't already done so, it's a good idea to run a nozzle check before aligning the print head (page 13). This ensures that the print head alignment patterns print correctly. 1. Turn on the printer. 2. Load 44-inch wide roll paper in the printer. Use coated ink jet paper, such as the roll of Doubleweight Matte Paper that came with the printer. For best results, use the paper you'll be printing on to perform the alignment-especially if it's non-EPSON paper or of unusual thickness. 3. Press the SelecType button until HEAD ALIGNMENT MENU is displayed. 4. Press the Item button. PAPER THICK=STD appears on the display. If you're using EPSON paper, leave this setting on STD. If you're using other media, enter the thickness of the paper (up to 1.6 mm) in 0.1-mm increments by pressing the + or - button. 5. Press the Enter button. You see ALIGNMENT=Bi-D LC on the display. 6. Press the + button so that ALIGNMENT=Uni-D appears. 7. Press the Enter button to print the alignment pattern. 8. Examine the first row (marked #1 C). You see a series of patterns similar to the one below across the width of the paper. Use an eye loupe to determine which line is the best. (Each line is composed of two overlapping colors. Look for the line in which the colors overlap the most evenly. In the example below, number 8 is the best line.) 1 2 3 4 5 6 7 8 9 10 11 12 13 14 15 Best line 6 7 8 9 10 9. Look at the other patterns in the first row to see if the same number is consistently the best line. If not, determine which number is generally the best. Ideally, number 8 (±1) should be the best line in all of the printed patterns in all rows. If it is, you can press Pause to exit the adjustment early. 10. Check the control panel display. It shows #1 C=8, which means that number 8 is the current setting for row #1 C. If you need to change the setting, use the + or - button to select the best line for that row. Then press the Enter button to register the setting. 11. Repeat step 8 through 10 for each additional row. 12. When done, press the Pause button to exit the alignment. 13. If you had to make changes to any of the settings, you should reprint the alignment pattern to verify that number 8 (±1) shows the best line in all rows. You may have to repeat the adjustment more than once for best results. 14. When done performing the adjustment in Uni-D (unidirectional) mode, as described above, you should repeat it in Bi-D mode (select ALIGNMENT=Bi-D ALL). The process is the same, but the printed pattern is different: Best choice To select the best pattern, use an eye loupe to determine which block has the smallest gaps. In the example shown above, number 8 has the smallest gaps. 14 - EPSON Stylus Pro 10600 9/02
-
 1
1 -
2
-
3
-
4
-
5
-
6
-
7
-
8
-
 9
9 -
 10
10 -
 11
11 -
 12
12 -
 13
13 -
 14
14 -
 15
15 -
 16
16
 |
 |