Epson Stylus Pro 4000 Professional Edition User Manual - ColorBurst Rip - Page 48
and enter a value for the curve., to save the curves that you create.
 |
View all Epson Stylus Pro 4000 Professional Edition manuals
Add to My Manuals
Save this manual to your list of manuals |
Page 48 highlights
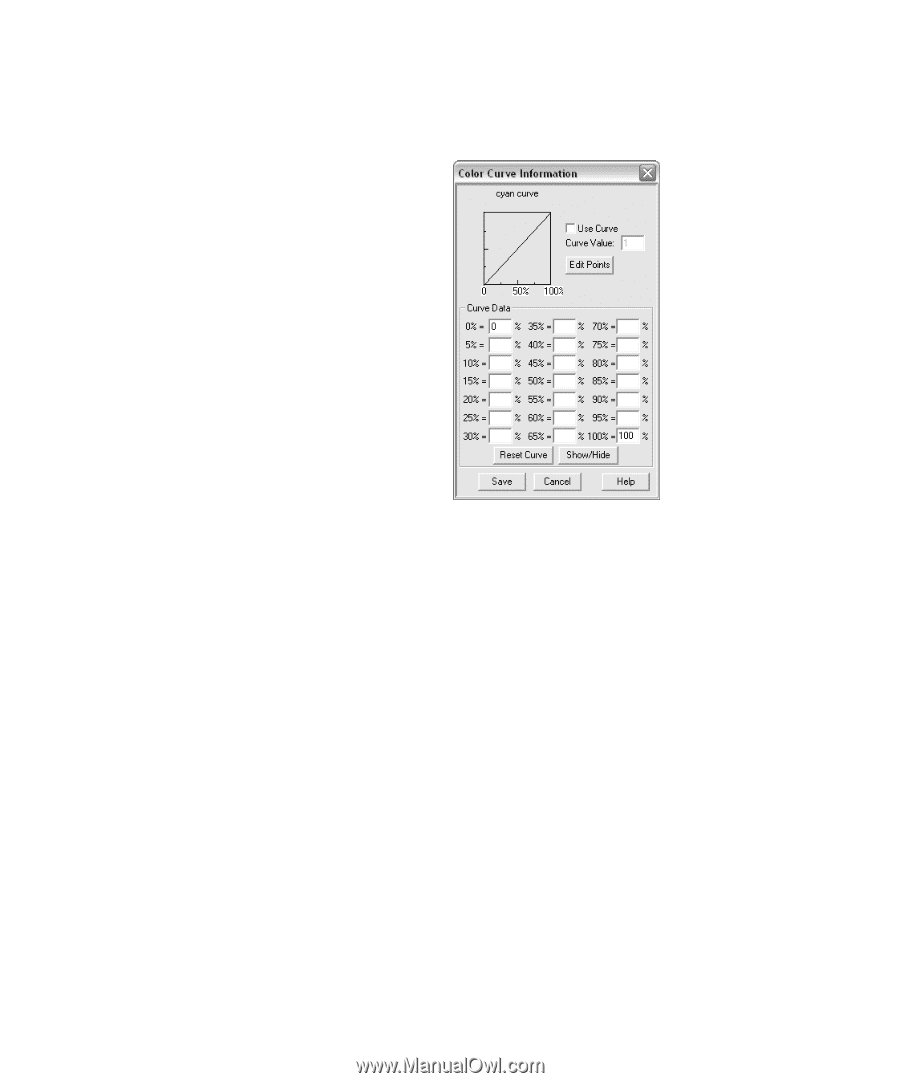
48 | Color Management and Printer Linearization Click Edit to adjust an individual ink curve. You see a window like this: Click Edit Points and click any point on the line and drag it to the desired location, then click a second point and move it to create the desired curve. Or, click Use Curve and enter a value for the curve. Click Save to save the curves that you create. 48
-
 1
1 -
2
-
3
-
4
-
5
-
6
-
7
-
8
-
9
-
10
-
11
-
12
-
13
-
14
-
15
-
16
-
17
-
18
-
19
-
20
-
21
-
22
-
23
-
24
-
25
-
26
-
27
-
28
-
29
-
30
-
31
-
32
-
33
-
34
-
35
-
36
-
37
-
38
-
39
-
40
-
41
-
42
-
 43
43 -
 44
44 -
 45
45 -
 46
46 -
 47
47 -
 48
48 -
 49
49 -
 50
50 -
 51
51 -
 52
52 -
 53
53 -
54
-
55
-
56
-
57
-
58
-
59
-
60
-
61
-
62
-
63
-
64
 |
 |
48
48
|
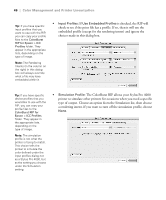
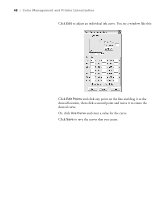
Color Management and Printer Linearization
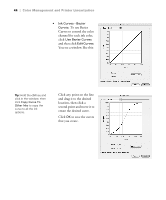
Click
Edit
to adjust an individual ink curve. You see a window like this:
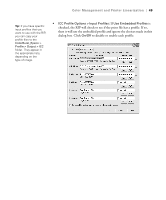
Click
Edit Points
and click any point on the line and drag it to the
desired location, then click a second point and move it to create the
desired curve.
Or, click
Use Curve
and enter a value for the curve.
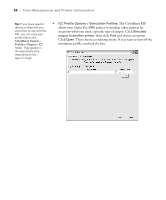
Click
Save
to save the curves that you create.