Epson Stylus Pro 4000 Professional Edition User Manual - ColorBurst Rip - Page 51
Relinearizing an Existing Printer Setup, Linearizing in Mac OS X
 |
View all Epson Stylus Pro 4000 Professional Edition manuals
Add to My Manuals
Save this manual to your list of manuals |
Page 51 highlights
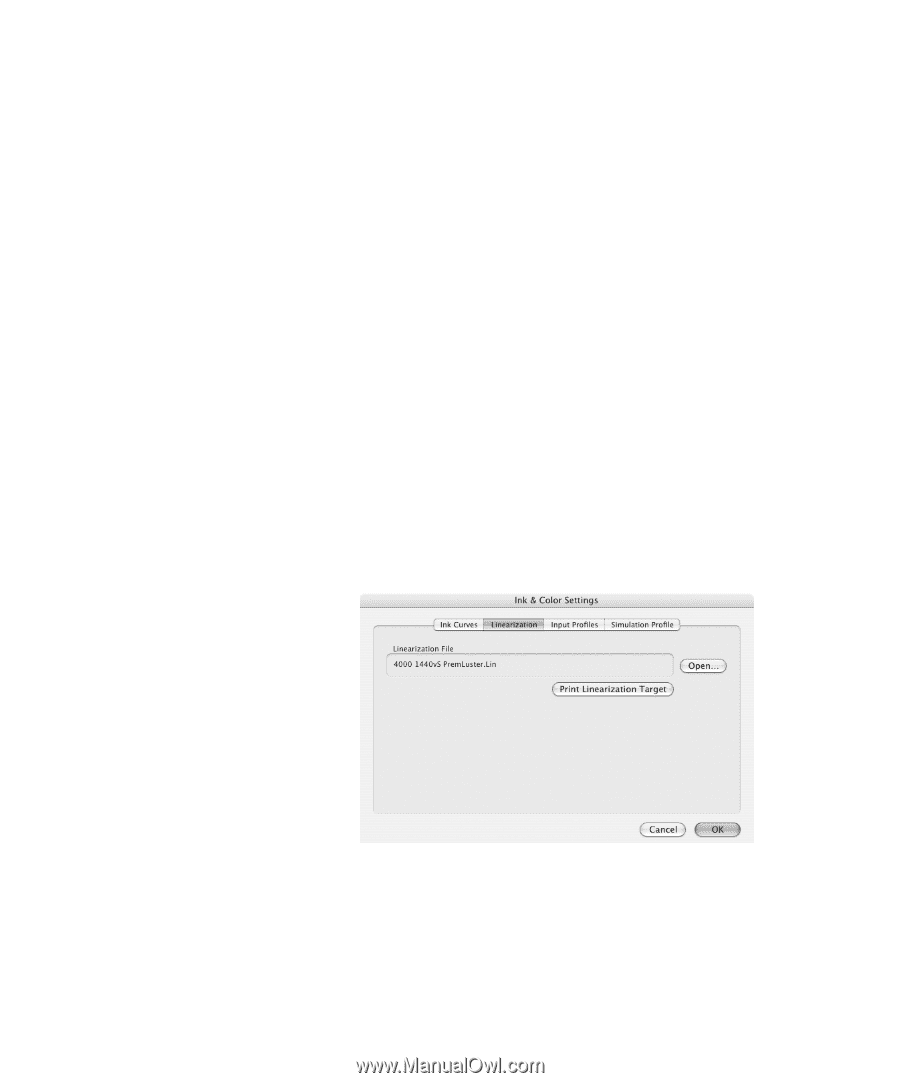
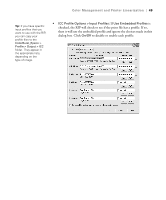
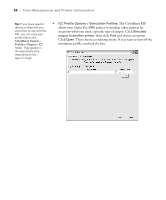
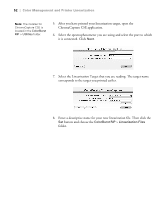
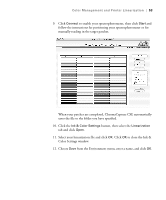
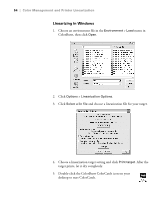
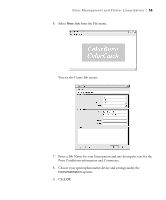
Color Management and Printer Linearization | 51 Relinearizing an Existing Printer Setup Why you should relinearize? When environments are built for ColorBurst, one of the most important things is linearization. A linearization file is the curve that corrects for differences in chroma (a derivative of L*ab) at different percentages. Over time (and on every different media) a printer will drift from its original state. By relinearizing you are putting the printer back into its original state. When you relinearize, you have made your environment as accurate as the day it was made. See the section for your operating system: • "Linearizing in Mac OS X" below • "Linearizing in Windows" on page 54 Linearizing in Mac OS X 1. Click the Ink & Color Settings button. 2. Click the Linearization tab and then click the Print Linearization Target button. 3. Choose the target that corresponds to the spectrophotometer you are using. 4. Click OK to send the target file to the RIP List. 51
-
 1
1 -
2
-
3
-
4
-
5
-
6
-
7
-
8
-
9
-
10
-
11
-
12
-
13
-
14
-
15
-
16
-
17
-
18
-
19
-
20
-
21
-
22
-
23
-
24
-
25
-
26
-
27
-
28
-
29
-
30
-
31
-
32
-
33
-
34
-
35
-
36
-
37
-
38
-
39
-
40
-
41
-
42
-
43
-
44
-
45
-
 46
46 -
 47
47 -
 48
48 -
 49
49 -
 50
50 -
 51
51 -
 52
52 -
 53
53 -
 54
54 -
 55
55 -
 56
56 -
57
-
58
-
59
-
60
-
61
-
62
-
63
-
64
 |
 |