Epson Stylus Pro 9600 - UltraChrome Ink User Manual - Page 151
Charging the Ink, Updating the Driver
 |
View all Epson Stylus Pro 9600 - UltraChrome Ink manuals
Add to My Manuals
Save this manual to your list of manuals |
Page 151 highlights
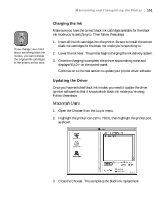
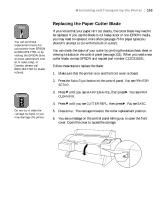
Maintaining and Transporting the Printer | 151 TIP If you change your mind about switching black ink modes, you can reinstall the original ink cartridges in the printer at this time. Charging the Ink Make sure you have the correct black ink cartridges available for the black ink mode you're switching to. Then follow these steps: 1. Insert all the ink cartridges into the printer. Be sure to install the correct black ink cartridges for the black ink mode you're switching to. 2. Lower the ink lever. The printer begins charging the ink delivery system. 3. Once the charging is complete, the printer stops making noise and displays READY on the control panel. Continue on to the next section to update your printer driver software. Updating the Driver Once you have switched black ink modes, you need to update the driver (printer software) so that it knows which black ink mode you're using. Follow these steps: Macintosh Users 1. Open the Chooser from the Apple menu. 2. Highlight the printer icon (SPro 7600), then highlight the printer port, as shown: 3. Close the Chooser. This completes the black ink replacement. 5-151
-
 1
1 -
2
-
3
-
4
-
5
-
6
-
7
-
8
-
9
-
10
-
11
-
12
-
13
-
14
-
15
-
16
-
17
-
18
-
19
-
20
-
21
-
22
-
23
-
24
-
25
-
26
-
27
-
28
-
29
-
30
-
31
-
32
-
33
-
34
-
35
-
36
-
37
-
38
-
39
-
40
-
41
-
42
-
43
-
44
-
45
-
46
-
47
-
48
-
49
-
50
-
51
-
52
-
53
-
54
-
55
-
56
-
57
-
58
-
59
-
60
-
61
-
62
-
63
-
64
-
65
-
66
-
67
-
68
-
69
-
70
-
71
-
72
-
73
-
74
-
75
-
76
-
77
-
78
-
79
-
80
-
81
-
82
-
83
-
84
-
85
-
86
-
87
-
88
-
89
-
90
-
91
-
92
-
93
-
94
-
95
-
96
-
97
-
98
-
99
-
100
-
101
-
102
-
103
-
104
-
105
-
106
-
107
-
108
-
109
-
110
-
111
-
112
-
113
-
114
-
115
-
116
-
117
-
118
-
119
-
120
-
121
-
122
-
123
-
124
-
125
-
126
-
127
-
128
-
129
-
130
-
131
-
132
-
133
-
134
-
135
-
136
-
137
-
138
-
139
-
140
-
141
-
142
-
143
-
144
-
145
-
 146
146 -
 147
147 -
 148
148 -
 149
149 -
 150
150 -
 151
151 -
 152
152 -
 153
153 -
 154
154 -
 155
155 -
 156
156 -
157
-
158
-
159
-
160
-
161
-
162
-
163
-
164
-
165
-
166
-
167
-
168
-
169
-
170
-
171
-
172
-
173
-
174
-
175
-
176
-
177
-
178
-
179
-
180
-
181
-
182
-
183
-
184
-
185
-
186
-
187
-
188
-
189
-
190
-
191
-
192
 |
 |
