Epson SureColor S50675 High Production Edition User Manual - Page 185
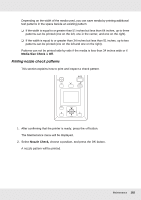
All Nozzles, Selected Nozzles, Proceed, Head Washing
 |
View all Epson SureColor S50675 High Production Edition manuals
Add to My Manuals
Save this manual to your list of manuals |
Page 185 highlights
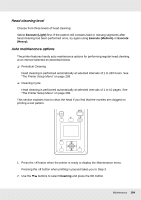
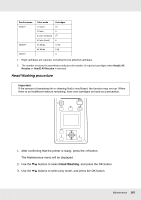
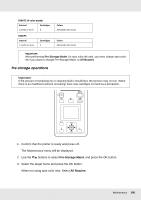
3. Choose the nozzles to be cleaned. All Nozzles Choose this option if all patterns in the printed nozzle check results contain faint or missing segments. If you select All Nozzles, proceed to Step 5. Selected Nozzles Choose this option if only some of the numbered patterns (nozzle arrays) in the printed nozzle check results contained faint or missing segments. You can select multiple nozzle arrays. 4. Choose the nozzle arrays to be cleaned. ❏ Use the d/u buttons to choose the nozzle arrays with faint or missing segments in the nozzle check pattern and press the Z button. ❏ After selecting the arrays you wish to clean, select Proceed and press the Z button. 5. Select a cleaning level and press the Z button. Head cleaning will be performed. The menu will close when cleaning is complete. Print a nozzle pattern and inspect the results to determine whether the problem has been resolved. See "Checking for Clogged Nozzles" on page 181. If you paused the printer in Step 1, printing will resume when head cleaning is complete; check the printout to confirm whether the problem has been resolved. If nozzle clogs cannot be cleared even after repeated head cleaning, the area around the print head maybe stained. See the following sections and clean each part. ❏ "Cleaning Around the Print Head (Daily)" on page 137 ❏ "Cleaning Around the Caps (Daily)" on page 142 ❏ "Cleaning the Flushing Pad (Daily)" on page 159 If nozzle clogs cannot be cleared by cleaning, perform Head Washing in the Maintenance menu. See Head Washing. On the S70675 or S50675, if only one print head has a nozzle clog that cannot be cleared by Head Washing, you can continue printing with the unclogged head using the Head Mode setting in the Printer Setup menu. See "The Printer Setup Menu" on page 208. Maintenance 185
-
 1
1 -
2
-
3
-
4
-
5
-
6
-
7
-
8
-
9
-
10
-
11
-
12
-
13
-
14
-
15
-
16
-
17
-
18
-
19
-
20
-
21
-
22
-
23
-
24
-
25
-
26
-
27
-
28
-
29
-
30
-
31
-
32
-
33
-
34
-
35
-
36
-
37
-
38
-
39
-
40
-
41
-
42
-
43
-
44
-
45
-
46
-
47
-
48
-
49
-
50
-
51
-
52
-
53
-
54
-
55
-
56
-
57
-
58
-
59
-
60
-
61
-
62
-
63
-
64
-
65
-
66
-
67
-
68
-
69
-
70
-
71
-
72
-
73
-
74
-
75
-
76
-
77
-
78
-
79
-
80
-
81
-
82
-
83
-
84
-
85
-
86
-
87
-
88
-
89
-
90
-
91
-
92
-
93
-
94
-
95
-
96
-
97
-
98
-
99
-
100
-
101
-
102
-
103
-
104
-
105
-
106
-
107
-
108
-
109
-
110
-
111
-
112
-
113
-
114
-
115
-
116
-
117
-
118
-
119
-
120
-
121
-
122
-
123
-
124
-
125
-
126
-
127
-
128
-
129
-
130
-
131
-
132
-
133
-
134
-
135
-
136
-
137
-
138
-
139
-
140
-
141
-
142
-
143
-
144
-
145
-
146
-
147
-
148
-
149
-
150
-
151
-
152
-
153
-
154
-
155
-
156
-
157
-
158
-
159
-
160
-
161
-
162
-
163
-
164
-
165
-
166
-
167
-
168
-
169
-
170
-
171
-
172
-
173
-
174
-
175
-
176
-
177
-
178
-
179
-
 180
180 -
 181
181 -
 182
182 -
 183
183 -
 184
184 -
 185
185 -
 186
186 -
 187
187 -
 188
188 -
 189
189 -
 190
190 -
191
-
192
-
193
-
194
-
195
-
196
-
197
-
198
-
199
-
200
-
201
-
202
-
203
-
204
-
205
-
206
-
207
-
208
-
209
-
210
-
211
-
212
-
213
-
214
-
215
-
216
-
217
-
218
-
219
-
220
-
221
-
222
-
223
-
224
-
225
-
226
-
227
-
228
-
229
-
230
-
231
-
232
-
233
-
234
-
235
-
236
-
237
-
238
-
239
-
240
-
241
-
242
-
243
-
244
-
245
-
246
-
247
-
248
-
249
-
250
-
251
-
252
-
253
-
254
-
255
 |
 |
