Epson TM-U220 Users Manual - Page 15
Replacing Roll Paper
 |
View all Epson TM-U220 manuals
Add to My Manuals
Save this manual to your list of manuals |
Page 15 highlights
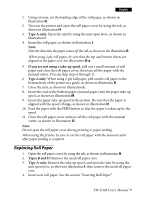
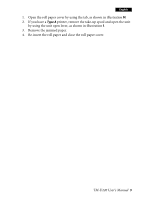
English 1. Using scissors, cut the leading edge of the roll paper, as shown in illustration G. 2. Turn on the printer and open the roll paper cover by using the tab, as shown in illustration H. 3. Type A only: Open the unit by using the unit open lever, as shown in illustration I. 4. Insert the roll paper, as shown in illustration J. Note: Note the direction the paper comes off the roll, as shown in the illustration G. When using 2-ply roll paper, be sure that the top and bottom sheets are aligned at the paper exit. See illustration G-a. 5. If you are not using a take-up spool, pull out a small amount of roll paper and close the roll paper cover; then tear off the paper with the manual cutter. You can skip steps 6 through 11. 6. Type A only: When using 2-ply roll paper, pull out the roll paper to the bottom front of the printer as a guide, as shown in illustration K. 7. Close the unit, as shown in illustration L. 8. Insert the end of the bottom paper (journal paper) into the paper take-up spool, as shown in illustration M. 9. Insert the paper take-up spool in the printer. Be sure that the paper is aligned with the spool's flange, as shown in illustration N. 10. Feed the paper with the FEED button so that the paper is taken up by the spool. 11. Close the roll paper cover and tear off the roll paper with the manual cutter, as shown in illustration O. Note: Do not open the roll paper cover during printing or paper feeding. When using the printer, be sure to cut the roll paper with the manual cutter after paper feeding is complete. Replacing Roll Paper 1. Open the roll paper cover by using the tab, as shown in illustration H. 2. Types B and D: Remove the used roll paper core. 3. Type A only: Remove the take-up spool, and open the unit by using the unit open lever, as shown in illustration I; then remove the used roll paper core. 4. Insert new roll paper. See the section "Inserting Roll Paper". TM-U220 User's Manual 7
-
 1
1 -
2
-
3
-
4
-
5
-
6
-
7
-
8
-
9
-
 10
10 -
 11
11 -
 12
12 -
 13
13 -
 14
14 -
 15
15 -
 16
16 -
 17
17 -
 18
18 -
 19
19 -
 20
20 -
21
-
22
-
23
-
24
-
25
-
26
-
27
-
28
-
29
-
30
-
31
-
32
-
33
-
34
-
35
-
36
-
37
-
38
-
39
-
40
-
41
-
42
-
43
-
44
-
45
-
46
-
47
-
48
 |
 |