Epson U200 User Manual - Page 9
Troubleshooting, Removing jammed paper, CAUTION - error
 |
View all Epson U200 manuals
Add to My Manuals
Save this manual to your list of manuals |
Page 9 highlights
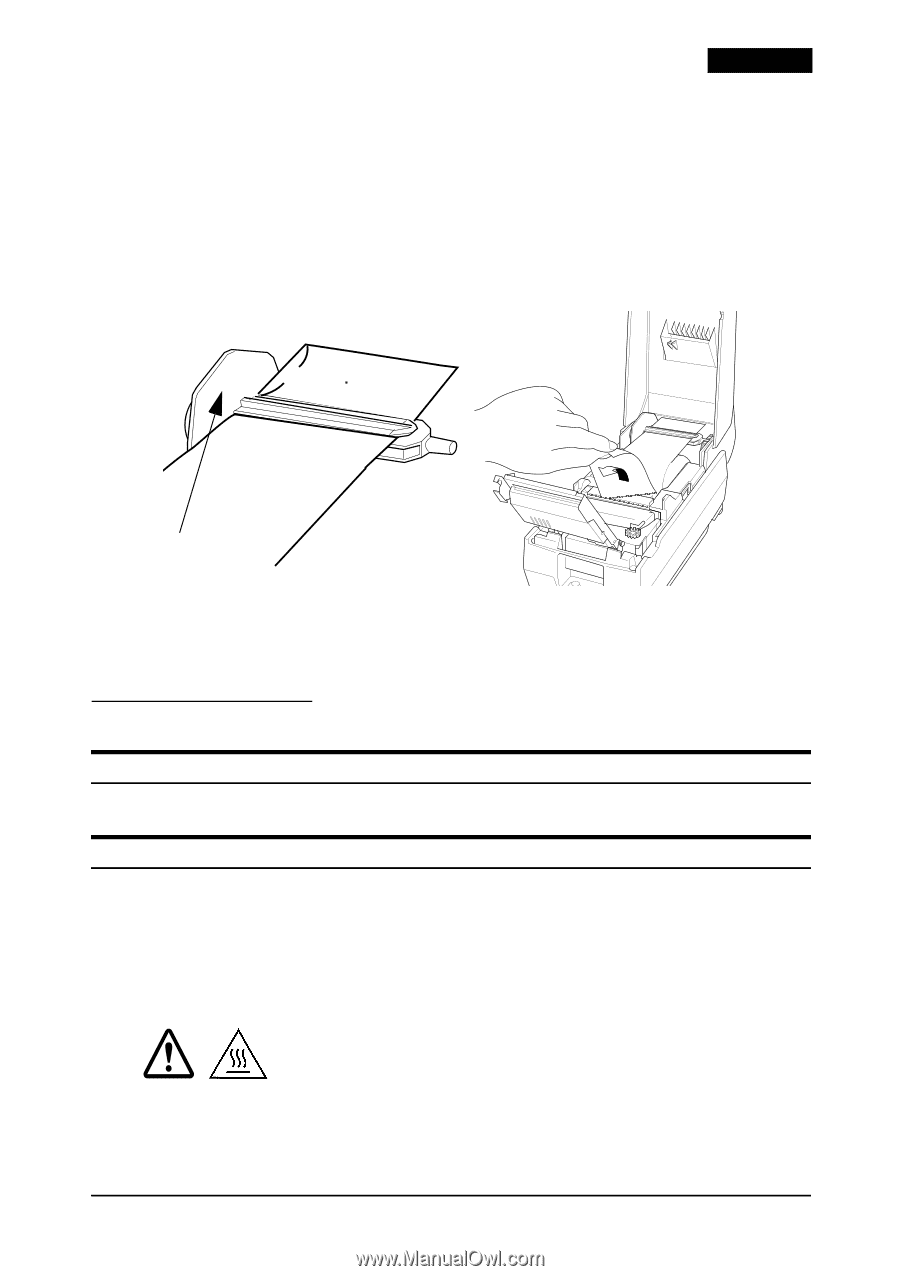
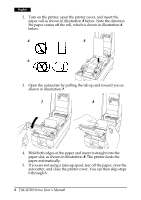
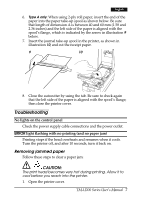
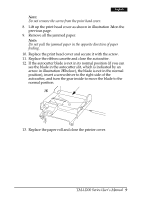
English 6. Type A only: When using 2-ply roll paper, insert the end of the paper into the paper take-up spool as shown below. Be sure that length of dimension A is between 40 and 60 mm (1.58 and 2.36 inches) and the left side of the paper is aligned with the spool's flange, which is indicated by the arrow in illustration 9 below. 7. Insert the journal take-up spool in the printer, as shown in illustration 10, and cut the receipt paper. 9 10 A 8. Close the autocutter by using the tab. Be sure to check again that the left side of the paper is aligned with the spool's flange; then close the printer cover. Troubleshooting No lights on the control panel Check the power supply cable connections and the power outlet. ERROR light flashing with no printing (and no paper jam) Printing stops if the head overheats and resumes when it cools. Turn the printer off, and after 10 seconds, turn it back on. Removing jammed paper Follow these steps to clear a paper jam: CAUTION: The print head becomes very hot during printing. Allow it to cool before you reach into the printer. 1. Open the printer cover. TM-U200 Series User's Manual 7
-
 1
1 -
2
-
3
-
 4
4 -
 5
5 -
 6
6 -
 7
7 -
 8
8 -
 9
9 -
 10
10 -
 11
11 -
 12
12 -
 13
13 -
 14
14 -
15
-
16
-
17
-
18
-
19
-
20
-
21
-
22
-
23
-
24
-
25
-
26
-
27
-
28
-
29
-
30
-
31
-
32
-
33
-
34
-
35
-
36
-
37
-
38
-
39
-
40
-
41
-
42
-
43
-
44
-
45
-
46
-
47
-
48
-
49
-
50
-
51
-
52
-
53
-
54
-
55
-
56
-
57
-
58
-
59
-
60
-
61
-
62
-
63
-
64
-
65
-
66
-
67
-
68
-
69
-
70
-
71
-
72
 |
 |