Epson V11H336120 User's Guide - PowerLite Home Cinema 8100 / 8500 UB - Page 41
Adjustments for Computer Images, RGBCMY, Gamma, Contrast Enhancement Home Cinema 8500 UB only
 |
UPC - 010343874374
View all Epson V11H336120 manuals
Add to My Manuals
Save this manual to your list of manuals |
Page 41 highlights
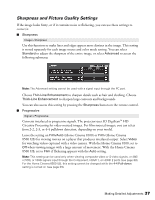
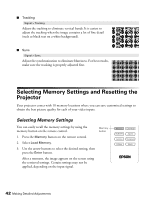
Use the RGBCMY settings to adjust the hue, saturation, and brightness of the six color components (red, green, blue, cyan, magenta, yellow). After adjusting each color, press Esc to move to another menu option. You can also access this setting by pressing the RGBCMY button on the remote control. See page 31 for more information. ■ Gamma Image > Advanced > Gamma Note: This setting cannot be used when the Color Mode is set to x.v.Color (see page 29). You can select from five gamma settings (2.0 to 2.4) or customize your own setting from your image or a displayed graph. Lower values will increase the contrast of dark areas, but tend to blur the bright areas. Higher values will darken the light areas. You can also access this setting by pressing the Gamma button on the remote control. See page 30 for more information. ■ Contrast Enhancement (Home Cinema 8500 UB only) Image > Advanced > Contrast Enhancement Note: This setting cannot be used when the Color Mode is set to x.v.Color (see page 29). This setting automatically enhances contrast by calculating based on the current contrast. You can select from 3 levels of contrast enhancement. ■ Super-resolution (Home Cinema 8500 UB only) Image > Advanced > Super-resolution This setting sharpens blurred images, enhancing the apparent detail of the image. You can select from 3 levels of enhancement. Note that intentionally blurred parts of the image, such as out-of-focus backgrounds, may become sharper. Adjustments for Computer Images In addition to the settings described previously, you can adjust the Tracking and Sync settings for analog RGB computer images. Normally, these settings are adjusted automatically by the projector. If you notice that the image is blurry or contains dark vertical bands, you may need to adjust the settings yourself. ■ Auto Setup Signal > Auto Setup Leave this setting on so that the projector automatically adjusts the tracking, sync, and position of the image. Making Detailed Adjustments 41
-
 1
1 -
2
-
3
-
4
-
5
-
6
-
7
-
8
-
9
-
10
-
11
-
12
-
13
-
14
-
15
-
16
-
17
-
18
-
19
-
20
-
21
-
22
-
23
-
24
-
25
-
26
-
27
-
28
-
29
-
30
-
31
-
32
-
33
-
34
-
35
-
 36
36 -
 37
37 -
 38
38 -
 39
39 -
 40
40 -
 41
41 -
 42
42 -
 43
43 -
 44
44 -
 45
45 -
 46
46 -
47
-
48
-
49
-
50
-
51
-
52
-
53
-
54
-
55
-
56
-
57
-
58
-
59
-
60
-
61
-
62
-
63
-
64
-
65
-
66
-
67
-
68
-
69
-
70
-
71
-
72
-
73
-
74
-
75
-
76
-
77
-
78
-
79
-
80
 |
 |