Epson V700 Product Information Guide - Page 7
Placing Slides in the Holder, Epson Perfection V700 Photo/V750 Pro
 |
UPC - 010343856899
View all Epson V700 manuals
Add to My Manuals
Save this manual to your list of manuals |
Page 7 highlights
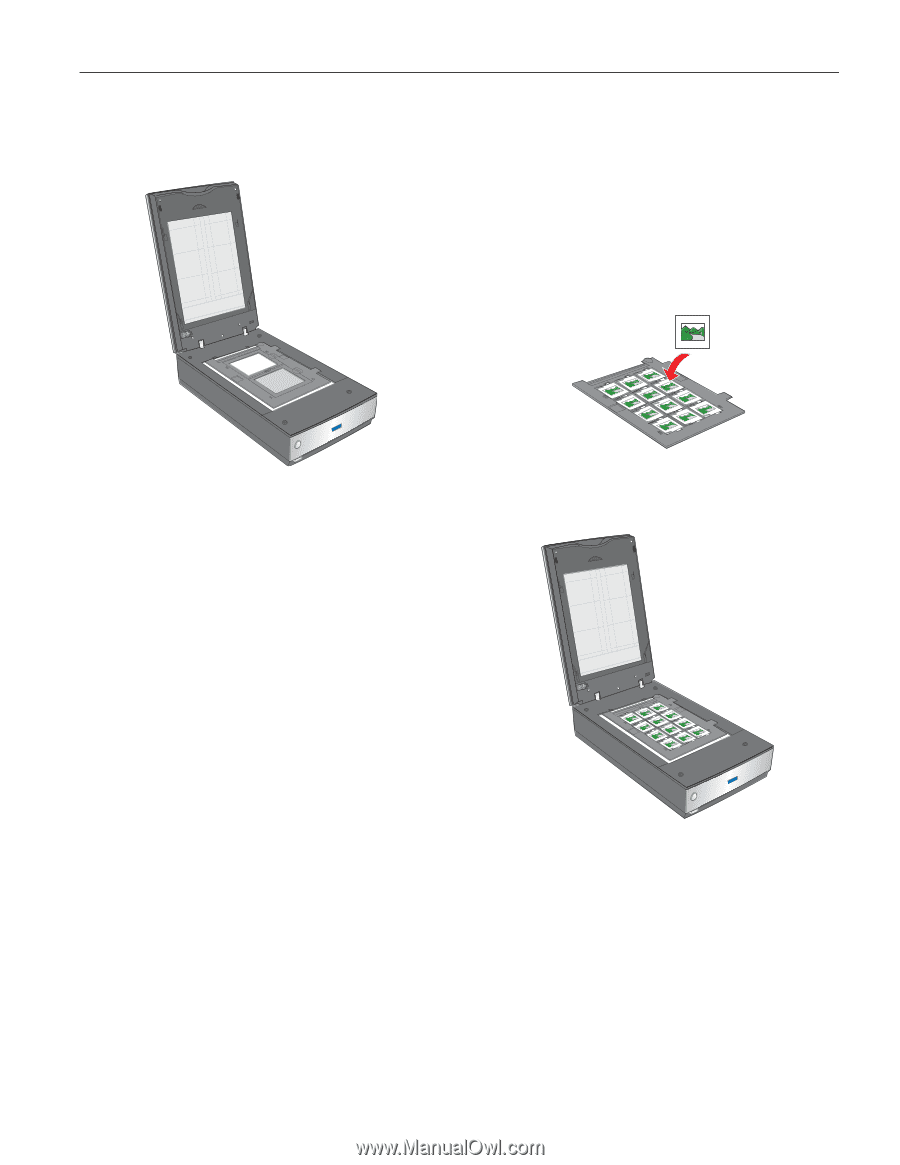
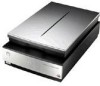
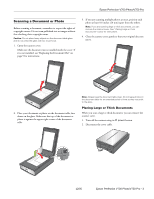
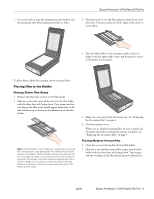
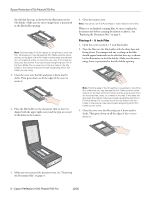
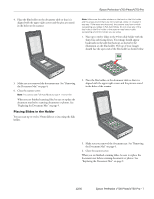
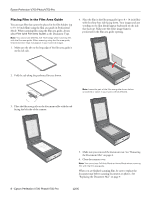
Epson Perfection V700 Photo/V750 Pro 4. Place the film holder on the document table so that it is aligned with the upper right corner and the pins are seated in the holes on the scanner. Note: Make sure the white stickers on the back on the film holder and the areas around them are not scratched, dusty, or covered in any way. If the areas are obscured, the scanner may have trouble recognizing your slides in Full Auto Mode. Do not cover any of the tiny holes in the film holder or the scanner may have trouble recognizing which film holder you are using. 1. Place up to twelve slides in the 35mm slide holder with the shiny base side facing down. Your image should appear backwards on the side that faces up, as shown by the illustration on the film holder. The top of your images should face the open end of the film holder as shown below. 5. Make sure you removed the document mat. See "Removing the Document Mat" on page 4. 6. Close the scanner cover. Note: You cannot use Full Auto Mode to scan 4 × 5 inch film. When you are finished scanning film, be sure to replace the document mat before scanning documents or photos. See "Replacing the Document Mat" on page 9. Placing Slides in the Holder You can scan up to twelve 35mm slides at a time using the slide holder. 2. Place the film holder on the document table so that it is aligned with the upper right corner and the pins are seated in the holes of the scanner. 3. Make sure you removed the document mat. See "Removing the Document Mat" on page 4. 4. Close the scanner cover. When you are finished scanning slides, be sure to replace the document mat before scanning documents or photos. See "Replacing the Document Mat" on page 9. 12/05 Epson Perfection V700 Photo/V750 Pro - 7
-
 1
1 -
 2
2 -
 3
3 -
 4
4 -
 5
5 -
 6
6 -
 7
7 -
 8
8 -
 9
9 -
 10
10
 |
 |