Epson WF-100 Quick Guide - Page 23
Installing Ink
 |
View all Epson WF-100 manuals
Add to My Manuals
Save this manual to your list of manuals |
Page 23 highlights
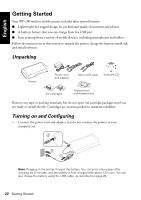
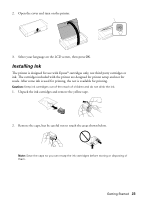
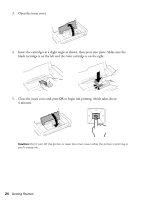
2. Open the cover and turn on the printer. 3. Select your language on the LCD screen, then press OK. Installing Ink The printer is designed for use with Epson® cartridges only, not third party cartridges or ink. The cartridges included with the printer are designed for printer setup and not for resale. After some ink is used for priming, the rest is available for printing. Caution: Keep ink cartridges out of the reach of children and do not drink the ink. 1. Unpack the ink cartridges and remove the yellow tape. 2. Remove the caps, but be careful not to touch the areas shown below. Note: Save the caps so you can recap the ink cartridges before storing or disposing of them. Getting Started 23
-
 1
1 -
2
-
3
-
4
-
5
-
6
-
7
-
8
-
9
-
10
-
11
-
12
-
13
-
14
-
15
-
16
-
17
-
 18
18 -
 19
19 -
 20
20 -
 21
21 -
 22
22 -
 23
23 -
 24
24 -
 25
25 -
 26
26 -
 27
27 -
 28
28 -
29
-
30
-
31
-
32
-
33
-
34
-
35
-
36
-
37
-
38
-
39
-
40
 |
 |

Getting Started
23
2.
Open the cover and turn on the printer.
3.
Select your language on the LCD screen, then press
OK
.
Installing Ink
The printer is designed for use with Epson
®
cartridges only, not third party cartridges or
ink. The cartridges included with the printer are designed for printer setup and not for
resale. After some ink is used for priming, the rest is available for printing.
Caution:
Keep ink cartridges out of the reach of children and do not drink the ink.
1.
Unpack the ink cartridges and remove the yellow tape.
2.
Remove the caps, but be careful not to touch the areas shown below.
Note:
Save the caps so you can recap the ink cartridges before storing or disposing of
them.