Fluke 124B/S Service Manual - Page 34
How To Verify, 4 Display and Backlight Test, then press
 |
View all Fluke 124B/S manuals
Add to My Manuals
Save this manual to your list of manuals |
Page 34 highlights
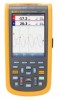
Fluke 123/124/125 Service Manual These video signals must be applied to the test tool via a 50Ω Coax Cable and terminated with a 50Ω feed through termination. 3.3 How To Verify Verification procedures for the display function and measure functions follow. For each procedure the test requirements are listed. If the result of the test does not meet the requirements, the test tool should be recalibrated or repaired if necessary. Some of the tests are slightly different for Fluke 123, 124, and Fluke 125. This is caused by the higher vertical and trigger bandwidth in Fluke 124 and 125. Moreover Fluke 125 has extra measuring functions and a slightly different way of operation. Differences in requirements for Fluke 123, 124, and 125 are clearly indicated. Follow these general instructions for all tests: • For all tests, power the test tool with the PM8907 power adapter. A charged The battery pack must be installed. • Allow the 5500A to satisfy its specified warm-up period. • For each test point , wait for the 5500A to settle. • Allow the test tool a minimum of 20 minutes to warm up. 3.4 Display and Backlight Test Proceed as follows to test the display and the backlight: 1. Press to turn the Test tool on. 2. Fluke 123: press and verify that the backlight is dimmed. Then select maximum backlight brightness again. Fluke 124/125: press , then press . Verify that the test tool can be switched between dimmed backlight and maximum brightness with the keys. During the tests, use maximum brightness for the best visibility. 3. Remove the adapter power, and verify that the backlight is dimmed. 4. Apply the adapter power and verify that the backlight brightness is set to maximum. 5. Press and hold . 6. Press and release . 7. Release . The test tool shows the calibration menu in the bottom of the display. Do not press now! If you did, turn the test tool off and on, and start at 5. 8. Press (PREV) three times. The test tool shows Contrast (CL 0100):MANUAL 9. Press (CAL) . The test tool shows a dark display; the test pattern as shown in Figure 3-1 may not be 3-4
-
 1
1 -
2
-
3
-
4
-
5
-
6
-
7
-
8
-
9
-
10
-
11
-
12
-
13
-
14
-
15
-
16
-
17
-
18
-
19
-
20
-
21
-
22
-
23
-
24
-
25
-
26
-
27
-
28
-
 29
29 -
 30
30 -
 31
31 -
 32
32 -
 33
33 -
 34
34 -
 35
35 -
 36
36 -
 37
37 -
 38
38 -
 39
39 -
40
-
41
-
42
-
43
-
44
-
45
-
46
-
47
-
48
-
49
-
50
-
51
-
52
-
53
-
54
-
55
-
56
-
57
-
58
-
59
-
60
-
61
-
62
-
63
-
64
-
65
-
66
-
67
-
68
-
69
-
70
-
71
-
72
-
73
-
74
-
75
-
76
-
77
-
78
-
79
-
80
-
81
-
82
-
83
-
84
-
85
-
86
-
87
-
88
-
89
-
90
-
91
-
92
-
93
-
94
-
95
-
96
 |
 |
