Fluke 124B/S Service Manual - Page 38
Input A Trigger Sensitivity Test, output, MODE levsine. Set the 5500A to Operate OPR.
 |
View all Fluke 124B/S manuals
Add to My Manuals
Save this manual to your list of manuals |
Page 38 highlights
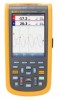
Fluke 123/124/125 Service Manual Observe the Input B trace, and check to see if it is set to the same position after changing the sensitivity. The allowed difference is ±0.04 division (= 1 pixel). 8. When you are finished, remove the Input A and Input B short. 3.5.2 Input A Trigger Sensitivity Test Proceed as follows to test the Input A trigger sensitivity: 1. Connect the test tool to the 5500A as shown in Figure 3-3. Figure 3-3. Test Tool Input A to 5500A Scope Output 50Ω ST8004.WMF 2. Select the following test tool setup: • Press to select auto ranging (AUTO in top of display). Do not press anymore! • Using change the sensitivity to select manual sensitivity ranging, and lock the Input A sensitivity on 200 mV/div. 3. Set the 5500A to source a 5 MHz leveled sine wave of 100 mV peak-to-peak (SCOPE output, MODE levsine). Set the 5500A to Operate (OPR). 4. Adjust the amplitude of the sine wave to 0.5 division on the display. 5. Verify that the signal is well triggered. If it is not, press to enable the up/down arrow keys for Trigger Level adjustment; adjust the trigger level using and verify that the signal will be triggered now. The trigger level is indicated by the trigger icon ( ). 6. Set the 5500A to source a 25 MHz (Fluke 123) or 40 MHz (Fluke 124/125) leveled sine wave of 400 mV peak-to-peak. 7. Adjust the amplitude of the sine wave to 1.5 divisions on the test tool display. 8. Verify that the signal is well triggered. If it is not, press to enable the up/down arrow keys for Trigger Level adjustment; adjust the trigger level and verify that the signal will be triggered now. 3-8
-
 1
1 -
2
-
3
-
4
-
5
-
6
-
7
-
8
-
9
-
10
-
11
-
12
-
13
-
14
-
15
-
16
-
17
-
18
-
19
-
20
-
21
-
22
-
23
-
24
-
25
-
26
-
27
-
28
-
29
-
30
-
31
-
32
-
 33
33 -
 34
34 -
 35
35 -
 36
36 -
 37
37 -
 38
38 -
 39
39 -
 40
40 -
 41
41 -
 42
42 -
 43
43 -
44
-
45
-
46
-
47
-
48
-
49
-
50
-
51
-
52
-
53
-
54
-
55
-
56
-
57
-
58
-
59
-
60
-
61
-
62
-
63
-
64
-
65
-
66
-
67
-
68
-
69
-
70
-
71
-
72
-
73
-
74
-
75
-
76
-
77
-
78
-
79
-
80
-
81
-
82
-
83
-
84
-
85
-
86
-
87
-
88
-
89
-
90
-
91
-
92
-
93
-
94
-
95
-
96
 |
 |
