Fluke Ti450 User Manual - Page 23
Control Buttons, Touch Screen, Table 4. Overview of Controls, Button, Button Label / Action
 |
View all Fluke Ti450 manuals
Add to My Manuals
Save this manual to your list of manuals |
Page 23 highlights
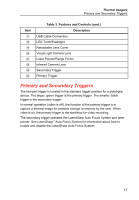
Thermal Imagers Control Buttons Control Buttons Three function buttons and four arrow buttons and ) are the primary controls. These buttons move the cursor through the menu structure to set the features. Table 4 is an overview of the buttons and their actions. In live Manual Mode, the arrow buttons are always active to adjust Level and Span. In general, push: to set the change and go back to the live view. to set the change and go back to the previous menu. to cancel the change and go back to the live view. Table 4. Overview of Controls Button or Primary Trigger or Primary Trigger Button Label / Action Cancel Done (exit from Menu structure) Select or OK Back Move cursor to highlight an option Touch Screen The touch screen enables you to interact directly with what is displayed. To change parameters or select function and options, touch a target on the display with a finger. Touch targets are easy to recognize, such as arrows to indicate a drop-down list for a selection of options. The touch screen has a backlight for work in dimly lit spaces. To change the backlight intensity, see Backlight. 19
-
 1
1 -
2
-
3
-
4
-
5
-
6
-
7
-
8
-
9
-
10
-
11
-
12
-
13
-
14
-
15
-
16
-
17
-
 18
18 -
 19
19 -
 20
20 -
 21
21 -
 22
22 -
 23
23 -
 24
24 -
 25
25 -
 26
26 -
 27
27 -
 28
28 -
29
-
30
-
31
-
32
-
33
-
34
-
35
-
36
-
37
-
38
-
39
-
40
-
41
-
42
-
43
-
44
-
45
-
46
-
47
-
48
-
49
-
50
-
51
-
52
-
53
-
54
-
55
-
56
-
57
-
58
-
59
-
60
-
61
-
62
-
63
-
64
-
65
-
66
-
67
-
68
-
69
-
70
 |
 |
