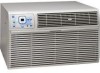
Frigidaire FAH106S1T Installation Instructions - Page 5
Protection
 |
UPC - 012505273063
View all Frigidaire FAH106S1T manuals
Add to My Manuals
Save this manual to your list of manuals |
Page 5 highlights
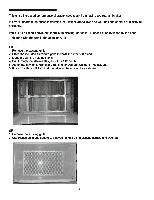
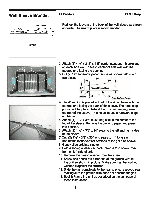
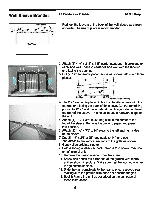
Wall Sleeve Brands: 3.5. 80' Rear Louvers 50' #3 Fedders or Friedrich 16 Ye Deep 1. Redirect the louvers at the back of the wall sleeve as shown opposite. The use of pliers is recommended. Top View 3" • 2. Attach (2) 4 1/2" x 3 1/2" x 1 Y2" centering/support blocks one on each side wall. Place in center of side wall with the tapered end facing the opening. 3. Cut (2) 17" Tapered Spacer Blocks as shown below into three pieces. 17' I air Tapered Spacer Block Cut lien) ! 12-1/r , Protection Paper Backing 4. The 2 Y2" section is placed in front of the rib on base with the tapered end facing the back of the sleeve. Cut the remaining portion to 12 Y2" and place behind the rib again sloping toward the rear of the sleeve. This helps induce a rearward slope on the unit. 5. Attach (1) 1 Y2" x 3/8" x 25" long seal in the center at the top of the sleeve. Remove the backing paper and press into position. 6. Attach (2) 1 1/2" x 3/8" x 14" seals to the left and right sides of the sleeve. 7. Cut (2) 13/2" x 3/8" x 25" long seals to 14" long each and attach to the vertical sections of the grille as shown. 8. Gently slide unit into sleeve. 9. Before sliding all-the-way back, remove 2nd screw from front on left side of unit. 10. Remove the plastic washer from the screw. 11. Screw and attach the other end of the ground wire to the unit as shown in picture. Make sure that the toothed washer is against the cabinet. 12. Slide the unit completely to the rear to ensure a good seal, making sure the ground wire does not become tangled. 13. Seal & Frame the unit as described on the last page of these instructions. 5
-
 1
1 -
 2
2 -
 3
3 -
 4
4 -
 5
5 -
 6
6 -
 7
7 -
 8
8 -
 9
9 -
 10
10 -
 11
11 -
12
 |
 |
