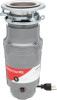
Frigidaire FF03DISPC1 Complete Owners Guide - Page 6
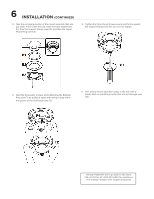
Mount Ring see E3.
 |
View all Frigidaire FF03DISPC1 manuals
Add to My Manuals
Save this manual to your list of manuals |
Page 6 highlights
6 INSTALLATION (CONTINUED) E. Take the remaining portion of the mount assembly that was put aside. From under the sink insert the Fiber Gasket (see E1), then the Support Flange (see E2), and then the Upper Mount Ring (see E3). G. Tighten the three Mount Screws evenly and firmly against the Support Flange (see G1). Do not over tighten. F. Hold the three parts in place while attaching the Retainer Ring (see F1) by pulling it apart and having it snap within the groove of the sink flange (see F2). H. Trim off any excess plumber's putty in the sink with a plastic knife or something similar that will not damage your sink. Having Problems? Don't go back to the store. Call us toll-free at 1-833-240-6224 for assistance. M-F 8:00am-5:00pm PST English & Spanish
-
 1
1 -
 2
2 -
 3
3 -
 4
4 -
 5
5 -
 6
6 -
 7
7 -
 8
8 -
 9
9 -
 10
10 -
 11
11 -
 12
12 -
13
-
14
-
15
 |
 |
